Book List API project
This is going to be a simple API project to keep track of books in a bookstore. Remember CRUD stands for create, read, update and delete. You will follow the standard API conventions you have learned including http methods and status codes.
A bookstore contacted you because they need a website and mobile application to streamline the management of their books. From the website and mobile app managers should be able to add and edit books quickly. And visitors should be able to browse the available book collection with no problem.
First, to store the books in the database, you need a storage space or table. And you need a Django model to manipulate and define how the data will be stored in a table.
And you need a Django model to manipulate and define how the data will be stored in a table. Django models work like a bridge between the data and your business logic.
For this project, you need to create a Django model with the following fields:
- Title, which will be a
CharFieldwith a max length of 255. - Author, which we have the same specs as the title field.
- Price, which will be a decimal field with a maximum of five digits and two decimal places.
- Inventory which is an optional positive small integer field to indicate if a book is in stock or not.
Next you need two API endpoints to allow users to browse a single book or the whole collection. Following the conventions for rest API, you decide to create the following endpoints:
/api/books/api/books/{bookId}
The first endpoint api books will deliver all the books in your database. This enables you to list books that are available to purchase or you can list books that are out of stock.
This is where the inventory field of your book model comes in.
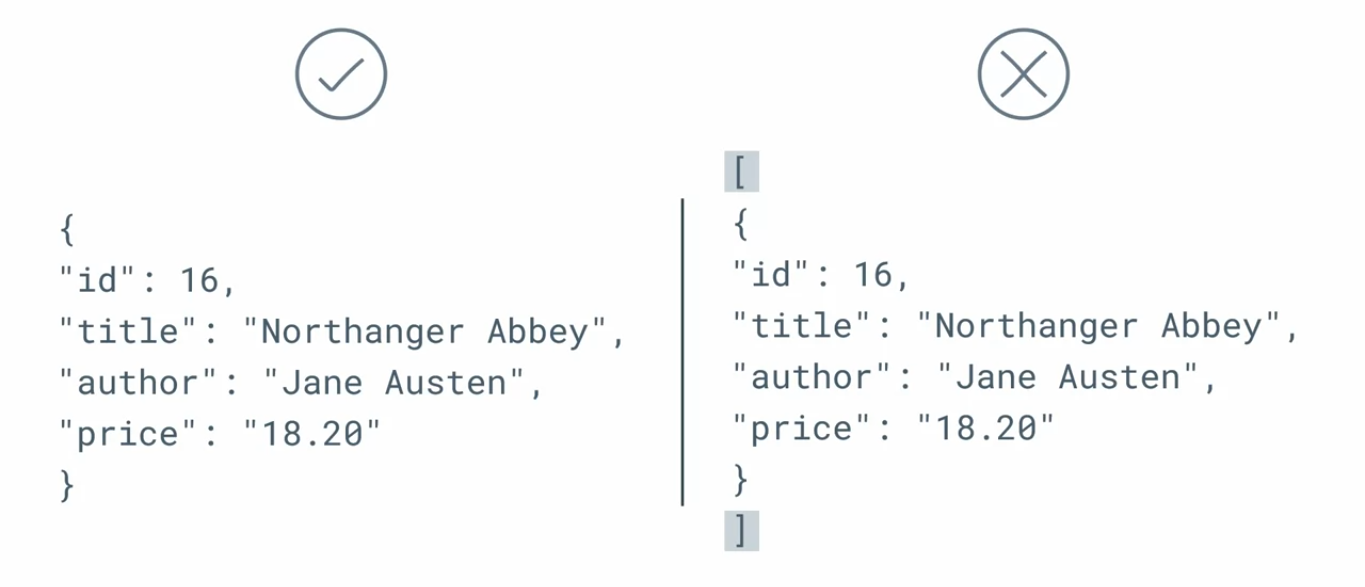
The second endpoint which is api books and book id will show only a particular book. So if someone requests a book that doesn’t exist, they should get an error message with the appropriate status code of 404. Otherwise for successful requests, the status code should be 200.
However, although the results of a single book contain different fields such as the id title, author and price, you are still accessing a single item, not an element in an array or a list. Therefore the results should not be between square brackets, because it is not an element in an array or list.
Next let’s focus on how to create a new book by making a http post request to the endpoint api books. On insomnia, you can send a http post request with essential data like in this screenshot.
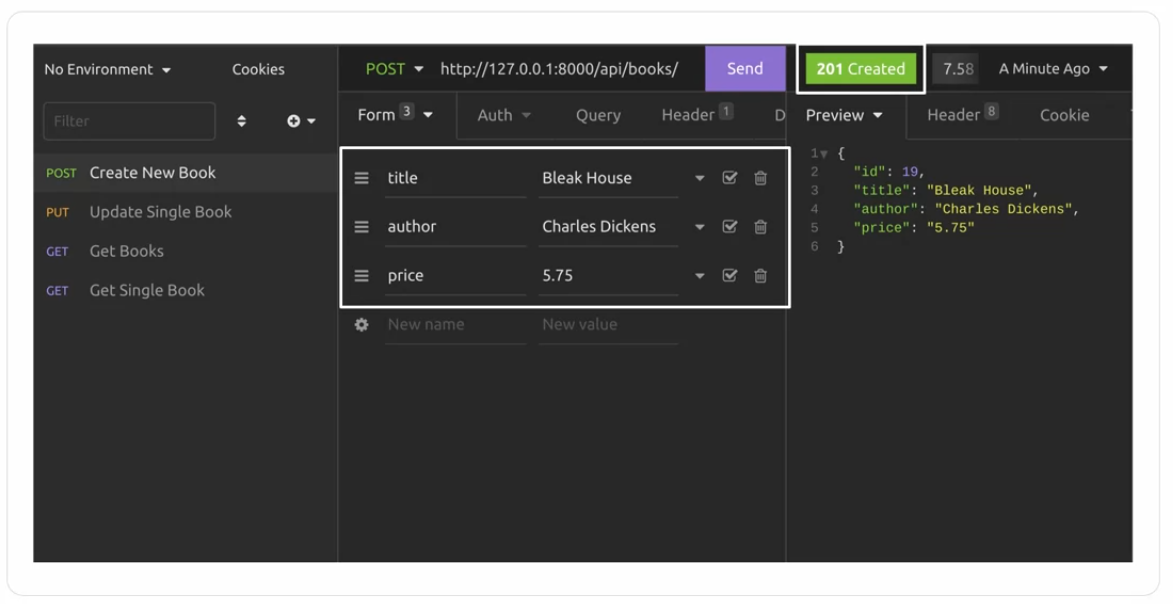
For a successful request, it should return the newly created book with a status code 201. If any required data is missing for example, the author’s name It should return an error message with http status code 400.
By now, you know how to create a Django model, how to create API endpoints and how to create a new book with an API post request. But the results of an API request are usually delivered as JSON or xml data.
Model to JSON
Here is a quick tip for converting a single model to a JSON response. First, import the model_to_dict function from the Django dot forms dot models module and the JSON response class from the Django dot http module.
Now you can retrieve a single book record for the book id and convert it to a JSON object.
from django.forms.models import model_to_dict
from django.http import JsonResponse
...
book = Book.objects.get(pk=16)
return JsonResponse(model_to_dict(book))
Next up, you will learn how to edit and delete a single book. To edit an existing book, you have to accept a http PUT request to the second endpoint. To delete an existing book, you’ll send a http DELETE request. For deleting and editing, you can create a URL pattern for this endpoint in your Django project as /api/books/<int:pk>
Previously you learned that data is passed to the web server in the http body as either a raw JSON string, or a form URL encoded string which is also called a payload.
Here is an example JSON payload with a book’s title and author data. But you need to parse this string to access these individual data elements.
{
	"title": "Seawolf",
	"author": "Jack London"
}
To do this, use the QueryDict class from the Django dot http module to parse the request body to a python dictionary. After this, you can access the individual elements of the http request body from this dictionary.
from django.http import QueryDict
...
request_body = QueryDict(request.body)

title = request_body.get('title')
Upfront planning and organizing are crucial if you want a project to be maintainable. Putting in the initial work will save you effort down the road when you need to extend the project, add new features or debug errors.
Split
First, it’s necessary to split a big app into multiple apps to make sure that all your goals are met. Splitting a big app into multiple apps means it’s as decoupled as possible with each app dealing with a particular set of relevant problems. Such splitting is an essential step to being productive with Django.
Instead of creating an app that does everything, you should plan it properly, break down the overall aim into smaller aims, and then create multiple apps for each.
Otherwise, what happens is that you add features to an app until you realize that it has become unmanageable. At that point, adding more features takes more time than usual, finding the cause of a bug becomes frustrating, and it takes so much time to deal with those issues that you eventually end up with a huge production block.
But creating multiple apps also means that there are some other things that you have to pay attention to.
You shouldn’t use the global environment for your project dependencies. That’s because not every project uses the same version of a package and not every project needs all of them. Using the global environment will create conflicts for the packages and create more issues than solutions.
Always use a virtual environment to avoid such conflicts.
That’s exactly why you’re using pipnv to isolate the dependencies in a virtual environment for your projects. By doing this, you avoid any potential conflicts and can ensure that your dependencies are exactly what you need for your project.
Versioning
When you upgrade an API, it may break the existing app because the result of the new API might not be the same as the old one. For such upgrades, you should always use versioning and keep the old working API intact and launch the updated version so that the developers of the client app have enough time to update their apps to work properly with the new APIs.
For the newer version, always create a separate app instead of adding everything in the old app because it will be hard to manage over time.
List dependencies
Another thing you should do is always save your packages and their version numbers in a separate requirements.text file. This is to ensure your app does not break when you deploy it to the production, or when someone else picks up your project and starts working on us.
pip
If you are using Pip, you can do is using the command:
pip3 freeze >requirements.txtpipenv
But if you are using pipnv, things are easier. It uses the piplock file to keep track of dependencies and complex inter-dependencies between the packages. You don’t need a requirements.txt file with pipnv, however, when setting up your project for the first time, pipnv can process your dependencies from the requirements.txt file.
Separate resource folder for each app
When it comes to your resources, it’s much better to have separate resource folders for each of your apps. That way, you can avoid conflicts and efficiently manage your files when required.
Plus, keeping your app-specific static files inside the app itself, just like your templates, is a smart way to stay organized.
Split settings into multiple settings files
Something else to consider is that instead of creating a combined settings file, you may split the relevant settings into separate files and include them all from the main settings. Not only does this process prevent a single long file that is hard to edit, it also helps you to manage your settings and easily find the ones you are looking for.
You can use Django splits settings for this purpose. The website link is in the additional resources at the end of this lesson.
Place business logic in models
Last, instead of putting all the business logic into views, take them to the related models. Doing so will help you write manageable code and organize the necessary pieces in one place.
Placing all the essential business logic in the models will make them more powerful, decoupled, and reusable so you can write less code throughout your project.
Consequences of a poorly designed API project
Introduction
Creating a good API project can be challenging. You need to stick to the conventions, write proper error checks in your code, perform security checks, and make sure that your APIs are using processing power and bandwidth optimally. This all takes time and proper planning. But what happens if you don’t properly plan and execute your APIs?
Let’s examine some of the consequences of a poorly designed API project.
Data breach
| Reasons | Consequences |
|---|---|
| Poor security checks in the code, no authentication or authorization checks, improper file permission, and not using SSL | The most significant risk of a poorly designed API project is a data breach. Sensitive data can leak if you don’t have proper security checks in your code or if you didn’t implement proper permissions for the files stored on the server. Also, if you are not using SSL for your API endpoints, attackers can steal user data before it reaches your API web server. Such mistakes can cause severe financial damage and trust issues. |
Fix: Add proper security checks in your code and create a solid authorization layer to prevent unauthorized access to your data. Always double-check these sensitive API endpoints before deploying them to production.
Data corruption
| Reasons | Consequences |
|---|---|
| Poor security, no authentication or authorization checks, absence of data validation and sanitization of input data | Improper security checks and lack of a solid authorization layer can let any user with a valid authentication token access sensitive APIs and modify the data unexpectedly. Also, creating resources without proper validation checks can create malformed data in the database. Such mistakes can cause severe data corruption and data loss beyond repair. |
Fix: Besides security checks and a solid authorization layer, an API developer must validate and sanitize user data before processing and saving it.
Wastage of computing power and memory
| Reasons | Consequences |
|---|---|
| Unoptimized code, improper business logic, lack of data validation, unoptimized SQL queries or model relationships, lack of database indexes, and no caching. | Poorly written API code can consume unnecessary computing power and memory with unoptimized code, algorithms and business logic. Unoptimized code, lack of proper database indexing and absence of caching can cause a huge load on the database server by running redundant SQL queries, which slows the whole system down. Such mistakes can end up increasing the cost of your API infrastructure. |
Fix: To avoid this, always spend time optimizing the code and double-checking your database-related code before deploying your APIs to production.
Wastage of bandwidth
| Reasons | Consequences |
|---|---|
| Absence of necessary caching header API code, lack of caching policy on the reverse proxy and on the web server, and lack of pagination and filtering. | If your API project doesn’t follow good API development practices like implementing caching, filtering and pagination can cause your APIs to deliver unnecessary data more times than what is required. Such mistakes can cause bandwidth wasting and end up charging extra bills in your monthly invoice, as well as poor performance from your API endpoints. Besides, the client applications need to spend more resources and time filtering unnecessary data every time. |
Fix: To avoid this, always send proper caching headers with your API responses and implement filtering and pagination features so that the client application can request and receive only what they need.
Bad user experience
| Reasons | Consequences |
|---|---|
Not following the proper naming convention, not sending proper HTTP codes, not accepting Accept headers, absence of pagination, sorting, searching and filtering, and lack of proper error checking in code. | It creates a bad user experience. The client application developers must go through extra processing of the API data, extra code to create the final output, and a steeper learning curve to use your API, which was not necessary if the API was designed by following the standard conventions and best practices. Not accepting the Accept headers means that the API client is not getting the API output in its required format. That will cause bad experiences because clients need extra time and unnecessary code to process the data on their end. Also, sending wrong HTTP status codes can cause unexpected errors on the client applications and a bad experience for the users who will use those applications. |
Fix: To avoid this, always follow the proper naming convention and implement data filtering, searching, sorting, searching and pagination features for your API endpoints. Always keep proper error checking in the code and write tests so that it doesn’t create unexpected 5XX errors on the server side.
Breaking client applications
| Reasons | Consequences |
|---|---|
| Not following the proper versioning system | If you don’t maintain the proper versioning system for your API project, it can immediately break backward compatibility, and the client application can stop working instantaneously. The API can cause failure in the current client applications because your new API requires new request data and delivers new responses. So, their old code will not work anymore. They must refactor it and release a new version of their application as soon as possible. Such disruption can cause a bad reputation and financial damage for both the API and client application developers. |
Failure to manage the app
| Reasons | Consequences |
|---|---|
| Keeping everything in one big Django app, adding all business logic in the views. | Django apps can become big and become unmanageable over time if you keep adding functionalities in one single app. And then, adding new features or debugging an error will be painful and take extra time and effort. Also, adding all business logic in the views file can lead to writing redundant code across multiple classes and function-based views. Failure to manage an app over time leads to bad coding, patching of errors without test coverage and ultimately, poor performance from the APIs. |
Fix: Distribute the features and functionalities to multiple smaller Django apps in a decoupled way. Additionally, put some business logic in the models which can be reused by the other parts of your API project.
Conclusion
Taking the time to properly design an API project from the start will save you time and effort over the course of a project. The consequences of a poorly designed API affect everyone who uses your API, including the API developers and client application developers.
The knowledge you gained in this reading will hopefully remind you of everything you need to keep in mind to make your future API projects successful.
XML and JSON response types
Introduction
When it comes to displaying output, an API developer should always allow the client to request the preferred content type, such as JSON or XML. Clients can do this by supplying an additional header called Accept in the request header. You learned about this in the reading, [[1.Introduction to APIs#[HTTP methods, status codes and response types](https //www.coursera.org/learn/apis/supplement/epTtA/http-methods-status-codes-and-response-types)|HTTP methods, status codes and response types]]. In this way, the client has full flexibility to use the content in the way they want to. In this reading, you’ll learn more about the two data formats that you will encounter the most in requests from clients, JSON and XML.
Request headers
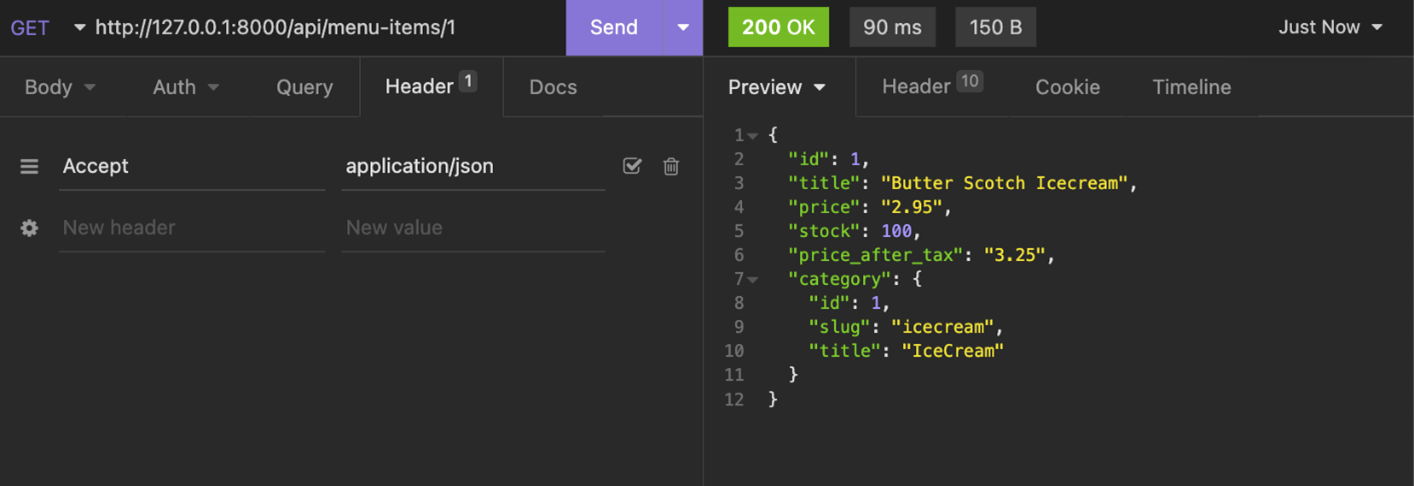
Client applications need to send Accept request headers with every HTTP request to receive the output in JSON or XML. For example:
| Response type | Request header |
|---|---|
| JSON | Accept: application/json |
| XML | Accept: application/xmlAccept: text/xml |
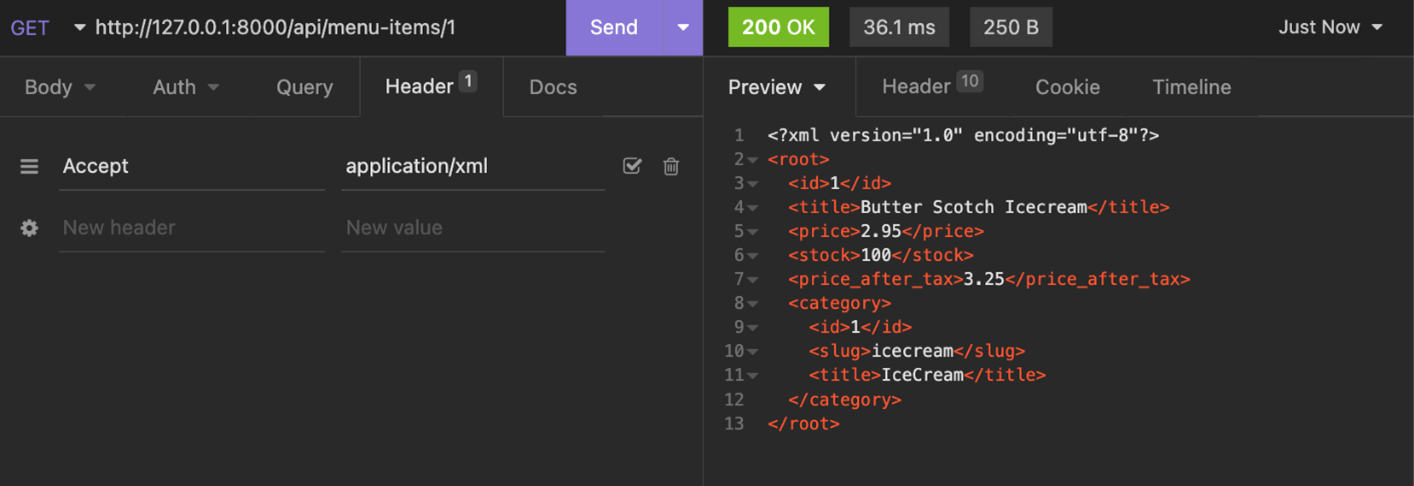
The client can send an Accept header in an HTTP GET request and depending on the request header, the same data will be displayed differently in JSON and XML. Below is a screenshot of an API request for a JSON response.
And here is the same API request but for an XML response.
Data conversion
In this course, you will build APIs using Django and Django REST framework, also called DRF. DRF has built-in renderers that can convert your data to JSON and represent it in an interactive, browsable API viewer. There are also third-party renderer classes that can convert these data to XML or YAML. You will learn about these features and write actual code later in this course.
JSON versus XML
JSON gained popularity because it’s very simple and lightweight. And creating JSON data or parsing it is easier than XML. However, XML has its own advantages too. XML is more readable and supports data attributes that are not possible in JSON. And you can represent complex data in XML and still keep it readable. JSON is very popular among JavaScript developers because they can instantly read and write JSON data just like a regular object.
The table below compares some of the features of both formats.
| JSON | XML |
|---|---|
| JSON or JavaScript Object Notation is a lightweight and dependency-free data format. | XML or Extensible Markup Language is a powerful, tag-based data format. It is similar to HTML. XML data can be fairly complex. |
| The size of JSON data is smaller than XML. So, it takes less bandwidth. | XML data is lengthier than JSON and takes up more bandwidth. |
JSON data is like keys and values.{"author": "Jack London","title": "Seawolf"} | XML is completely tag-based, it does not have key-value pairs like JSON.<?xml version="1.0" encoding="UTF-8"?><root><author>Jack London</author><title>Seawolf</title></root> |
Representing array elements is simpler in JSON. Here’s an example:{"items": [1,2,3,4,5]} | You can still display array elements in XML but it’s very verbose.<?xml version="1.0"<br><br>encoding="UTF-8"?><root><items><br><br><element>1</element><element>2</element><element>3</element><element>4</element><element>5</element></items></root> |
| Generating and parsing JSON data is faster than XML and this conversion process requires less memory and computing power. | Generating and parsing XML is a complex process, and it usually takes more processing power and memory than processing JSON. |
| There is no way to include comments in JSON data. | XML data can include comments. |
Conclusion
It is clear that JSON and XML both have benefits and limitations. Later in this course, you will learn how to display API output in both formats, but you will mostly use JSON in this course because it’s very simple and lightweight.
Debugging your API
Debugging allows you to find and fix errors in your code efficiently, and helps you better understand how your program works.
Let’s get to it, open the terminal and activate the virtual environment for your project by typing pipenv shell. Now open the current project directory in VS code, and select the python interpreter from the command palette.
Create a new Django app and open the project in VS code. You can find the d bugger icon on the left sidebar, click on this icon and it will open a debug panel.
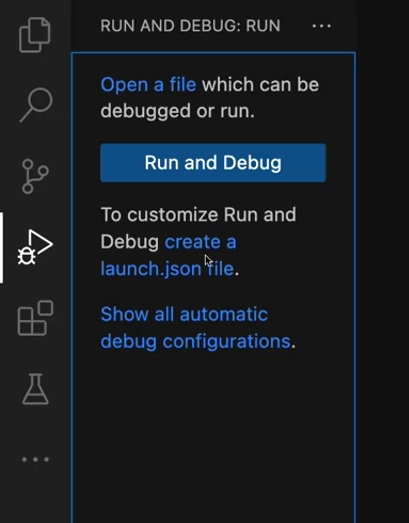
When you open it for the first time, there will be a create a launch.json file link at the top of this panel along with the debugger icon. Click on this, create a launch file link which will open a debug configuration list with many available options. Select Django from this list and you are ready for debugging.
There are two options in the run menu. Start debugging and run without debugging. When you start the debugger it will automatically activate your virtual environment in a terminal session, and starts the web server. So, you don’t need to manually start the web server anymore.
Breakpoint
A breakpoint is a position where you intentionally want to pause the execution of your code. When the execution is paused you can examine the variables value up to that point.

You can add or remove breakpoints by clicking on the red dot beside every line number in VS code.
Watch
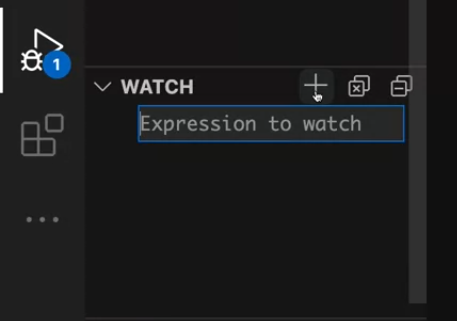
You can add variables to the watch list by clicking on the plus icon and examining their values whenever they change.
Debug toolbar

The debug toolbar will be visible when the code execution reaches a breakpoint and is paused. There are six buttons
- The first button is continue or pause and it lets you execute code on the current line, and it continues until the next breakpoint is reached.
- Step over, lets you continue the execution to the next line and pause.
- If you use a function call and you need to go to that function and pause the code execution you’ll use the step into.
- And step out, lets you go back to the line where it was called from inside a function.
- Restart means that you restart the debugging session.
- Stop ends the debugging session and stops the web server.
Browser tools and extensions for API development
This is Chrome, but you can find a developer console and similar tools for every browser. Open the developer console, in the Chrome browser, you can do that by pressing control and shift and the I key in Windows and Linux. And command and option and I in MacOS.
The developer console is helpful when debugging the API calls met from JavaScript on your website. If you come to the network tab, you can see many options, but you should focus on the fetch XHR filter.
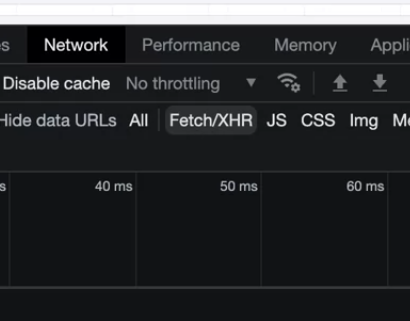
Click on the console’s tab and paste this single line of code to initiate a HTTP GET call to your API and press enter.
fetch('http://127.0.0.1:8000/api/menu-items')
You can use any valid URL inside the fetch function to test this. Now, go to the network tab and see that the API call has been recorded. It shows menu items on the left side, click on it and then click on the header step. You can see all the request response headers involved in this call.
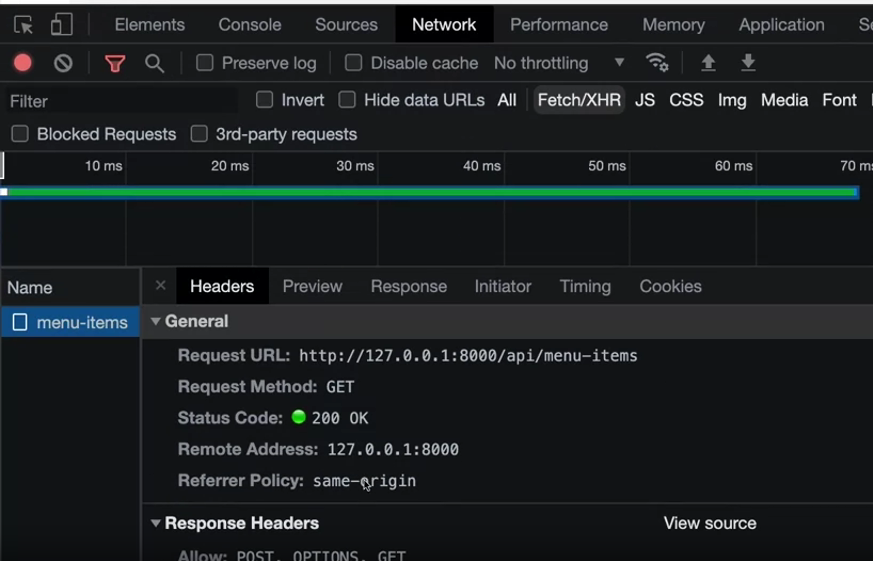
The preview tab displays the output. The response tab does the same, but the preview tab renders the output in a more formatted style and the response tab shows the raw output of your API call.
The initiator is a very handy tab, it shows the line in your JavaScript from where this API call was initiated.
At the top of this developer console, just below the network tab is a checkbox called divisible cache. If you want to avoid climb site caching and you expect a fresh output from your APIs, then you should keep it checked.
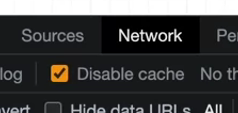
All the API calls from your JavaScript will be recorded in this network tab and you can inspect one after another. You can also delete all those recorded calls by clicking on the clear option next to this red button at any time.
Let us visit any API endpoint in your browser. For example, this public API https://restcountries.com/v3.1/all.
It displays a list of countries but the JSON output is not formatted and it looks messy.
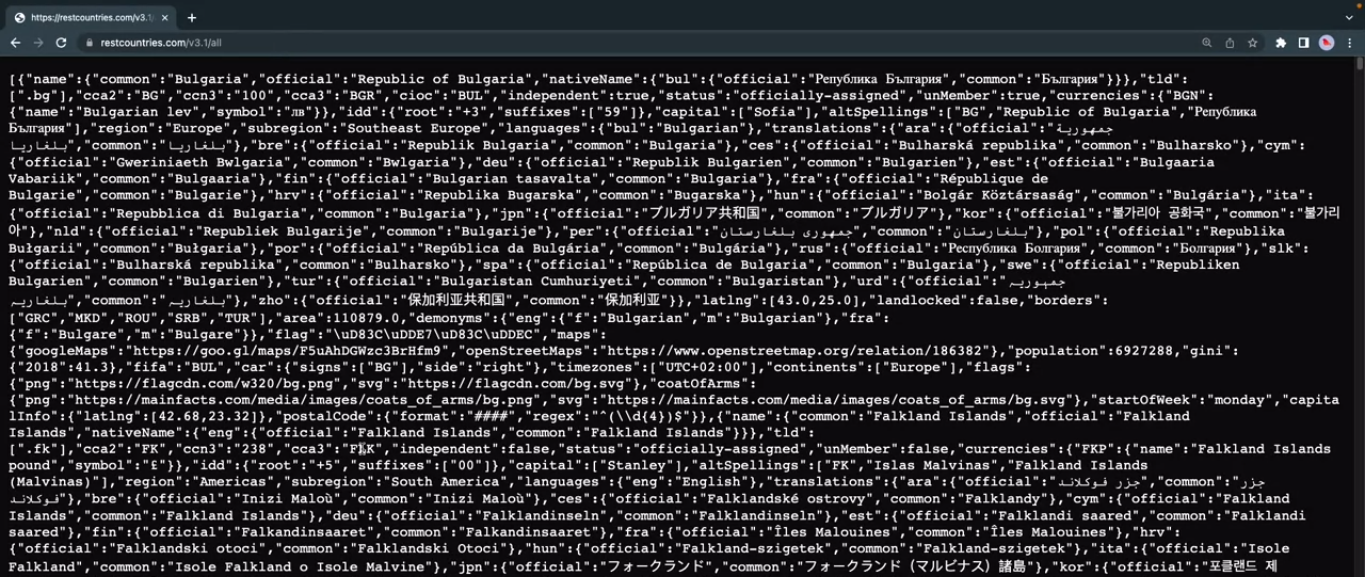
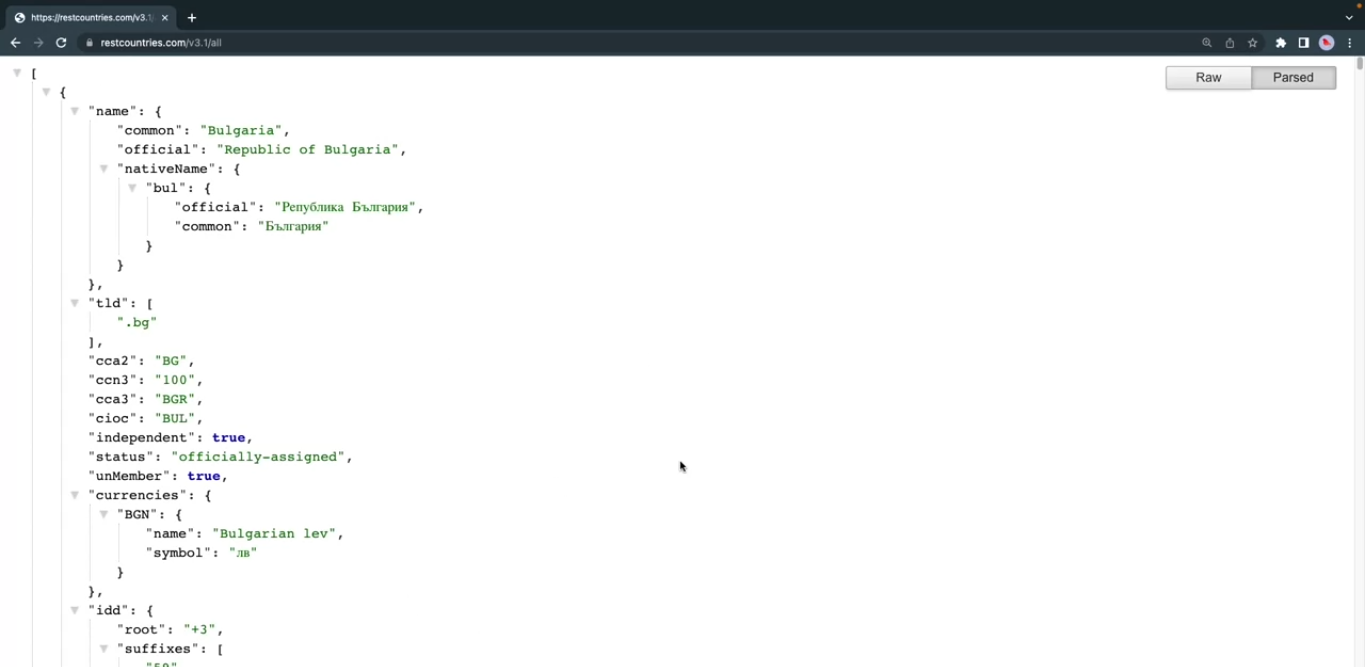
You can install a JSON formatter extension available for all major browsers. Go to the Chrome extension store, search for the JSON formatter and install any JSON formatter extension of your choice, they all work mostly the same. After installing and enabling a JSON formatter extension, revisit the REST countries API and note how the output is now nicely formatted.
Mock APIs
Introduction
When developing APIs, it can take a long time before clients can start using them. Fortunately, as an API developer, you can use the mocking technique to provide the same output as a real API endpoint.
A mock API imitates the real API endpoint with fake data so that the client application developers can start development before the actual API is developed. This allows them to develop their apps without waiting for the production APIs to go live.
In mock API outputs, the data structure remains correct, but the values are fake. And you don’t do any kind of business logic process for these mock data. You just return some pre-generated hard-coded data as a response.
How it works
When you create the mock API endpoints with fake data, both the API developers and the client application developers can evaluate the output and instantly understand what data they will get from an API call or what data they should deliver.
Then, based on these mock APIs endpoints and their output, these developers can start coding the client applications. They don’t need to wait for the API developers to finish implementing these APIs because they already know what type of data they will get.
And finally, when the actual API is ready, the client application developers will change those mock API endpoints with the real endpoints. Client applications are easier to maintain when using mock API tools.
There are two major steps involved in creating Mock APIs. First, you create mock data that you can deliver from the mock API endpoints. And the second step is to create mock API endpoints and serve those data.
Mock API tools
You can search for Mock API Data Generator in your browser and get plenty of tools that you can use for free. Similarly, searching for Mock API Endpoints will give you access to some handy free services too.
Mockaroo is a popular fake data generator service that you can use for free, which is available from www.mockaroo.com
Mockapi is a popular mock API service that you can use to create mock API endpoints for free, which you can access at https://mockapi.io/
Conclusion
In this reading, you learned how mock APIs can speed up development. Mocking APIs play an essential role in API development because client application developers don’t need to wait for the actual API to become live. It minimizes the time of development and reduces the dependencies between API developers and client application developers.
APIDjangoPythonRESTRESTfulJSONXML
Previous one → 2.Principles of API development | Next one → 4.Introduction to Django REST Framework (DRF)