How are HTML and CSS used in the real world?
By now you know that HTML is a markup language used to create webpages. In fact, it’s the most basic and fundamental language for creating webpages. Together with CSS, it has helped the web browser expand beyond just desktop computers.
HTML
HTML has been around since 1990, and it was originally designed to provide a way for people to share information over the Internet. HTML webpages used to only show basic images and text.
The websites you browse today are very different. This is because HTML can do much more than just defining how content is displayed in the browser.
CSS
HTML is great, but together with CSS, it can do so much more. CSS is a stylesheet language that is used to describe the look and layout of a document written in HTML.
While CSS is not a programming language, it does allow for some programming like features, such as variables and nested rules. What it does is gives you control over color, size, spacing, fonts, positioning, and more.
One of the fundamental principles of CSS is the separation of content and style. That means you can change a webpages appearance without editing its underlying HTML.
W3C, the organization responsible for standards for the worldwide web, manages both HTML and CSS specifications. They continually improve their capabilities to ensure that they are always oriented towards current requirements.
Many new features were added to the current version of HTML that make it easier to use than previous versions. These are:
- better support for multimedia content such as audio and video,
- improved support for responsive design such as adopting the webpage layout depending on the device the webpage is viewed on,
- new form input types such as sliders and range inputs, date and color pickers,
- new form validation features,
- new ways to work with texts such as spell checking and text editing.
Some major additions released for CSS in 2011 ensure that CSS can style and control a website regardless of the media content or the device used for viewing the page. The additions to the current version are:
- media queries, which allow for different styles to be applied depending on the device being used;
- box sizing, which allows developers to specify how they want their content to be sized and padded;
- multiple backgrounds, which means you can specify multiple background images for an element;
- border images, which allow developers to specify an image as a border instead of a solid color or style;
- text shadows, which means you can add shadows behind text for a more three-dimensional look;
- transformations and transitions, which allow developers to animate elements on a webpage
In essence, the combination of HTML and CSS allows websites to adapt their design and layout based on the devices on which they’re viewed. While this feature was initially used to support mobile devices like cell phones and tablets, the usage of HTML and CSS has grown beyond the traditional web browser and webpages.
Today, webpages can be viewed not only on computers, cell phones, and tablets, but also on video game consoles and even smart TVs. The web browser has truly expanded beyond traditional desktop devices, and it’s all thanks to the combination of HTML and CSS.
Semantic tags and why we need them
By now you know that HTML describes the content of a web page. But how do you describe the meaning of a web page, to understand this in a real world context think of buttons in an elevator.
The vertical arrangement of buttons isn’t enough for someone to understand their meaning. To convey the meaning or semantics of the buttons numbers are added so that people know which button will take them to which floor.
When you write HTML it’s good practice to semantically describe the content. This allows search engines and accessibility software such as screen readers to understand the contents of a page.
fortunately you can do this by using some basic HTML tags. For example using a heading tags such as H1 describes that the content is a heading. Similarly the UL and OL tags describe lists.
Basic HTML page structure
<!DOCTYPE html>
<html>
	<head>
	</head>
	<body>
	</body>
</html>
Inside the body tag you can lay out the website with very semantic tags to describe each of the sections.
<!DOCTYPE html>
<html>
	<head>
	</head>
	<body>
		<header>
		</header>
		<main>
		</main>
		<footer>
		</footer>
	</body>
</html>
For a typical HTML page the structure can be semantically described using the header, main and footer semantic HTML tags.
For example, suppose you lay out your page with a header section that contains some company logo and navigation links. Then a main section contains sections and articles. Finally a footer section contains contact information and social media links.
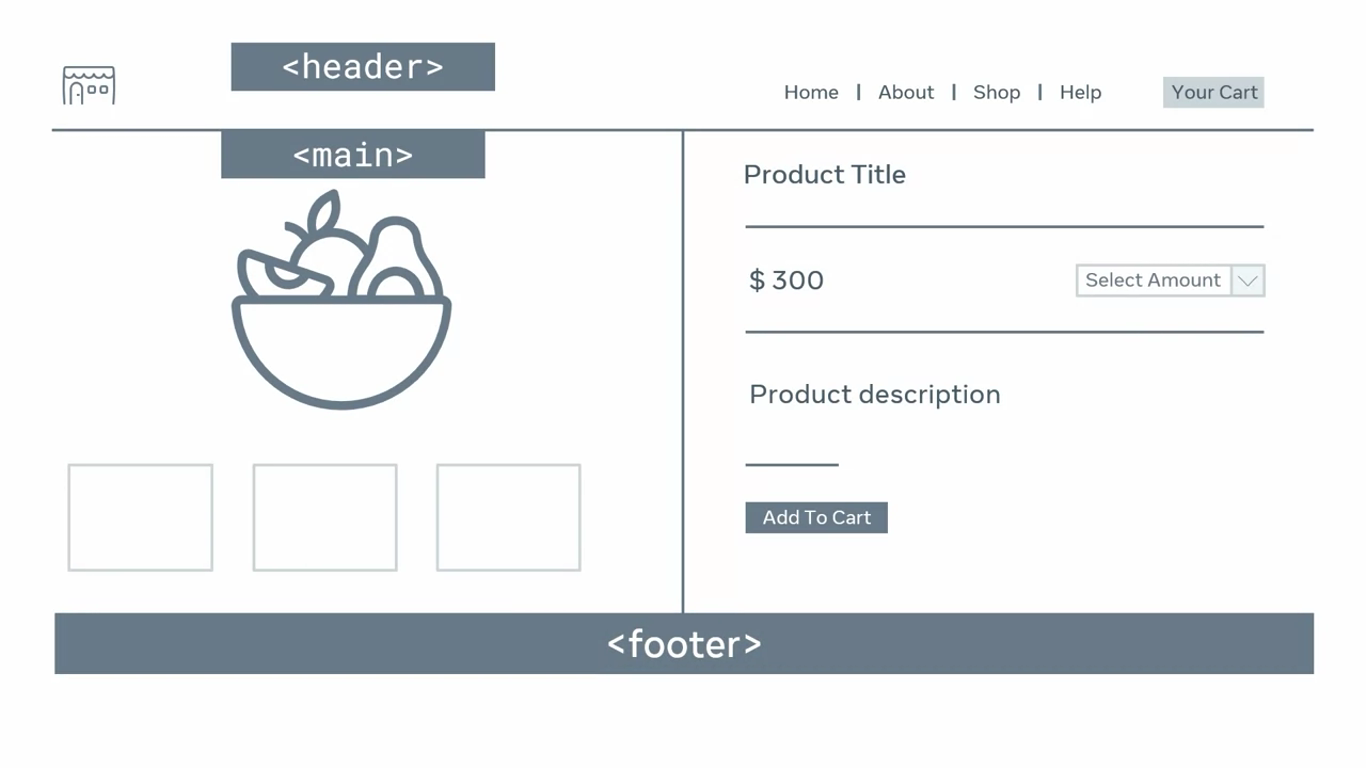
nav
The main navigation section of your web page can also be described semantically using the Nav tag.
<!DOCTYPE html>
<html>
	<head>
	</head>
	<body>
		<header>
			<nav>
			</nav>
		</header>
		<main>
		</main>
		<footer>
		</footer>
	</body>
</html>
Depending on how web pages designed the Nav element is often placed after the header element and the header element is used for logos.
The main links of your website are then added inside the Nav element. It is common practice for developers to specify their links as an unordered list inside the Nav element.
<!DOCTYPE html>
<html>
	<head>
	</head>
	<body>
		<header>
			<nav>
				<ul>
					<li><a href="#home">Home</a></li>
					<li><a href="#about">About</a></li>
					<li><a href="#contact">Contact</a></li>
			</nav>
		</header>
		<main>
		</main>
		<footer>
		</footer>
	</body>
</html>
main
Next is the main content of a web page. The two key semantic elements for your main content are the article and section elements.
article
The HTML specification states that according to the World Wide Web Consortium’s website, the article element indicates content which represents a complete or self contained composition in a document page application or site that is independently distributable.
That’s quite a mouthful. It may help to think of a page in a newspaper. There are many articles on the page and you can cut out the individual articles with scissors if you want to. The articles you can remove are the article element. Examples of this include:
- a forum post,
- a magazine or a newspaper article,
- a blog entry,
- a user submitted comment,
- an interactive widget or gadget
- or any other independent item of content
How article element is used
Say you are developing a blog about your summer holiday. It’s good practice to contain the blog post content inside of the article element because it’s a complete self-contained composition on a web page.
You should place the article element within your main element. Then you add your regular heading and paragraph tags inside the article element.
<!DOCTYPE html>
<html>
	<head>
	</head>
	<body>
		<header>
		</header>
		<main>
			<article>
				<h2>My summer holiday</h2>
				<p>This summer I visited my grandparents.</p>
			</article>
		</main>
		<footer>
		</footer>
	</body>
</html>
The reason for doing it this way is because the main element semantically represents the main content of the page. And inside of it there can be multiple article elements for something like a blog post list.
footer
This might contain additional navigation links or other content.
NOTE
It is important to note that semantic elements are not limited to this structure. Since their purpose is to describe the semantics of the content, the elements can be nested inside of each other, if it accurately describes the content.
Nested semantic structure
You add a header element to the article element, inside the header element at the heading element with the blog title and a paragraph element describing the date and author of the blog post. Inside the main element at the content of the blog post.
<body>
	<article>
		<header>
			<h2>My summer holiday</h2>
			<p>Posted on Monday, by Jane Wilson</p>
		</header>
		<main>
			<p>This summer I visited my grandparents.</p>
		</main>
	</article>
</body>
section
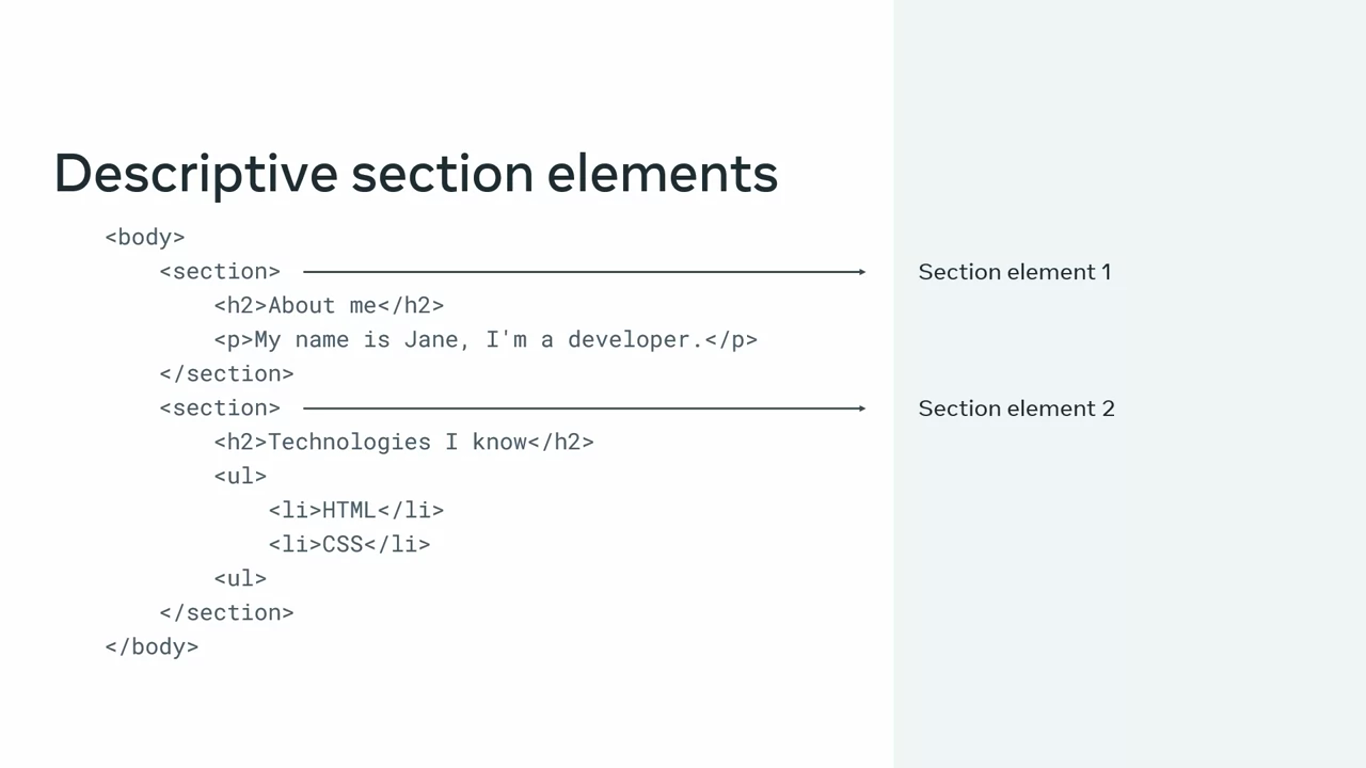
You can add a section element to semantically define individual sections of the article.
<body>
	<article>
		<header>
			<h2>My summer holiday</h2>
			<p>Posted on Monday, by Jane Wilson</p>
		</header>
		<main>
			<section>
				<h3>Day one</h3>
				<p>I arrived at my grandparents' house.</p>
			</section>
		</main>
	</article>
</body>
NOTE
It is important to note that sections should contain heading elements to semantically describe the section.
It is also possible to use section elements to describe different sections of your webpage, the section element doesn’t require the article element. It all depends on how you want to semantically describe your page.
Semantic HTML cheat sheet
There are hundreds of semantic tags available to help describe the meaning of your HTML documents. Below is a cheat sheet with some of the most common ones you’ll use in this course and in your development career.
Sectioning tags
Use the following tags to organize your HTML document into structured sections. <header>
The header of a content section or the web page. The web page header often contains the website branding or logo.
<nav>
The navigation links of a section or the web page.
<footer>
The footer of a content section or the web page. On a web page, it often contains secondary links, the copyright notice, privacy policy and cookie policy links.
<main>
Specifies the main content of a section or the web page.
<aside>
A secondary set of content that is not required to understand the main content.
<article>
An independent, self-contained block of content such as a blog post or product.
<section>
A standalone section of the document that is often used within the body and article elements.
<details>
A collapsed section of content that can be expanded if the user wishes to view it.
<summary>
Specifies the summary or caption of a <details> element.
<h1><h2><h3><h4><h5><h6> Headings on the web page. <h1> indicates the most important heading whereas <h6> indicates the least important.
Content tags
<blockquote>
Used to describe a quotation.
<dd>
Used to define a description for the preceding <dt> element.
<dl>
Used to define a description list.
<dt>
Used to describe terms inside <dl> elements.
<figcaption>
Defines a caption for a photo image.
<figure>
Applies markup to a photo image.
<hr>
Adds a horizontal line to the parent element.
<li>
Used to define an item within a list.
<menu>
A semantic alternative to <ul> tag.
<ol>
Defines an ordered list.
<p>
Defines a paragraph.
<pre>
Used to represent preformatted text. Typically rendered in the web browser using a monospace font.
<ul>
Unordered list
Inline tags
<a>
An anchor link to another HTML document.
<abbr>
Specifies that the containing text is an abbreviation or acronym.
<b>
Bolds the containing text. When used to indicate importance use <strong> instead.
<br>
A line break. Moves the subsequent text to a new line.
<cite>
Defines the title of creative work (for example a book, poem, song, movie, painting or sculpture). The text in the <cite> element is usually rendered in italics.
<code>
Indicates that the containing text is a block of computer code.
<data>
Indicates machine-readable data.
<em>
Emphasizes the containing text.
<i>
The containing text is displayed in italics. Used to indicate idiomatic text or technical terms.
<mark>
The containing text should be marked or highlighted.
<q>
The containing text is a short quotation.
<s>
Displays the containing text with a strikethrough or line through it.
<samp>
The containing text represents a sample.
<small>
Used to represent small text, such as copyright and legal text.
<span>
A generic element for grouping content for CSS styling.
<strong>
Displays the containing text in bold. Used to indicate importance.
<sub>
The containing text is subscript text, displayed with a lowered baseline.
<sup>
The containing text is superscript text, displayed with a raised baseline.
<time>
A semantic tag used to display both dates and times.
<u>
Displays the containing text with a solid underline.
<var>
The containing text is a variable in a mathematical expression.
Embedded content and media tags
<audio>
Used to embed audio in web pages.
<canvas>
Used to render 2D and 3D graphics on web pages.
<embed>
Used as a containing element for external content provided by an external application such as a media player or plug-in application.
<iframe>
Used to embed a nested web page.
<img>
Embeds an image on a web page.
<object>
Similar to <embed> but the content is provided by a web browser plug-in.
<picture>
An element that contains one element and one or more
<video>
Embeds a video on a web page.
<source>
Specifies media resources for <picture>, <audio> and <video> elements.
<svg>
Used to define Scalable Vector Graphics within a web page.
Table tags
<table>
Defines a table element to display table data within a web page.
<thead>
Represents the header content of a table. Typically contains one <tr> element.
<tbody>
Represents the main content of a table. Contains one or more <tr> elements.
<tfoot>
Represents the footer content of a table. Typically contains one <tr> element.
<tr>
Represents a row in a table. Contains one or more <td> elements when used within <tbody> or <tfoot>. When used within <thead>, contains one or more <th> elements.
<td>
Represents a cell in a table. Contains the text content of the cell.
<th>
Defines a header cell of a table. Contains the text content of the header.
<caption>
Defines the caption of a table element.
<colgroup>
Defines a semantic group of one or more columns in a table for formatting.
<col>
Defines a semantic column in a table.
What is Hyper Text Markup Language?
[[3.Getting started with HTML#[What is Hyper Text Markup Language?](https //www.coursera.org/learn/introduction-to-back-end-development/lecture/bvbzK/what-is-hyper-text-markup-language)]]
Semantic tags in action
The Little Lemon Restaurant has asked me to add a new blog page to their website. They’ve told me that the page will contain several blog posts, and that it must use semantic html so that search engines and accessibility software can understand the semantics of the page.
blog.html
<!DOCTYPE html>
<html>
<head>
	<title>Little Lemon</title>
	<link rel="stylesheet" href="styles.css">
</head>
<body>
	<header>

	</header>
	<nav>

	</nav>
	<main>

	</main>
	<footer>

	</footer>
</body>
</html>
Specifically the header element will be used to display the Little Lemon logo, and the nav element will be used to describe the navigational structure of the website. The main element will feature the main content of the web page, and the footer will be used to display copyright information.
When a search engine or accessibility software reads this document, the semantic tags will help the software understand the purpose and meaning of different sections of the document.
<!DOCTYPE html>
<html>
<head>
	<title>Little Lemon</title>
	<link rel="stylesheet" href="styles.css">
</head>
<body>
	<header>
		<img src="logo.png">
	</header>
	<nav>
		<ul>
			<li><a href="index.html">Home</a></li>
			<li><a href="location.html">Location</a></li>
			<li><a href="blog.html">Blog</a></li>
		</ul>
	</nav>
	<main>
		<h1>Blog</h1>
		<article>
			<h2>20% off this weekend</h2>
			<p>Come down to Little Lemon and your meal will be 20% off!</p>
		</article>
		<article>
			<h2>Our new menu</h2>
			<p>We've updated our menu with new dinners.</p>
		</article>

	</main>
	<footer>
		<p>Copyright Little Lemon</p>
	</footer>
</body>
</html>
Forms and validation
Form validation
Form validation is a process that ensures that the data entered by the user in a form is valid and conforms to rules defined by the developer.
There are two methods of form validation, client-side validation and server-side validation.
Client-side validation
Client-side validation checks for errors as soon as they are typed into the form. This is done by the web browser or by JavaScript code, and provide the user with immediate feedback.
The client-side validation process starts by checking if a form has been filled out correctly. If there are no errors, the form will be submitted to the server for processing. However, if there are errors, an error message will alert the user of the invalid data and how to change it for successful submission.
For example, you decide to use the input element with its type attributes set to email. If the user does not enter a valid email address, the web browser will display an error message informing them that the data they entered is not a valid email address.
Server-side validation
On the other hand, server-side validation checks for errors after the data has been submitted to the web server. Server-side validation is more secure because it prevents malicious users from tampering with your website’s code and submitting invalid data to your server.
When the form data is received by the web server, the backend will validate the data before processing it. This validation can run more complex checks, such as checking the data against a database, or validating the data against business requirements.
Most websites use both client-side and server-side validation to provide immediate feedback to users, but also to protect against malicious data submission and to ensure data integrity.
HTML client-side validation
HTML has several input types that are validated by the web browser. As demonstrated in the example,
"email"is used for email addresses:<input type="email">"tel"for telephone numbers"url"for URLs such aswww.data.com"date"for date values"time"for time values"number"for numeric values"range"for numeric values which have a minimum and maximum value"color"for color selection
Say for instance, a user makes mistakes on a user account form when entering a telephone number and URL, the browser will validate the entered data against the requirements of the input type and provide user feedback.
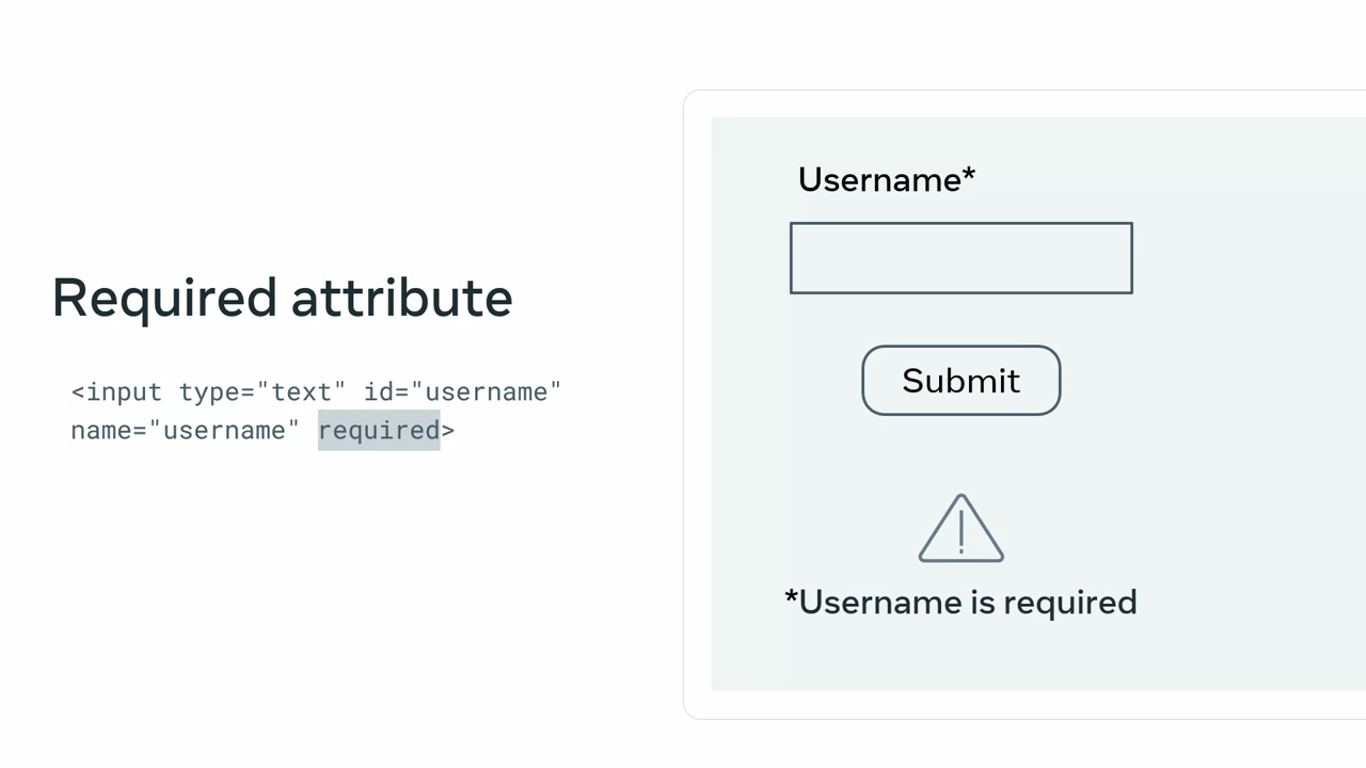
Another example is the required attribute, which indicates that the user must supply a value to an input field. The web browser will alert a user if a required value is outstanding.
Input types
You already learned about the input HTML tag and how the type property determines the data your users can type in. This cheat sheet should be a reference to decide what type best suits your use case. Most of the inputs go hand in hand with the label tag for best accessibility practices.
Button
This displays a clickable button and it’s mostly used in HTML forms to activate a script when clicked.
<input type="button" value="Click me" onclick="msg()" />Keep in mind, you can also define buttons with the <button> tag, with the added benefit of being able to place content like text or images inside the tag.
<button onclick="alert('Are you sure you want to continue?')">
    <img src="https://yourserver.com/button_img.jpg"
        alt="Submit the form" height="64" width="64">
 </button>
Checkbox
Defines a check box allowing single values to be selected or deselected. They are used to let a user select one or more options from a limited number of choices.
<input type="checkbox" id="dog" name="dog" value="Dog">
<label for="dog">I like dogs</label>
<input type="checkbox" id="cat" name="cat" value="Cat">
<label for="cat">I like cats</label>
Radio
Displays a radio button, allowing only a single value to be selected out of multiple choices. They are normally presented in radio groups, which are collections of radio buttons describing a set of related options that share the same name attribute.
<input type="radio" id="light" name="theme" value="Light">
<label for="light">Light</label>
<input type="radio" id="dark" name="theme" value="Dark">
<label for="dark">Dark</label>
Submit
Displays a submit button for submitting all values from an HTML form to a form-handler, typically a server. The form-handler is specified in the form’s action attribute.
<form action="myserver.com" method="POST">
  …
<input type="submit" value="Submit" />
</form>
Text
Defines a basic single-line text field that a user can enter text into.
<label for="fname">First name:</label>
<input type="text" id="fname" name="fname">
Password
Defines a single-line text field whose value is obscured, suited for sensitive information like passwords.
<label for="pwd">Password:</label>
<input type="password" id="pwd" name="pwd">
Date
Displays a control for entering a date (year, month and day) with no time.
<label for="dob">Date of birth:</label>
<input type="date" id="dob" name="date of birth">
Datetime-local
Defines a control for entering a date and time, including the year, month and day, as well as the time in hours and minutes.
<label for="birthdaytime">Birthday (date and time):</label>
<input type="datetime-local" id="birthdaytime" name="birthdaytime">Defines a field for an email address. It’s similar to plain text input, with the addition that it validates automatically when submitted to the server.
<label for="email">Enter your email:</label>
<input type="email" id="email" name="email">
File
Displays a control that lets the user select and upload a file from their computer. To define the types of files permissible you can use the accept attribute. Also, to enable multiple files to be selected, add the multiple attribute.
<label for="myfile">Select a file:</label>
<input type="file" id="myfile" name="myfile">
Hidden
Defines a control that is not displayed but whose value is still submitted to the server.
<input type="hidden" id="custId" name="custId" value="3487">Image
Defines an image as a graphical submit button. You should use the src attribute to point to the location of your image file.
<input type="image"src="submit_img.png" alt="Submit" width="48" height="48">Number
Defines a control for entering a number. You can use attributes to specify restrictions, such as min and max values allowed, number intervals or a default value.
<input type="number" id="quantity" name="quantity" min="1" max="5">Range
Displays a range widget for specifying a number between two values. The precise value, however, is not considered important. This is typically represented using a slider or dial control. To define the range of acceptable values, use the min and max properties.
<label for="volume">Volume:</label>
<input type="range" id="volume" name="volume" min="0" max="10">
Reset
Displays a button that resets the contents of the form to their default values.
<input type="reset">Search
Defines a text field for entering a search query. These are functionally identical to text inputs, but may be styled differently depending on the browser.
<label for="gsearch">Search in Google:</label>
<input type="search" id="gsearch" name="gsearch">
Time
Displays a control for entering a time value in hours and minutes, with no time zone.
<label for="appt">Select a time:</label>
<input type="time" id="appt" name="appt">
Tel
Defines a control for entering a telephone number. Browsers that do not support tel fall back to standard text input. You can optionally use the pattern field to perform validation.
<label for="phone">Enter your phone number:</label>
<input type="tel" id="phone" name="phone" pattern="[+]{1}[0-9]{11,14}">
Url
Displays a field for entering a text URL. It works similarly to a text input, but performs automatic validation before being submitted to the server.
<label for="homepage">Add your homepage:</label>
<input type="url" id="homepage" name="homepage">
Week
Defines a control for entering a date consisting of a week-year number and a year, with no time zone. Keep in mind that this is a newer type that is not supported by all browsers.
<label for="week">Select a week:</label>
<input type="week" id="week" name="week">
Month
Displays a control for entering a month and year, with no time zone. Keep in mind that this is a newer type that is not supported by all browsers.
<label for="bdaymonth">Birthday (month and year):</label>
<input type="month" id="bdaymonth" name="bdaymonth" min="1930-01" value="2000-01">
Form submission
By now, you know that the web browser communicates with a web server using a HTTP request response cycle. This means that the web browser sends requests to the web server, and the web server sends back a response.
Up to now, the main type of requests you’ve been introduced to were for resources such as HTML documents, images, CSS files, and JavaScript files. But it is also possible to send data as part of a request. This is how form send data to the web server. In fact, there are two ways a form can send data to the web server using the HTTP GET method or the HTTP POST method.
You can specify which method the form should use with the method attribute of the form element.
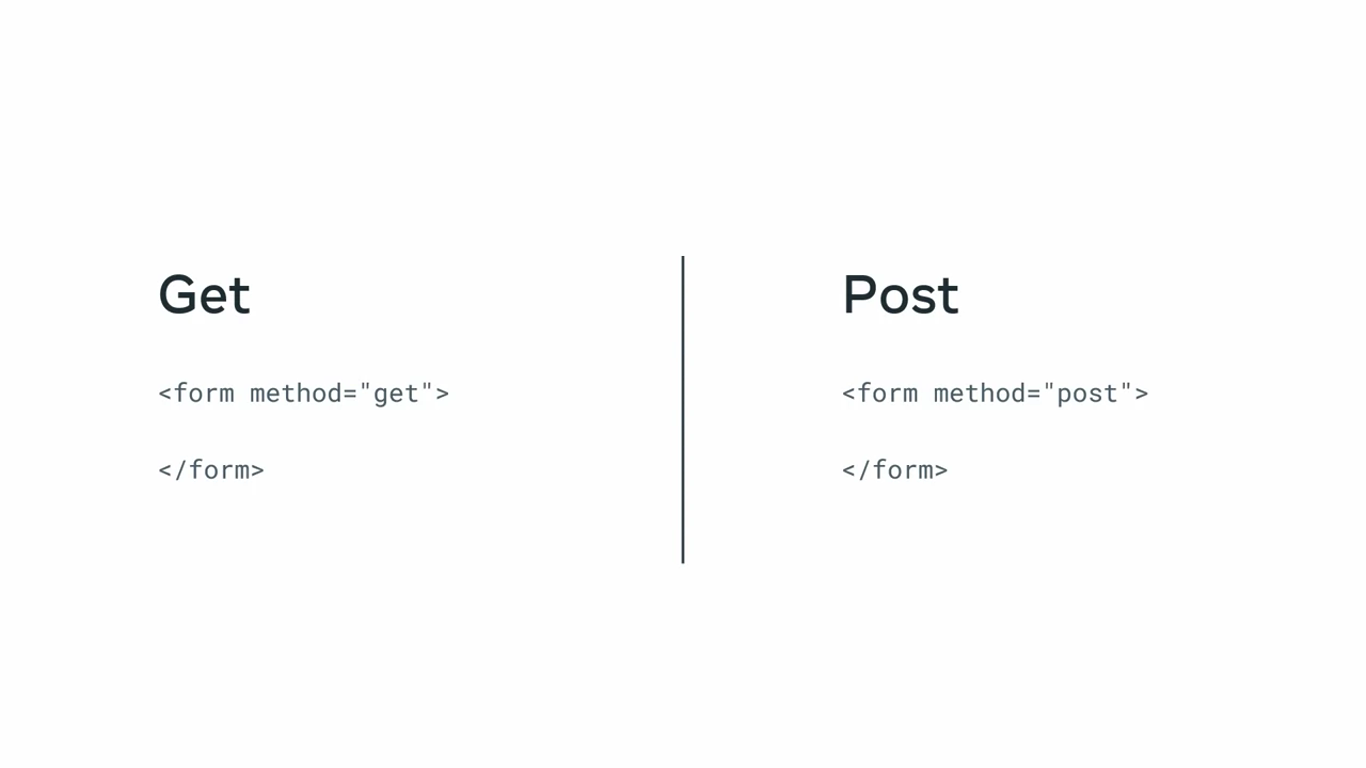
Form with GET method
This login form, excepts a username and password. It also has a login button that submits the form to the web server.
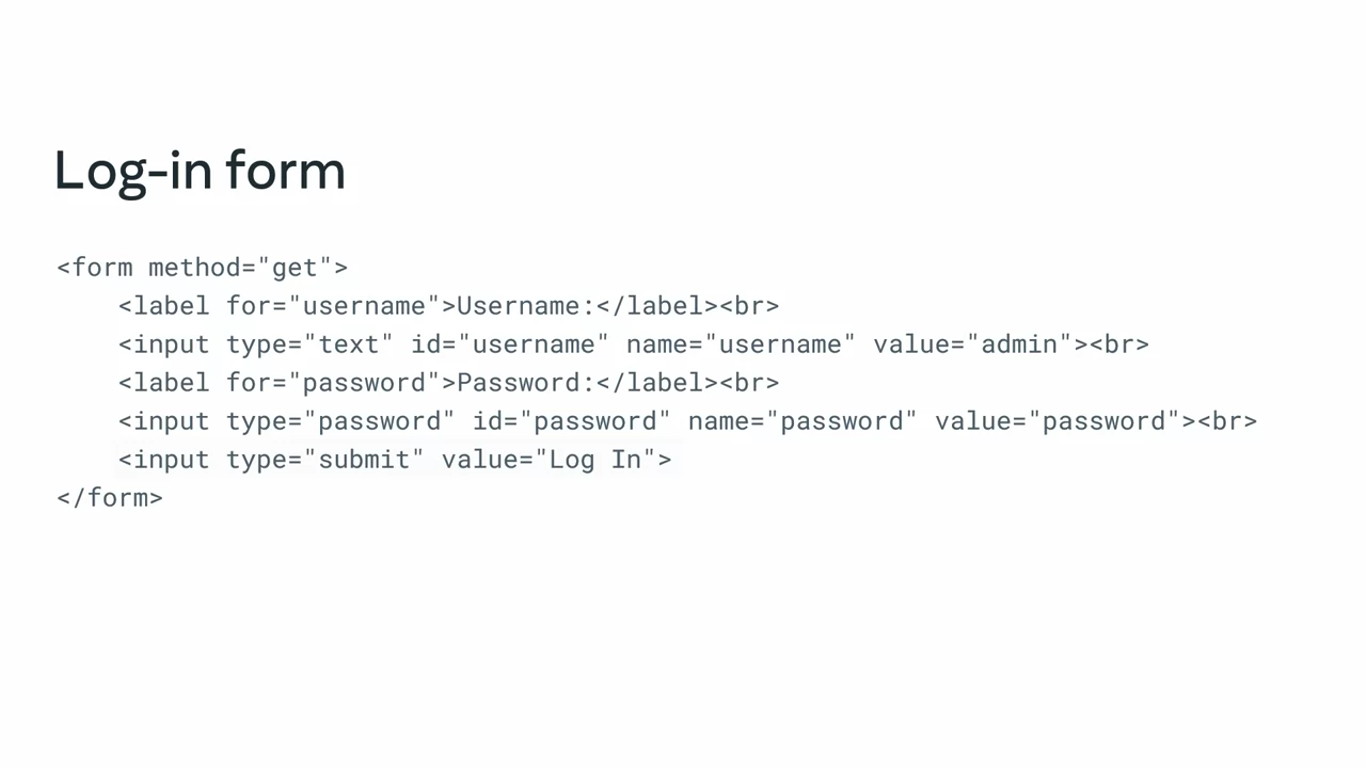
How would it work if the method attribute is set to GET?
When the Login button is clicked, the form data is sent as part of the request URL. This means that the user data is appended to the end of the URL in the web browser navigation bar.
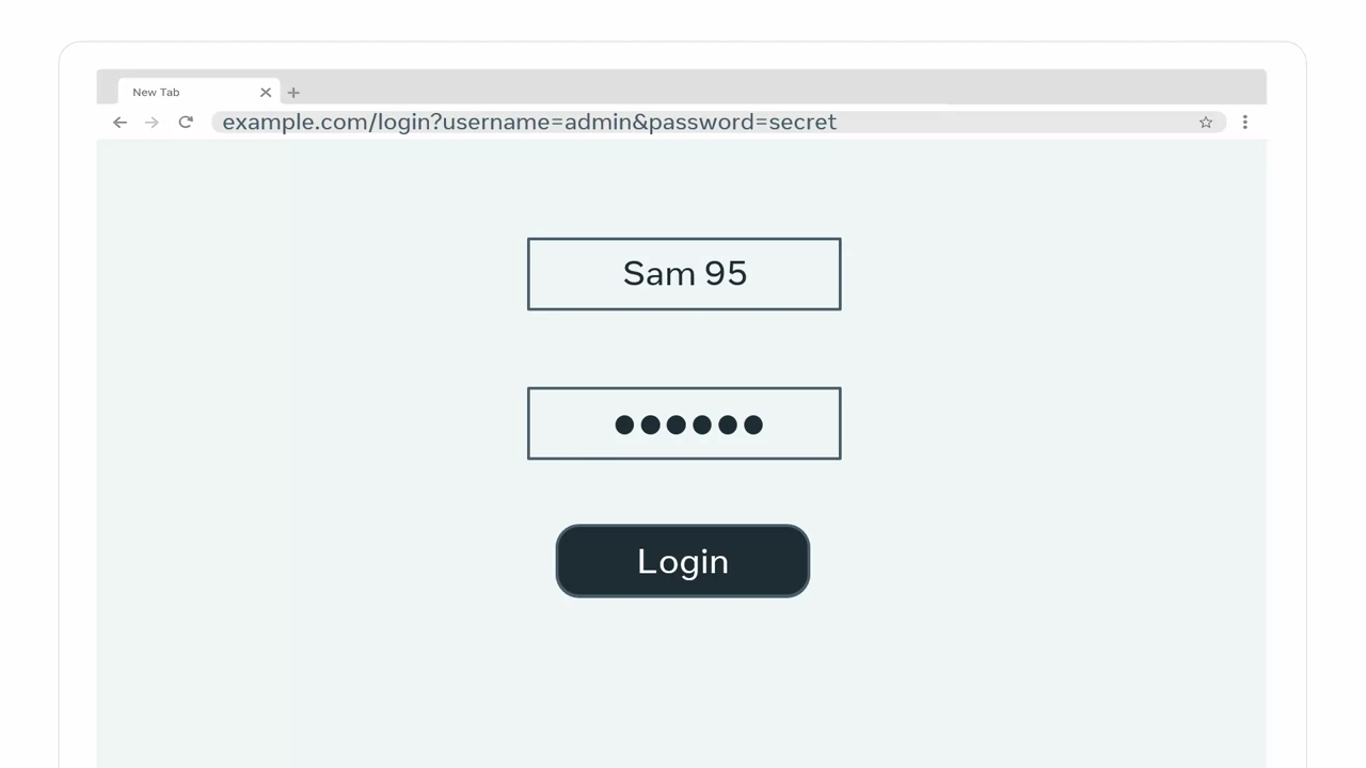
The web server receives the HTTP GET request, and extracts the form data from the URL.
While this is an easy way to submit data, it has three key problems.
- First, the length of a URL is limited to around 2,000 characters depending on the web browser you’re using. Some web browsers allow more, but there are inconsistencies between browsers. So if you have a large form, some data may be lost when it sent via the GET Method to the web server.
- Second, the length of a requested URL is also limited on some web servers. Popular web server software such as Apache web server or Engine X, have a default limit of around 4,096 characters. Again, if you have a large form, some data may be lost.
- The final problem is security. Since the data is included as part of the URL, it means that your data is stored in your web browser history and possibly in the request logs on the web server. If you’re transmitting personal information such as addresses or credit card numbers, this is a major privacy and security risk.
Form with POST method
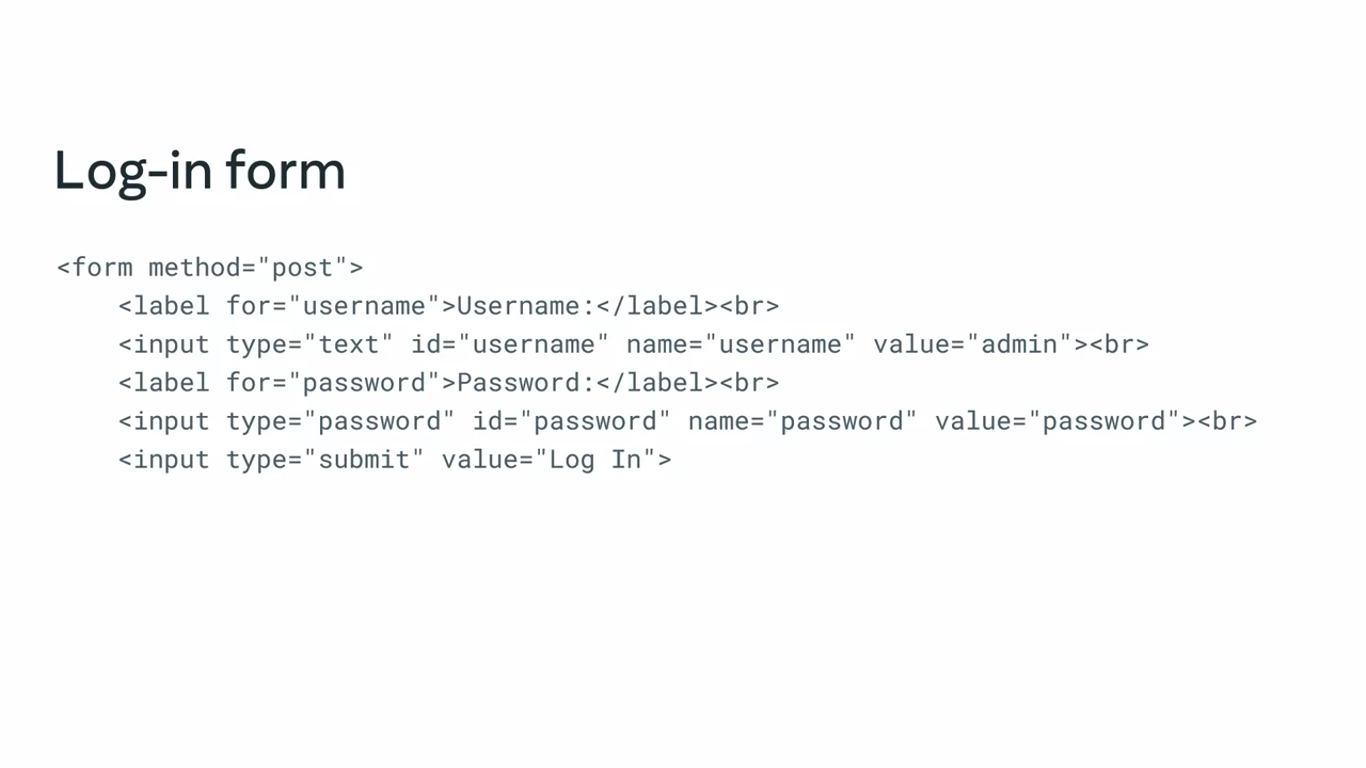
When the form is submitted using the post method, the form data is inserted into the content of the HTTP request. When the submit button is pressed, it will send an HTTP post request with the data contained in the body of the request.
The HTTP post method is more secure than the HTTP GET method. However, the data could still be read by a third party listening to the HTTP request.
To secure this completely, HTTPS is used to encrypt the data so that only the sender and receiver can understand the data.
Once the web server receives the request, it processes it and sends back an HTTP response. If the request was successful, the response will direct the web browser to a new webpage. If errors occurred, there are many ways this can be handled by the webpage.
Submit
You have recently learned about how forms are sent to web servers and the difference between GET and POST. In this reading, you will build on this knowledge by learning about Submit.
Action and method
Form submissions are an essential part of the world wide web. Nearly every website uses forms, from buying items online to ordering food for delivery. When you click the login button on a website, it sends your username and password to a web server to log you into your account. As you know by now, you add a form to your web page using the form tag.
<form>
</form>
But how the form is submitted is determined by two essential attributes: action and method.
The action attribute specifies to which web address the form must be sent. This address is the location of server-side code that will process the request.
<form action="/login">
</form>
It is important to note that action can be a full URL address such as https://meta.com, an absolute path such as /login, or a relative path such as login.
The absolute path, which starts with a forward slash, will use the base address of the current website, such as https://meta.com and combine it with the absolute path. For example, if /login is the absolute path, the form will be submitted to https://meta.com/login. If the address is https://meta.com/company-info/ and /login is the absolute path, the submission address will still be https://meta.com/login.
Similarly, a relative path will combine the current web address with a relative path. For example, if the web browser is currently on the web page https://meta.com/company-info/, and the relative path is set to login, the form will be submitted to https://meta.com/company-info/login. The method attribute specifies which HTTP method is used to submit the form; GET or POST.
<form method="get">
</form>
<form method="post">
</form> The form will default to the HTTP GET method when the method attribute is not provided.
As you may already know, when the form is submitted using the HTTP GET method, the data in the form’s fields are encoded in the URL. And when the form is submitted using the HTTP POST method, the data is sent as part of the HTTP request body.
When the web server receives the request, it processes the data and sends back an HTTP response. The response indicates the result of the submission, which can be successful or unsuccessful due to invalid or incorrect data.
However, as a front-end developer, it is essential to know that forms are not the only way to submit data to the web server. As you learn more about JavaScript and front-end libraries, you’ll discover that developers often submit HTTP requests directly via code and send data as part of the HTTP request body in a text format called JavaScript Object Notation, or JSON.
For now, practice building HTML forms and submitting data to the web server using the different attributes available.
Additional resources
The following resources will be helpful as additional references in dealing with different concepts related to the topics you have covered in this section.
- HTML meta tags
- Semantic elements
- Client-side validation of forms with HTML5
<input>tag in HTML- Form validation examples
Previous one → 1.Introduction to the full stack | Next one → 3.CSS