Token-based authentication in DRF
Some APIs are meant to be used by anyone and some APIs especially those that modify data, are meant to be accessed only by authenticated clients.
In password based authentication the client, or the API user sends their username and password with every API call, then you can verify these credentials and deliver the appropriate response.
However, sending a username and password every time is frustrating, and it is also not secure, that’s why Token-based authentication is the most popular method when it comes to API authentication.
In this approach, users send their usernames and passwords once. If the credentials are okayed, the server generates a unique piece of string. This token is long, hard to read and contains alphanumerical characters and symbols.
The server can decide for how long a token will be valid and when it expires.
The client sends new API requests and includes this token in the header. Server-side scripts then check if the token is valid, or if it has expired, then it finds which user this token belongs to.
This token is validated with the help of token authentication class in the auth token app provided by DRF.
If everything is okay, the API will run on behalf of that user. The authentication process is now done using the token, and you avoid sending the username and password every time.
In settings.py add rest_framework.authtoken in the INSTALLED_APPS list.
pipenv shell
python manage.py migrate
python manage.py createsuperuser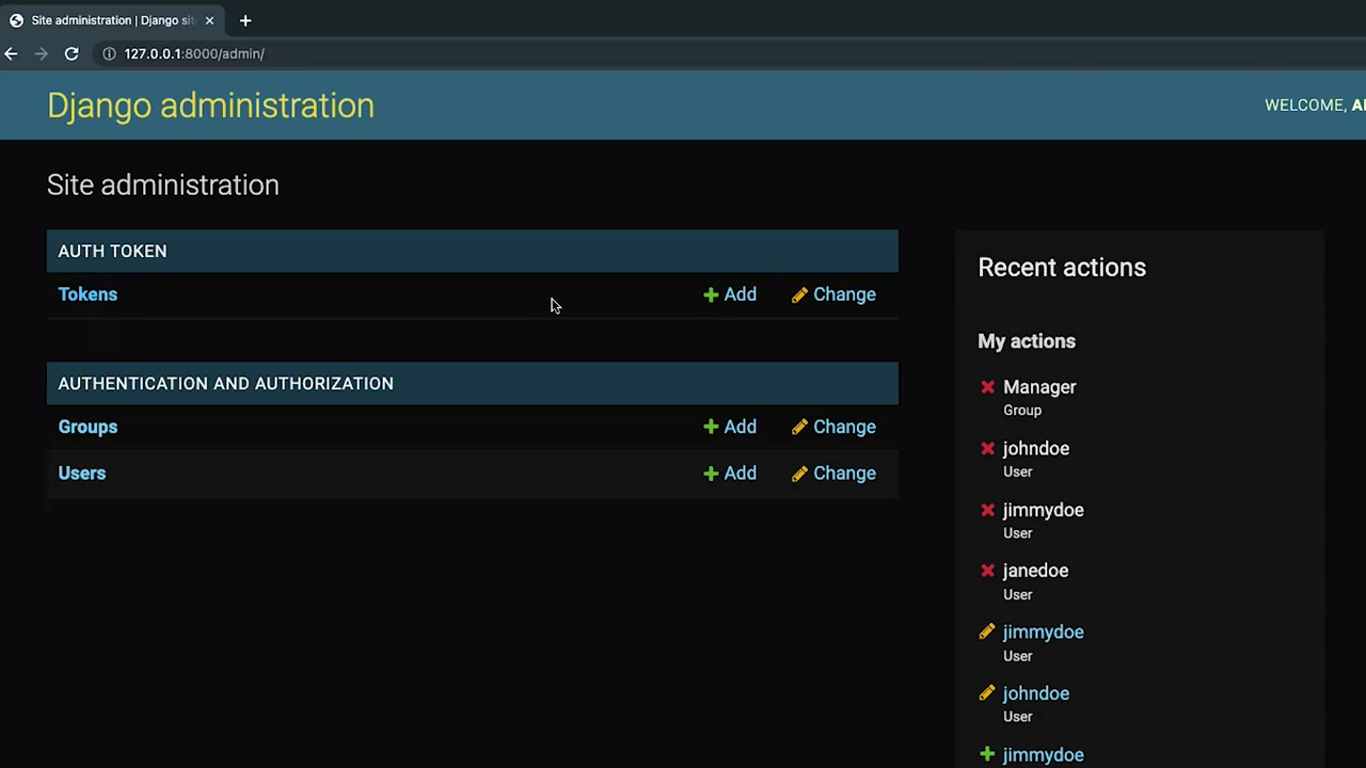
All previously created tokens for all users are displayed here. You can also create tokens for new users here.
# views.py

from rest_framework.reponse import Reponse
from rest_freamework.decorators import api_view
from .models import MenuItem
from .serializers import MenuItemSerializer
from rest_framework import status
from decimal import Decimal
from django.core.paginator import Paginator, EmptyPage

@api_view(['GET', 'POST'])
def menu_item(request):
	if request.method == 'GET':
		items = MenuItem.objects.select_related('category').all()
		category_name = request.query_params.get('category')
		to_price = request.query_params.get('to_price')
		search = request.query_params.get('search')
		ordering = request.query_params.get('ordering')
		perpage = request.query_params.get('perpage', default=2)
		page = request.query_params.get('page', default=1)
		if category_name:
			items = items.filter(category__title=category_name)
		if to_price:
			items = items.filter(price__lte=to_price)
		if search:
			items = items.filter(title__startswith=search)
		if ordering:
			ordering_fields = ordering.split(",")
			items = items.order_by(*ordering_fields)

		paginator = Paginator(items,per_page=perpage)
		try:
			items = paginator.page(number=page)
		except EmptyPage:
			items = []
		serialized_item = MenuItemSerializer(items, many=True)
		return Reponse(serialized_item.data)
	if request.method == 'POST':
		serialized_item = MenuItemSerializer(data=request.data)
		serialized_item.is_valid(raise_exception=True)
		return Response(serialized_item.data, status.HTTP_201_CREATED)

@api_view()
def single_item(request, id):
	item = get_object_or_404(MenuItem, pk=id)
	serialized_item = MenuItemSerializer(item)
	return Response(serialized_item.data)

@api_view()
def secret(request):
	return Response({"message":"Some secret message"})
Add path('secret/', views.secret) in the urls.py.
Not secret and not secure at all!
from rest_framework.permissions import IsAuthenticated
from rest_framework.decorators import permission_classes
@api_view()
@permission_classes([IsAuthenticated])
def secret(request):
return Response({"message":"Some secret message"})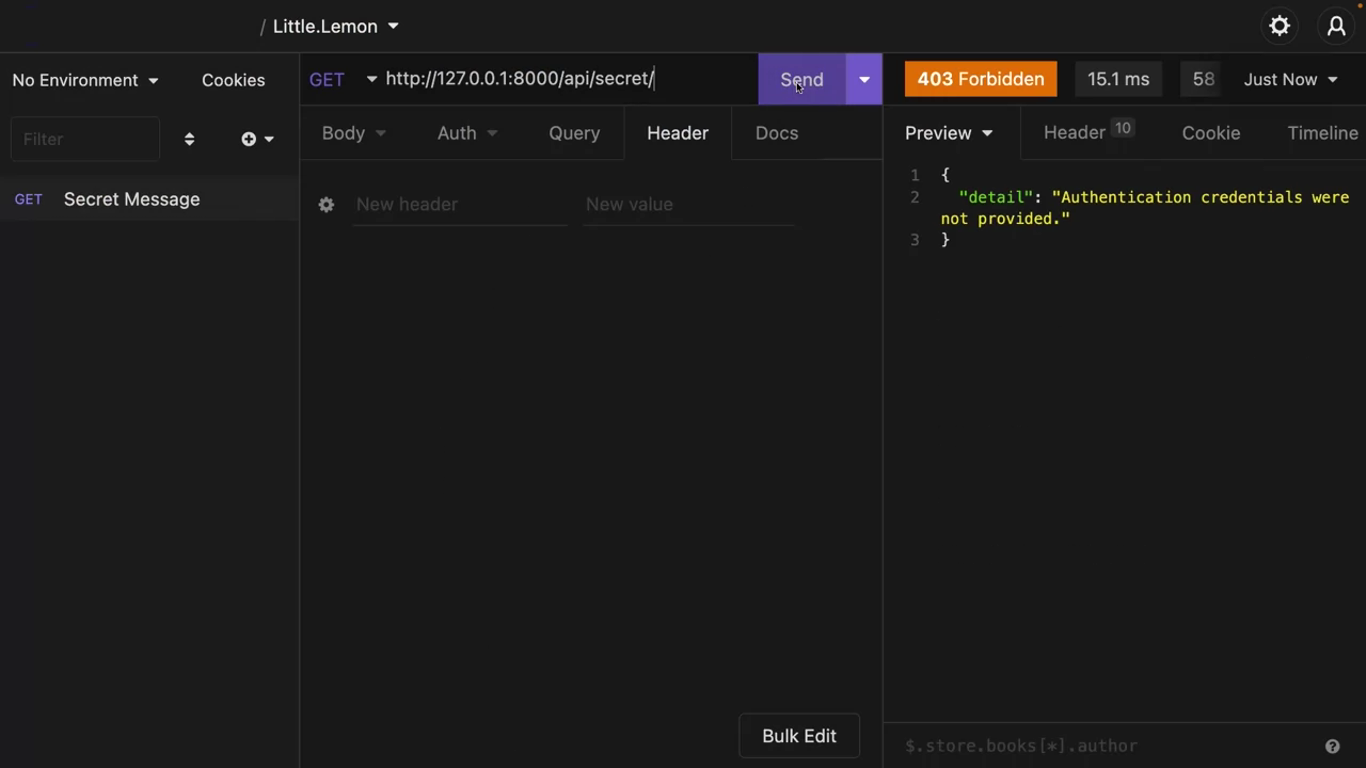
You need to tell DRF to use the token-based authentication.
# settings.py

REST_FRAMEWORK = {
	'DEFAULT_RENDERER_CLASSES': [
		'rest_framework.renderers.JSONRenderer',
		'rest_framework.renderers.BrowsableAPIRenderer',
		'rest_framework_xml.renderers.XMLRenderer',
	],
	'DEFAULT_AUTHENTICATION_CLASSES': [
		'rest_framework.authentication.TokenAuthentication',
	],
}
Now go back to the Django admin and copy the token.
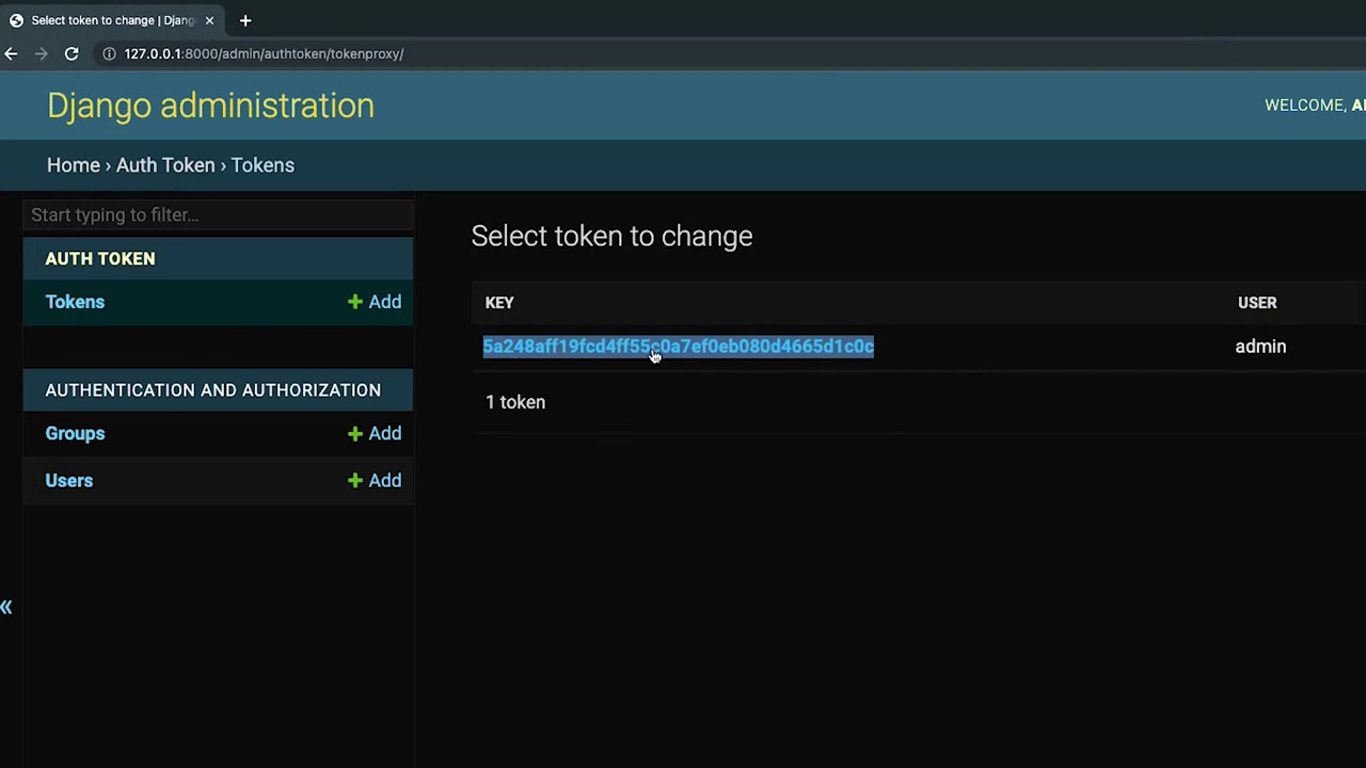
Come back to insomnia and click on the “Auth” tab next to body and select bearer token. Paste the token you just copied in the token field and right token and the prefix field.
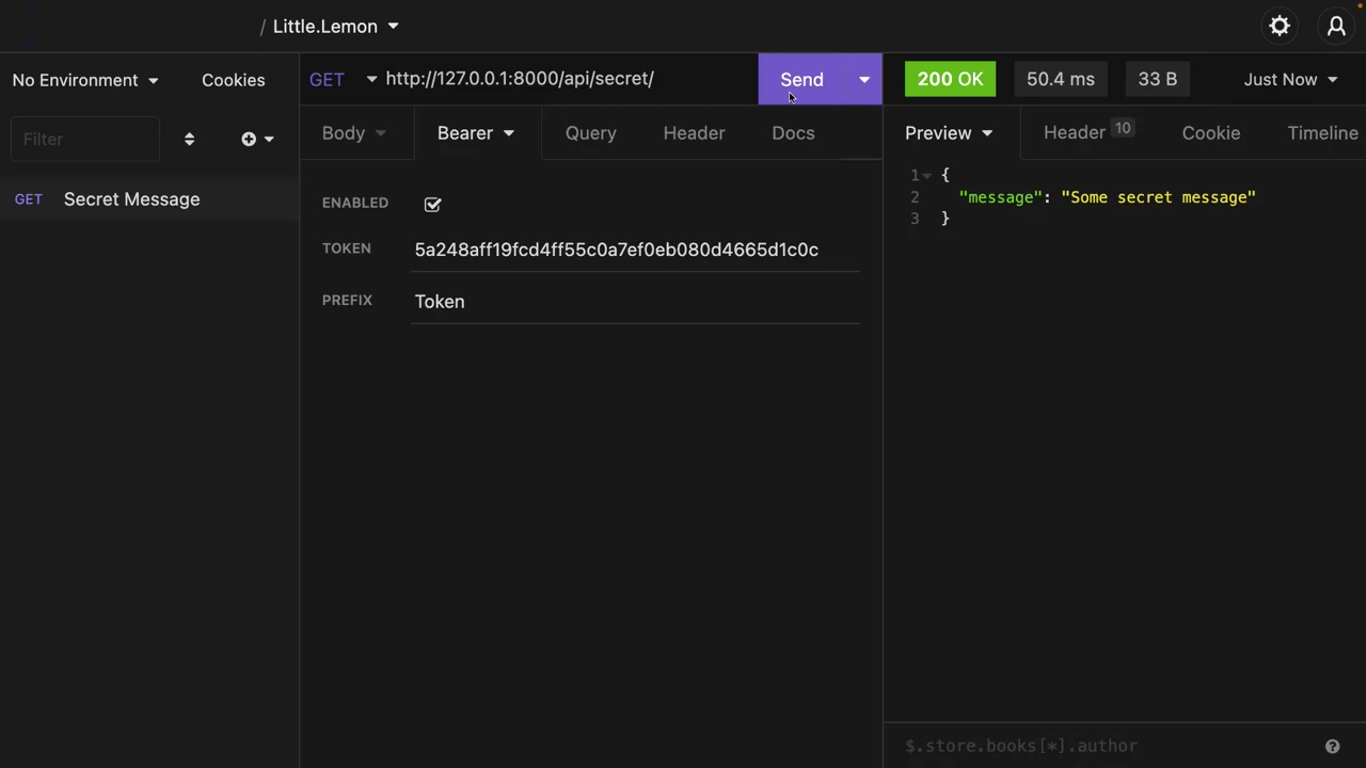
The authentication token is sent as Authorization: Token in the header.
You can create another user from the Django admin panel and use that user’s token. But how can you generate these tokens from an API endpoint?
In the urls.py import:
from rest_framework.authtoken.views import obtain_auth_tokenand then add the path:
path('api-token-auth/', obtain_auth_token)This endpoint only accept HTTP post calls.

Add the username and password of a user that you created from Django admin and insomnia as form URL encoded data, and send the post request again.
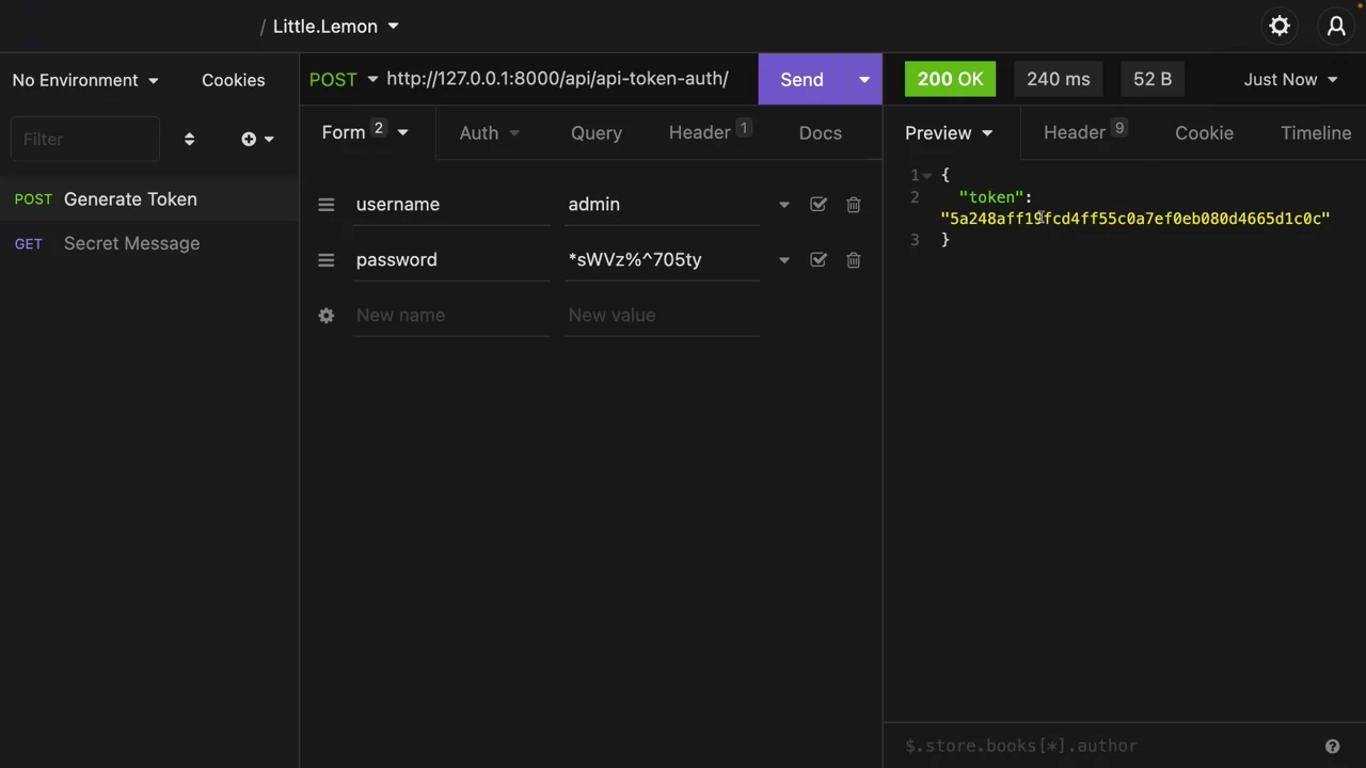
If they’re credentials are valid, DRF sends the user token in a response.
If you create a new user from the Django admin panel, or via code, you can always use the endpoint /api/api-token-auth/ to authenticate them and generate a token.
Then use this token to make HTTP calls to the protected URLs.
User roles
What if an authenticated user makes a http delete call to one of the menu items? Or what if an authenticated customer submits a http patch request to an order item and changes the data?
Relying only on the authentication check, will not be sufficient to protect your data, you must also check privileges, like if the authenticated user has authorization to perform this action.
Go to admin panel and log in as super user. Create a manager group with no permissions added. Then make two users and assign one of the the manager group.
# views.py

@api_view()
@permission_classes([IsAuthenticated])
def manager_view(request):
	return Response({"manager": "Only Manager Should See This"})
Add path('manager-view/', views.manager_view in the urls.py.
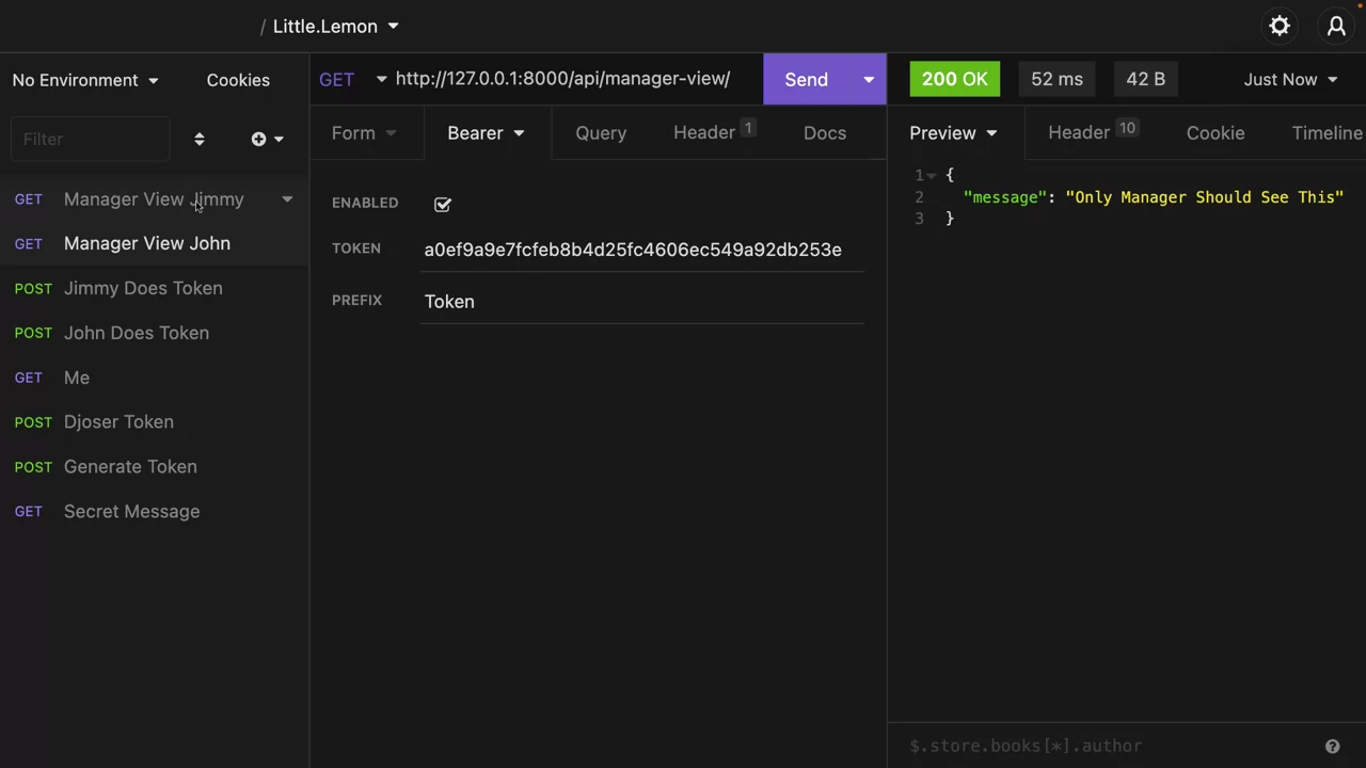
Make a token for the manager user by sending an HTTP POST call to /api/api-token-auth/.
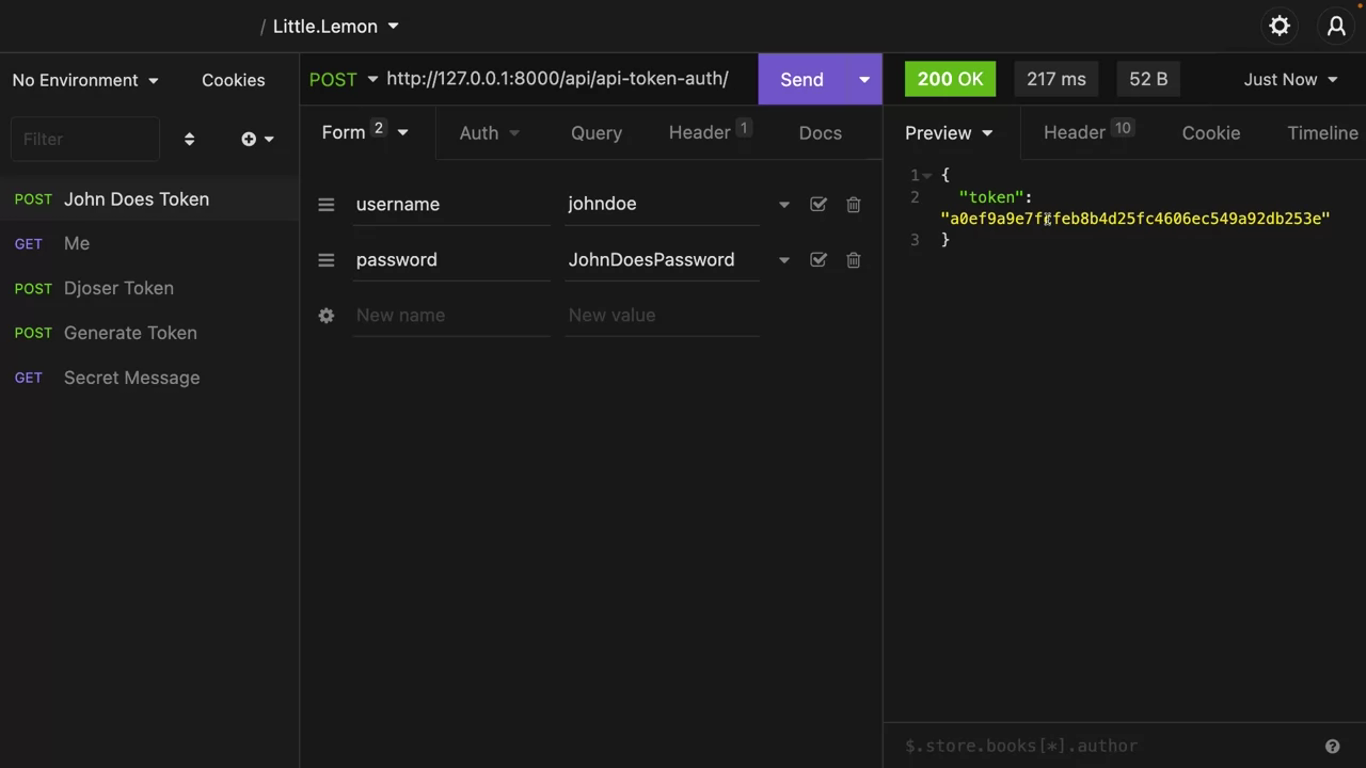
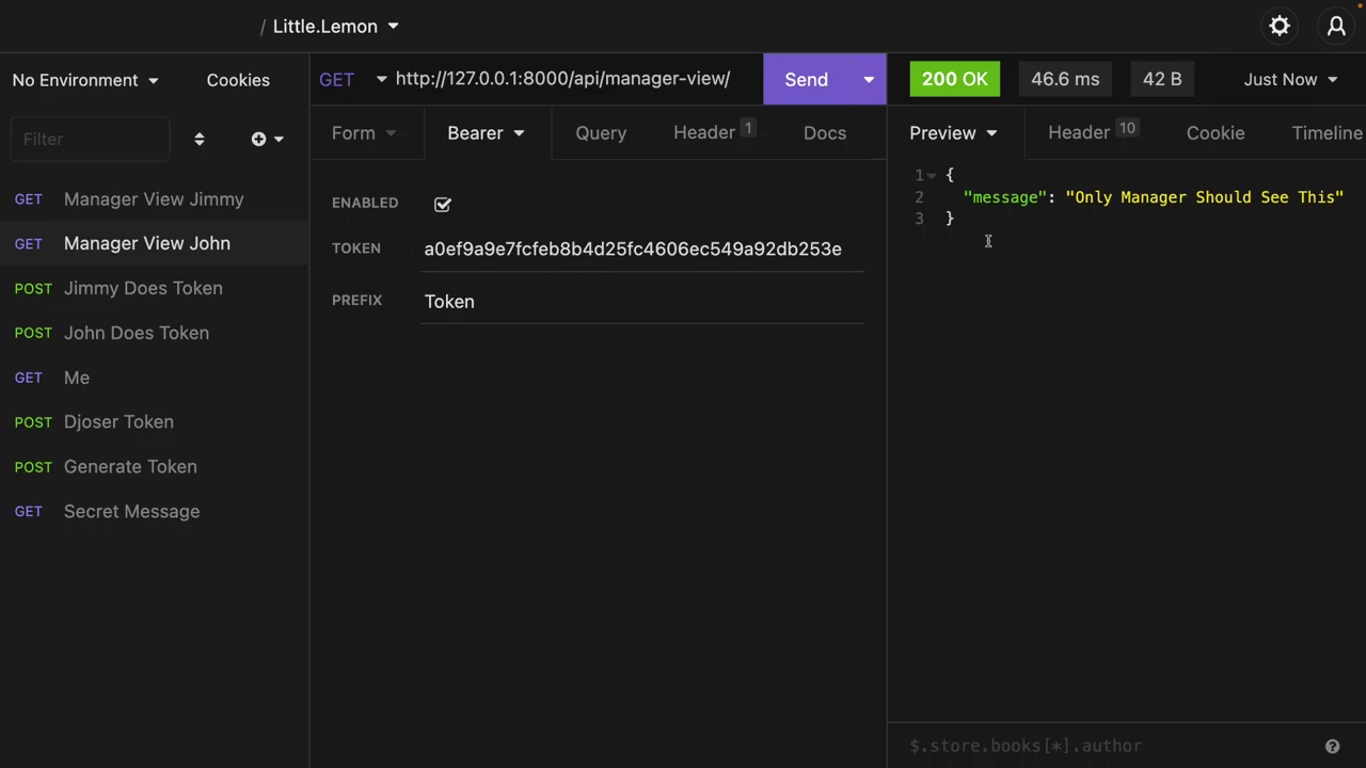
Now both the normal and the manager can see the message.
# views.py

@api_view()
@permission_classes([IsAuthenticated])
def manager_view(request):
	if request.user.groups.filter(name='Manager').exist():
		return Response({"manager": "Only Manager Should See This"})
	else:
		return Response({"message": "You are not authorized"}, 403)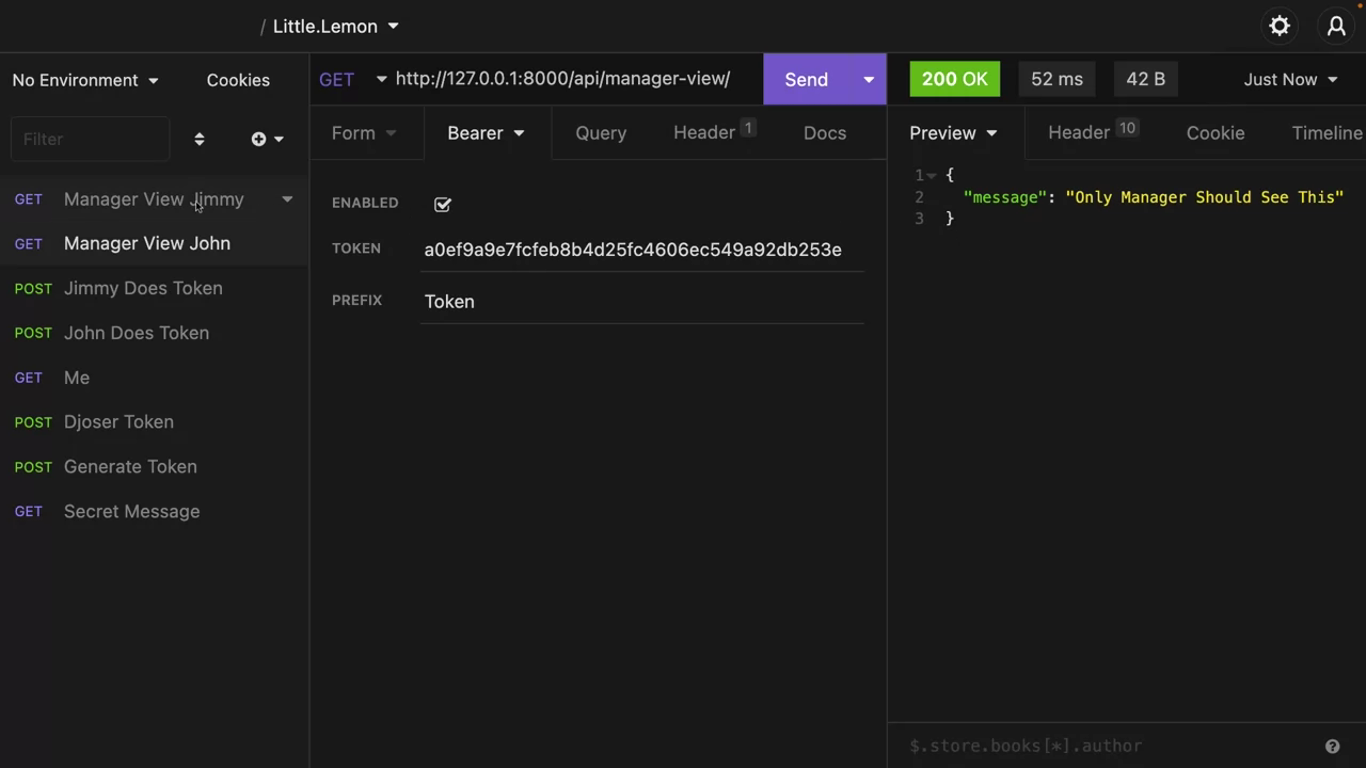
Setting up API throttling
Throttling is a very efficient technique to prevent API abuse. Computing power and bandwidth are involved with every request. If you don’t monitor it, your API infrastructure will be at risk.
With throttling, you can control how often API can be accessed in a certain amount of time.
Throttling classes are built into DRF. There are two major type of throttling.
- One is for anonymous or unauthenticated users,
- and the second one is for authenticated users.
An anonymous throttling rate will be used when there is no token in the API header and user throttling will be used when there are valid tokens.
Limit API calls for Anon users
# views.py

@api_view()
def throttle_check(request):
	return Response({"message":"successful"})
Add path('throttle-check', views.throttle_check) to urls.py.
# views.py
...
from rest_framework.decorators import api_view, permission_classes, throttle_classes
...
from rest_framework.throttling import AnonRateThrottle
# views.py
@api_view()
@throttle_classes([AnonRateThrottle])
def throttle_check(request):
return Response({"message":"successful"})This line instructs DRF to use the anonymous throttling policy for this function.
In settings.py add this in the REST_FRAMEWORK section:
'DEFAULT_THROTTLE_RATES': {
	'anon':'2/minute',
}
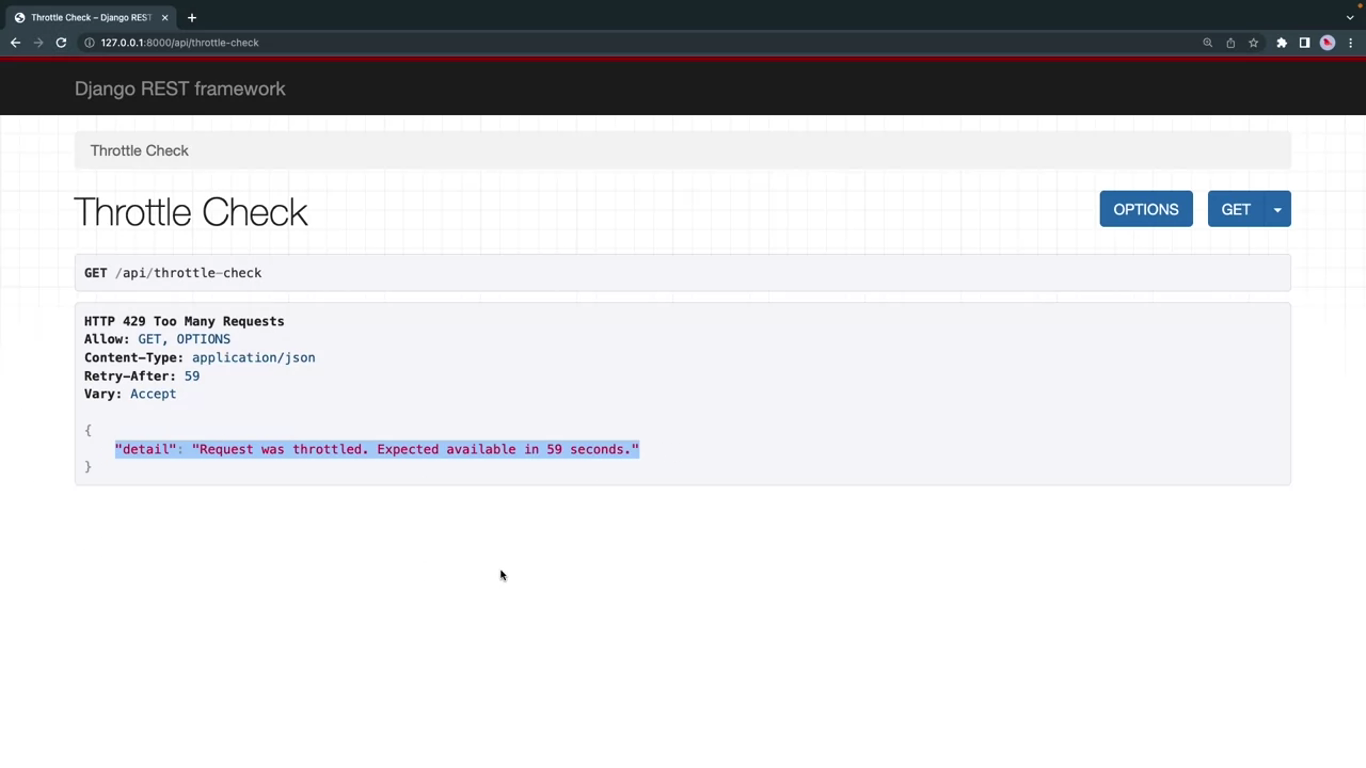
Instead of using minute, you can use second, hour, or day.
Calling the endpoint after 2 calls:
Limit API calls for authenticated users
# view.py

...
from rest_framework.throttling import UserRateThrottle
...
Make a function only for authenticated users.
# views.py

@api_view()
@permission_classes([IsAuthenticated])
@throttle_classes([UserRateThrottle])
def throttle_check_auth(request):
	return Response({"message":"message for the logged in users only"})
Add the path('throttle-check-auth', views.throttle_check_auth) in the urls.py.
In the settings.py and in the REST_FRAMEWORK section add this:
'DEFAULT_THROTTLE_RATES': {
	'anon':'2/minute',
	'user':'5/minute',
}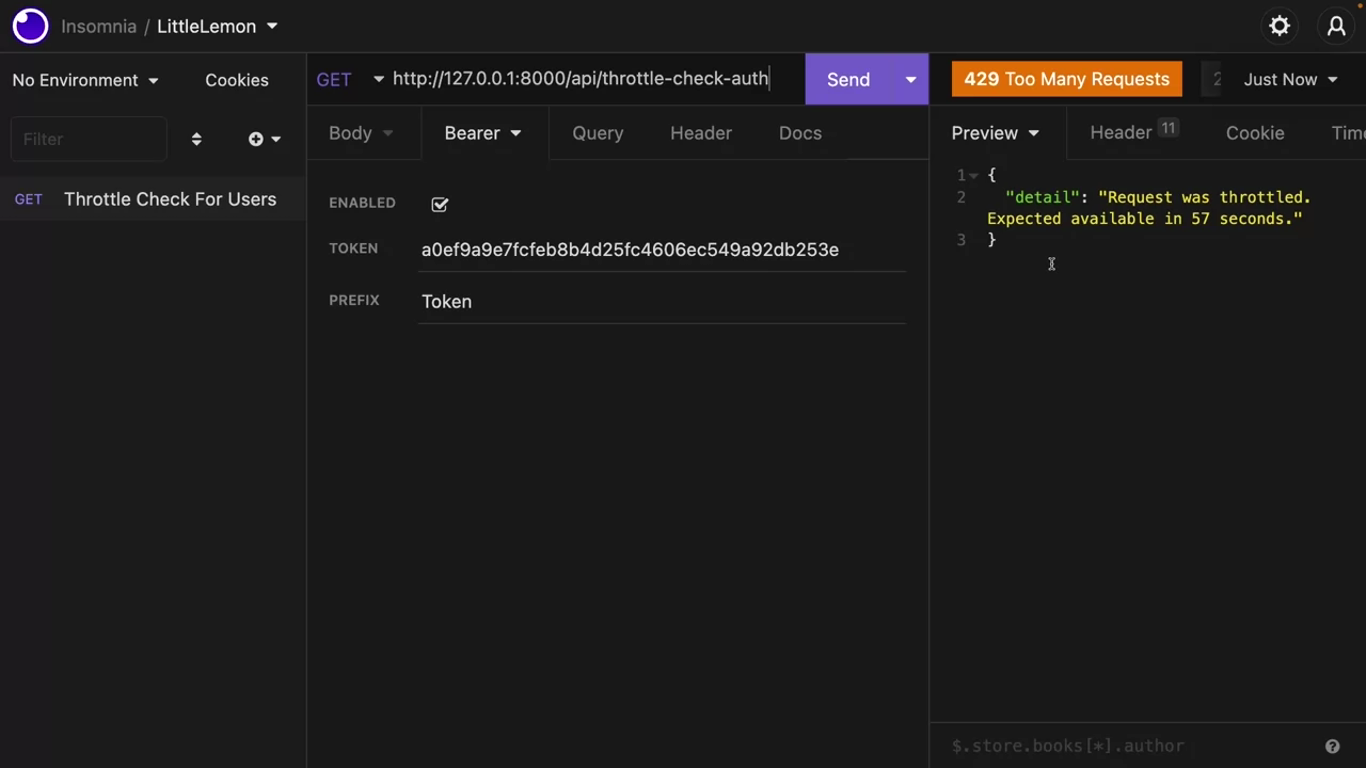
With the current setting, when you use throttling classes, all API endpoints will be limited to two calls per minute for the anonymous users and five calls per minute for the authenticated users. But say you want another policy for some API endpoints so that authenticated users can call them 10 times per minute.
Create a throttles.py in the app directory.
# throttles.py

from rest_framework.throttling import UserRateThrottle

class TenCallsPerMinute(UserRateThrottle):
	scope = 'ten'
'DEFAULT_THROTTLE_RATES': {
'anon':'2/minute',
'user':'5/minute',
'ten':'10/minute'
}# views.py
...
from .throttles import TenCallsPerMinute
...
@api_view()
@permission_classes([IsAuthenticated])
@throttle_classes([TenCallsPerMinute])
def throttle_check_auth(request):
return Response({"message":"message for the logged in users only"})You can use the TenCallsPerMinute class for any function that needs the ten calls per minute limit.
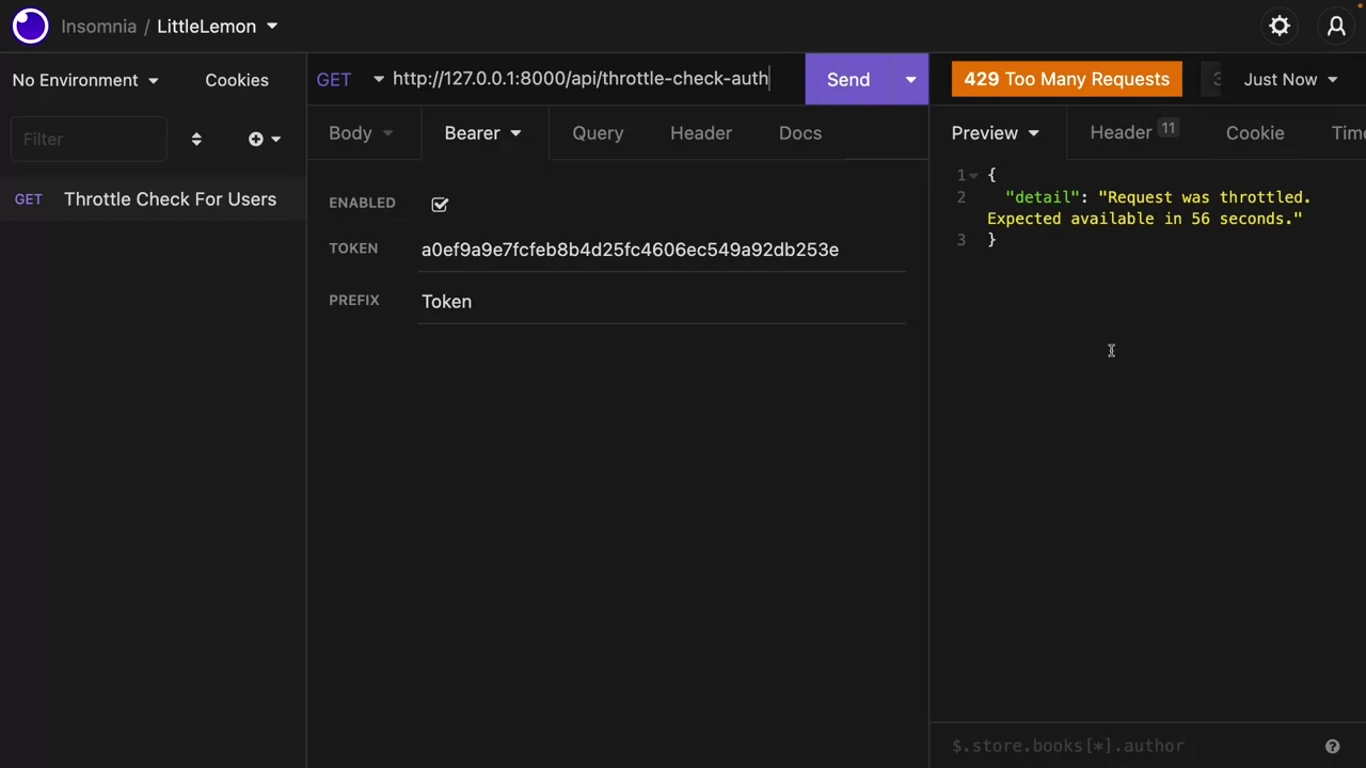
After 10 times calling:
API throttling for class-based views
Introduction
You already learned about the basics of rate limiting or throttling earlier in the course. But, in this reading, you will learn how to quickly implement throttling in class-based views. You will also learn about how some real-world services use this API throttling to protect their API endpoints from abuse.
Project scaffolding
Use a class-based view to extend the ModelViewSet to quickly implement a functional CRUD API endpoint for the menu items. To create this class-based view add these lines in the views.py file.
from rest_framework.response import Response from rest_framework import viewsets
from .models import MenuItem from .serializers import MenuItemSerializer
class MenuItemsViewSet(viewsets.ModelViewSet):
    queryset = MenuItem.objects.all()
    serializer_class = MenuItemSerializer
Open the urls.py file and map this MenuItemViewSet class to the menu-items API endpoint. Map only the GET methods.
from django.urls import path
from . import views
urlpatterns = [
    path('menu-items',views.MenuItemsViewSet.as_view({'get':'list'})),
    path('menu-items/<int:pk>',views.MenuItemsViewSet.as_view({'get':'retrieve'})),
]
Now you can list all menu items by visiting http://127.0.0.1:8000/api/menu-items and any single menu item by visiting http://127.0.0.1:8000/api/menu-items/1.
Add support for throttling
DRF comes with excellent throttling classes that you can use straight out of the box. To do this, add the following lines in the settings.py in the REST_FRAMEWORK section.
'DEFAULT_THROTTLE_CLASSES': [
        'rest_framework.throttling.AnonRateThrottle',
        'rest_framework.throttling.UserRateThrottle'
],
Now you can implement throttling in your API project.
Throttling for class-based views
Class-based views don’t use the throttle_classes decorator like function-based views. To use throttling, you need to pass the throttle classes to a public class property called throttle_classes. First import the necessary classes in the views.py file.
from rest_framework.throttling import UserRateThrottle, AnonRateThrottleThen create a public property called throttle_classes with either one or both of these two classes, UserRateThrottle or AnonRateThrottle.
class MenuItemsViewSet(viewsets.ModelViewSet):
    throttle_classes = [AnonRateThrottle, UserRateThrottle]
    queryset = MenuItem.objects.all()
    serializer_class = MenuItemSerializer
Now the menu-items API endpoints will be throttled for both anonymous and authenticated users. You can define the throttling rate for both in the settings.py file. If you want to limit the API calls to 5 per minute for anonymous users and 10 per minute for authenticated users, then add the following lines in the REST_FRAMEWORK section, as you learned in a previous video.
'DEFAULT_THROTTLE_RATES': {
        'anon': '2/minute',
        'user': '10/minute'
}
To test if the throttling is working properly, go to the http://127.0.0.1:8000/api/menu-items endpoint three times. After the second visit, the client will see an error message.
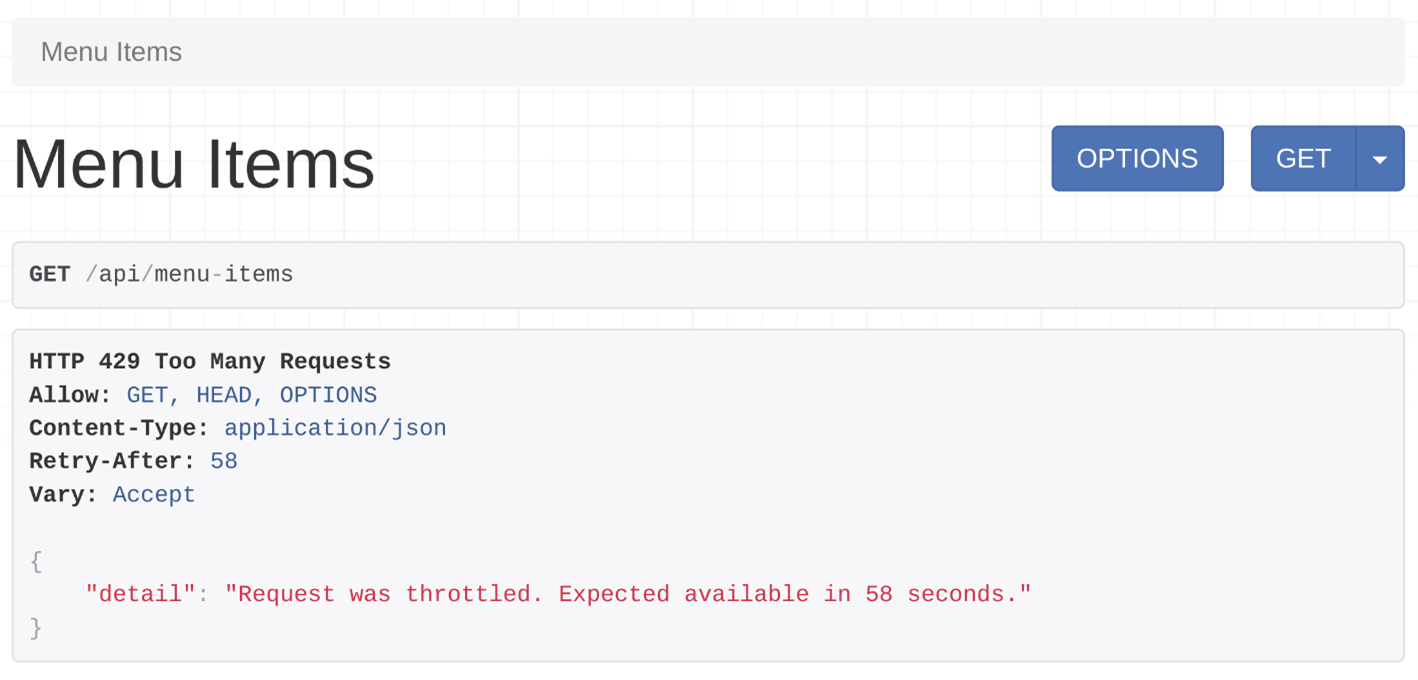
API users with a valid token will see the same message after 10 successful calls to this endpoint.
Conditional throttling
It’s very easy to implement conditional throttling in class-based views. With conditional throttling, you can throttle API endpoints only for the specific HTTP methods, like GET calls, or POST calls.
For example, you can have conditional throttling that throttles POST calls, but not GET calls. You can do this by overriding the get_throttles method. In a class-based view that extends a ModelViewSet class, the POST call is handled by create methods. Similarly, the GET call is handled by the list method. Add the following lines of code to implement conditional throttling in the MenuItemsViewSet class.
class MenuItemsViewSet(viewsets.ModelViewSet):
    queryset = MenuItem.objects.all()
    serializer_class = MenuItemSerializer

    def get_throttles(self):
        if self.action == 'create':
            throttle_classes = [UserRateThrottle]
        else:
            throttle_classes = []
return [throttle() for throttle in throttle_classes]Note: The throttle_classes is not used as a public attribute this time, which means the following line from the previous code example was removed.
throttle_classes = [AnonRateThrottle, UserRateThrottle]Instead, this checks if the router called the create action, which handles the POST request. If that action is called, implement the throttling class UserRateThrottle. The POST calls will be limited to 10 calls per minute to this menu-items endpoint.
Custom throttling classes
You can use the custom throttling classes you created earlier in the course, like TenCallsPerMinute in the throttles.py file. All you have to do is import this class and then add it in the throttle_classes attribute, and you are done.
from .throttles import TenCallsPerMinuteAnd then
throttle_classes = [TenCallsPerMinute]Real world examples of API rate limits
Here are some popular services and their current rate limit. This can help you to get some idea of how others are using such features in their API projects.
| Service | Anonymous | Authenticated |
|---|---|---|
| Facebook graph API | X | 200/hour |
| Instagram API | X | 200/hour |
| Instagram messenger API | X | 100/second |
| WhatsApp messaging API | X | 80/second |
Conclusion
In this reading, you learned how to implement throttling in class-based views and also how to create conditional throttling.
Introduction to Djoser library for better authentication
pipenv shell
pipenv install djoser
Add the djoser in the INSTALLED_APPS in settings.py.
WARNING
It’s important that you keep Djoser after the
rest_frameworkapp.
Add a new section in settings.py called DJOSER:
DJOSER = {
	"USER_ID_FIELD": "username"
}
This is how you specify which field in your user model will act as the primary key.
Sometimes, people prefer to use the email address as the username, which you can change using:
DJOSER = {
	"USER_ID_FIELD": "username",
	"LOGIN_FIELD":"email"
}
Let’s go with the default settings for now.
Remember, you added the token authentication class in the default authentication class or section and the rest framework earlier in this course.
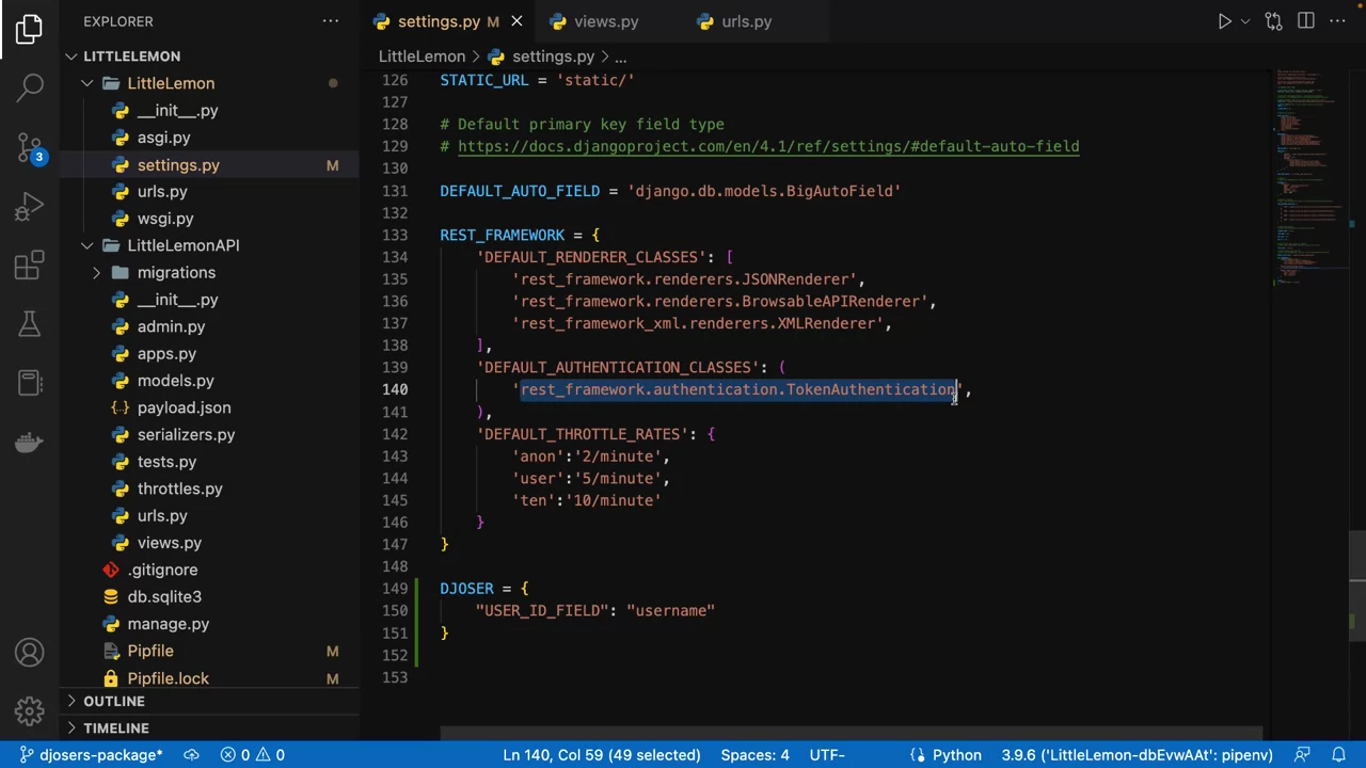
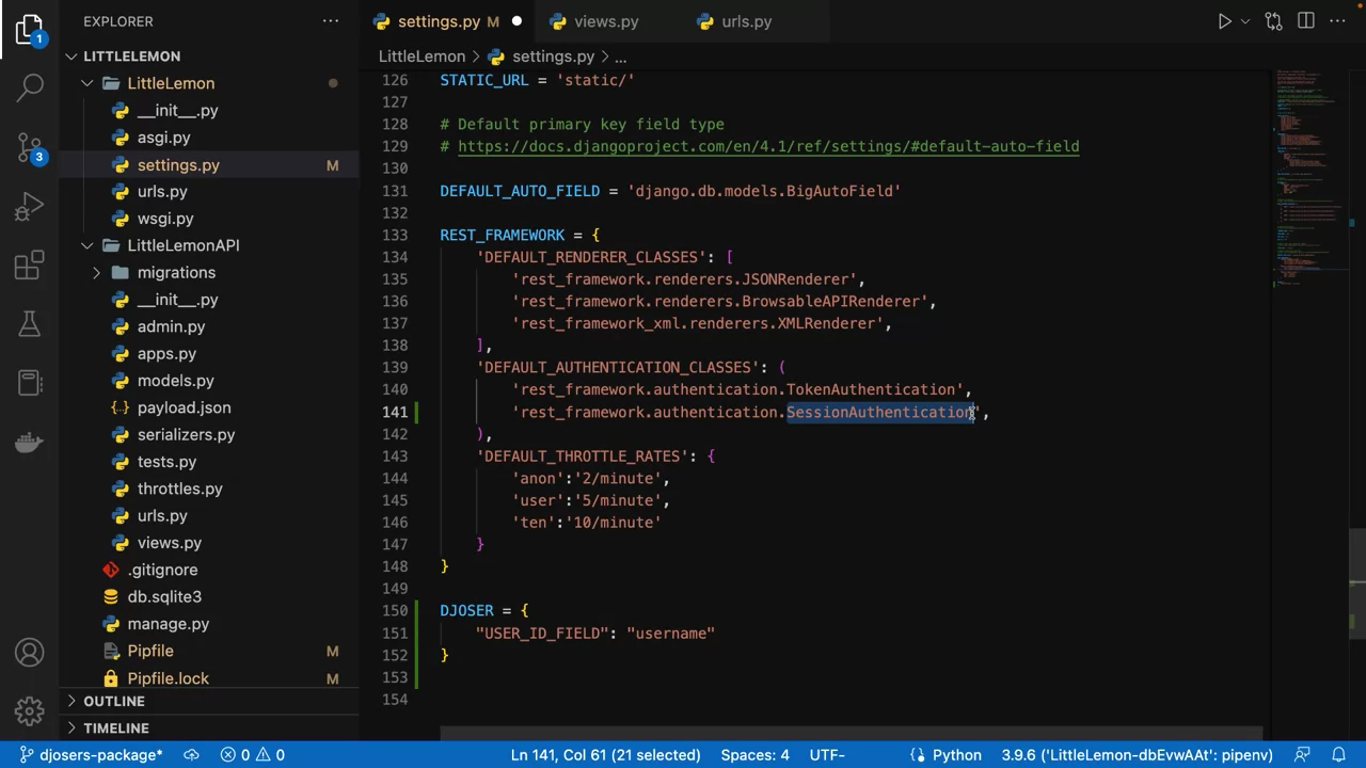
If you want to use the Django admin login simultaneously with a browsable API view of Djoser, you need to add this session authentication class too.
# urls.py (project)

urlpatterns = [
	path('admin/', admin.site.urls),
	path('api/', include('LittleLemonAPI.urls')),
	path('auth/', include('djoser.urls')),
	path('auth/', include('djoser.urls.authtoken')),
]
Djoser offers a few handy endpoints. Here is a list of them:
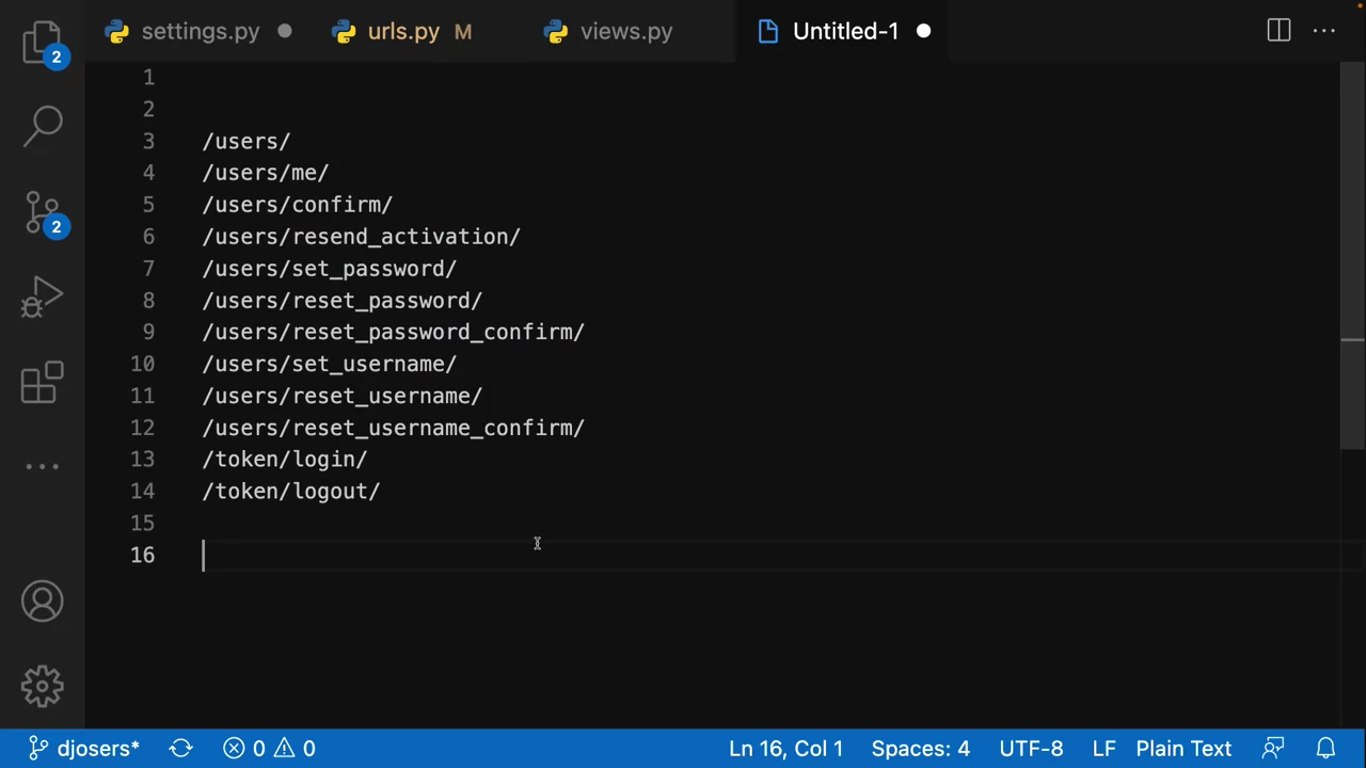
Some of them support only the getMethod and some of them support POST, PUT, PATCH and DELETE methods. You can access these endpoints by adding http://127.0.0.1:8000/auth in front of each one of them.
You can access these endpoints by adding them to the end of the localhost URL. If you visit the auth users endpoint and wants to add new users, then you need to login as a superuser in the Django admin first. Then you can visit these browsable API endpoints.
There is a new button called Extra actions added beside the options and GET button in the browsable API view. Click on that to quickly perform the common operations related to the endpoint that you are visiting.
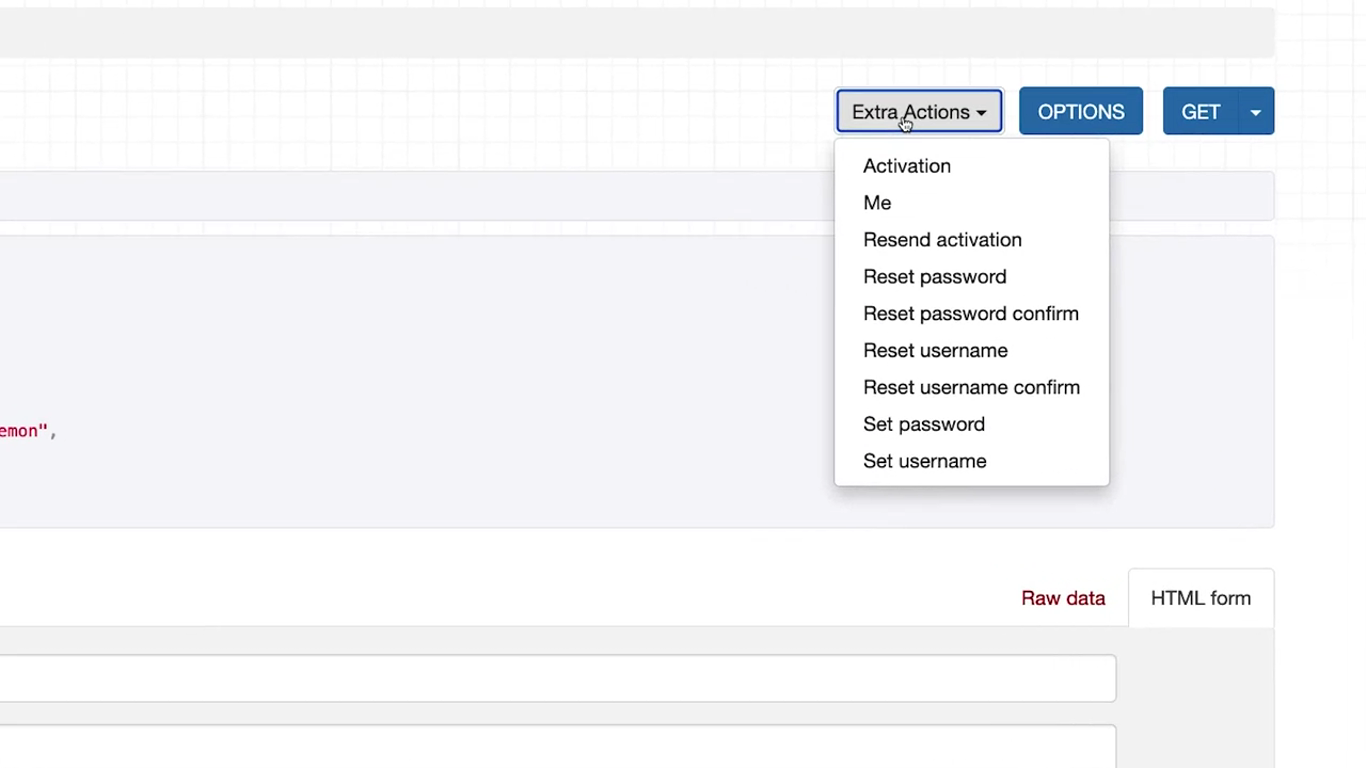
Click on the “Options” button while visiting any of these endpoints in the browsable API view, and you’ll notice full information like what parameters or HTTP methods these end points accept.
/users/
The /users/ endpoint lists all the users and you can make a post call to create a new one. If you want to create a new user from an API client like insomnia, you don’t need to pass any token to this API.
/auth/token/login/
You can also create tokens for a user from the /auth/token/login/ endpoint.
You can use insomnia to make an HTTP post call with username and password and receive the token,
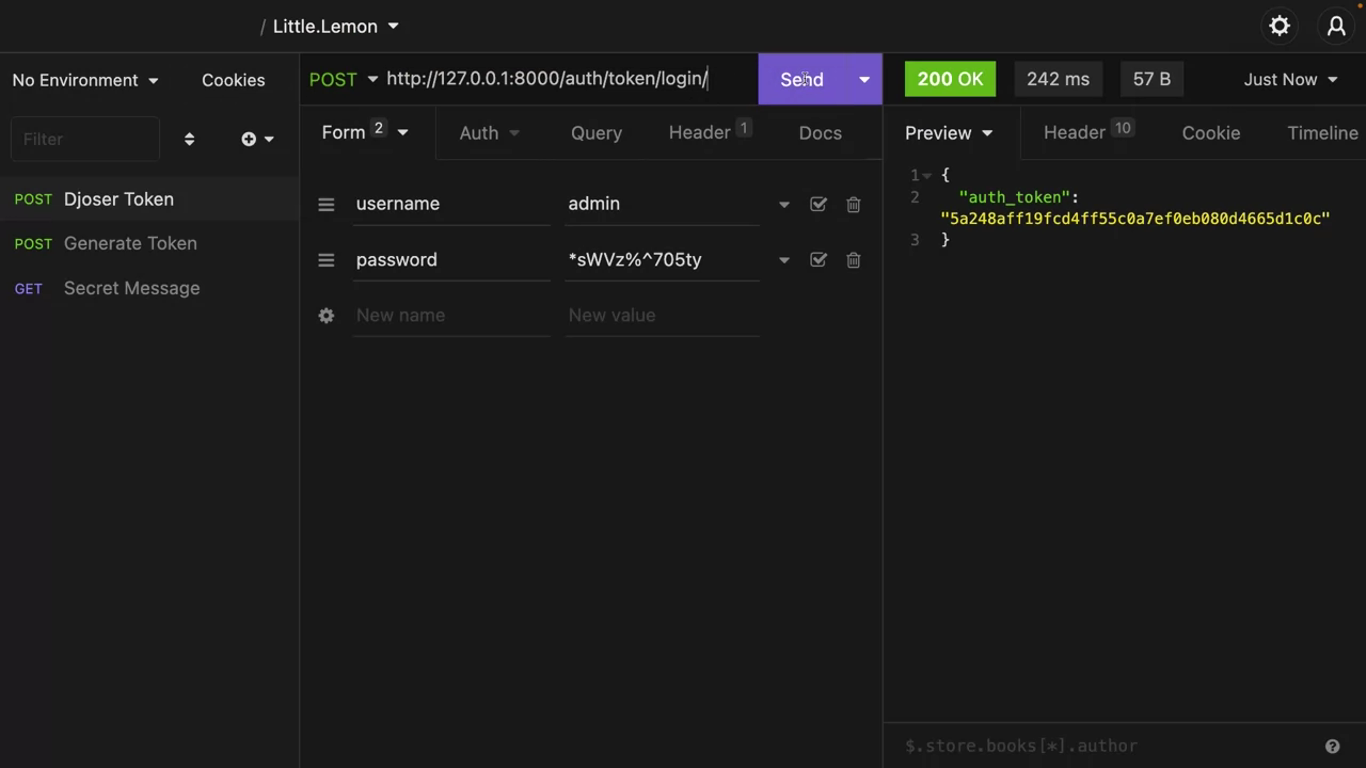
or you can use the browsable API view. There is a form with username and password fields that you can use to generate user tokens.
/auth/users/me/
Make a get call with any user’s token to this end point, and it will provide the details of the authenticated user.
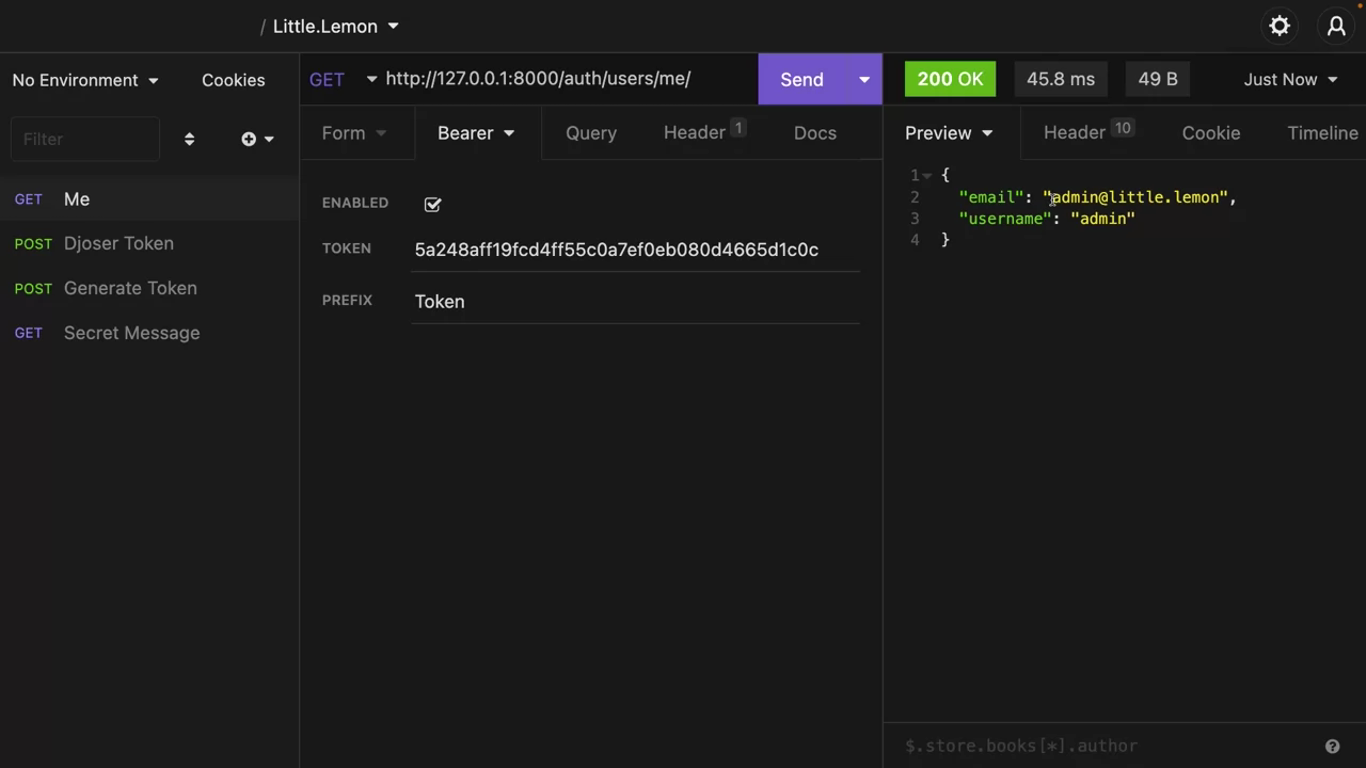
This endpoint also supports a PUT call to update the email address of this user.
With this Djoser library and a few lines of configuration, you get some handy API endpoints to deal with users and token-based authentication in your DRF project.
Djoser library also offers a different type of token-based authentication, which is called JSON Web Token or JWT.
Registration and authentication endpoints with JWT
Like the built-in token system in DRF, you can also use JSON Web Token or JWT. A popular token system for API authentication.
To implement JWT based authentication for your API endpoints, you need the djangorestframework-simplejwt package.
pipenv shell
pipenv install djangorestframework-simplejwt~=5.2.1
Add the rest_framework_simplejwt in the INSTALLED_APPS in settings.py.
# settings.py

REST_FRAMEWORK = {
	'DEFAULT_RENDERER_CLASSES': [
		'rest_framework.renderers.JSONRenderer',
		'rest_framework.renderers.BrowsableAPIRenderer',
		'rest_framework_xml.renerers.XMLRenderer',
	],
	'DEFAULT_AUTHENTICATION_CLASSES': (
		'rest_framework_simplejwt.authentication.JWTAuthentication',
		'rest_framework.authentication.TokenAuthentication',
		'rest_framework.authentication.SessionAuthentication',
	),
}
# urls.py (project)
...
from rest_framework_simplejwt.views import TokenObtainPairView, TokenRefreshViewThe simple JWT package needs some API endpoints so that it can exit the username and password and generate the JWT token.
So also add these paths:
path('api/token/', TokenObtainPairView.as_view(), name='token_obtain_pair'),
path('api/token/refresh/', TokenRefreshView.as_view(), name='token_refresh'),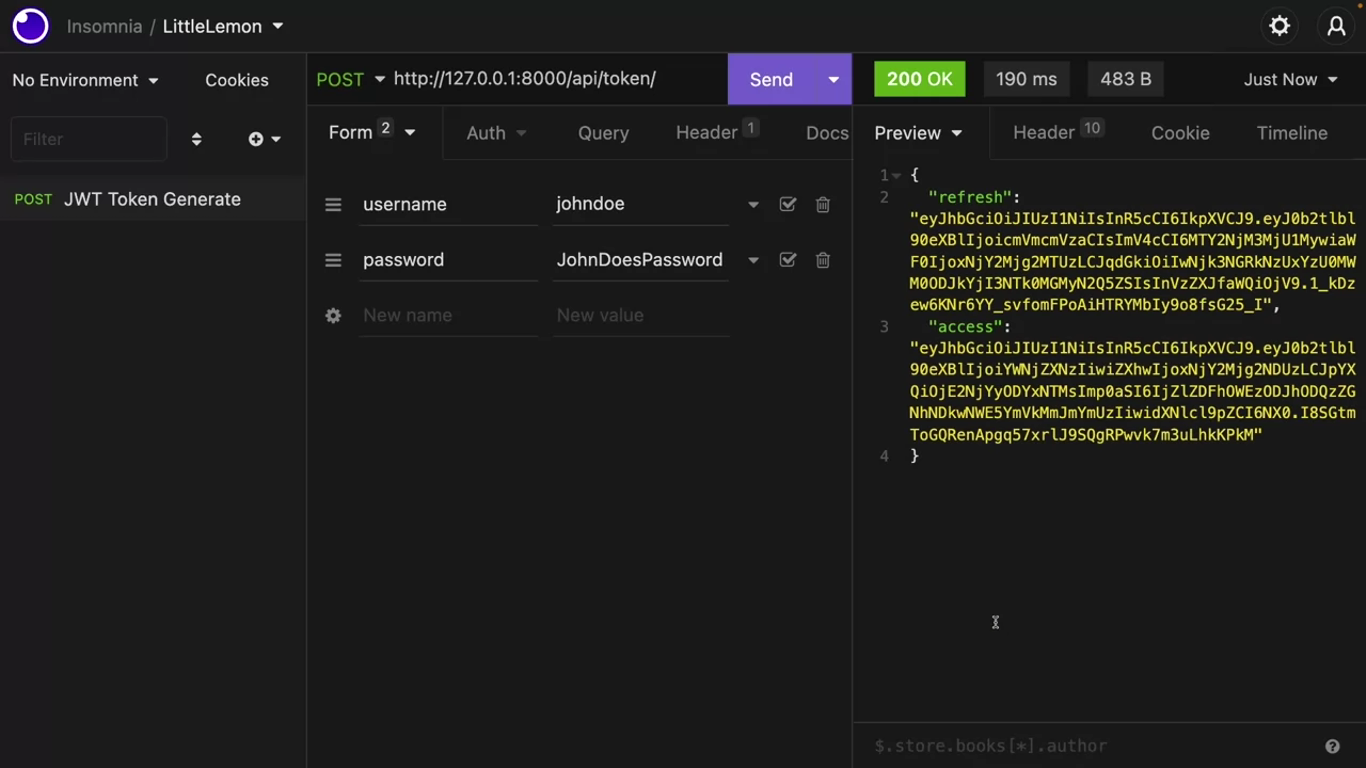
There are two essential tokens involved in JWT:
- One is an access token which the client will use to authenticate to the API calls. This access token expires after five minutes in simple JWT,
- and the other is refresh token, to regenerate the access token.
Access
You can specify the period after which the access token expires in the settings.py file.
SIMPLE_JWT = {
	'ACCESS_TOKEN_LIFETIME': timedelta(minutes=5),
}
WARNING
But it’s always a good idea to keep this expiry period short.
When this access token expires, the API calls can no longer authenticate with the access token, but that doesn’t mean that the client needs to login again. They can use the refresh token from the previous call to regenerate an access token again.
Then you can use these regenerated access token to authenticate an API call again. This is a security measure involved with JWT.
It’s important because you cannot manually let an access token expire. If you need to prevent someone from regenerating the access token, you can blacklist the refresh token so that it cannot be used anymore.
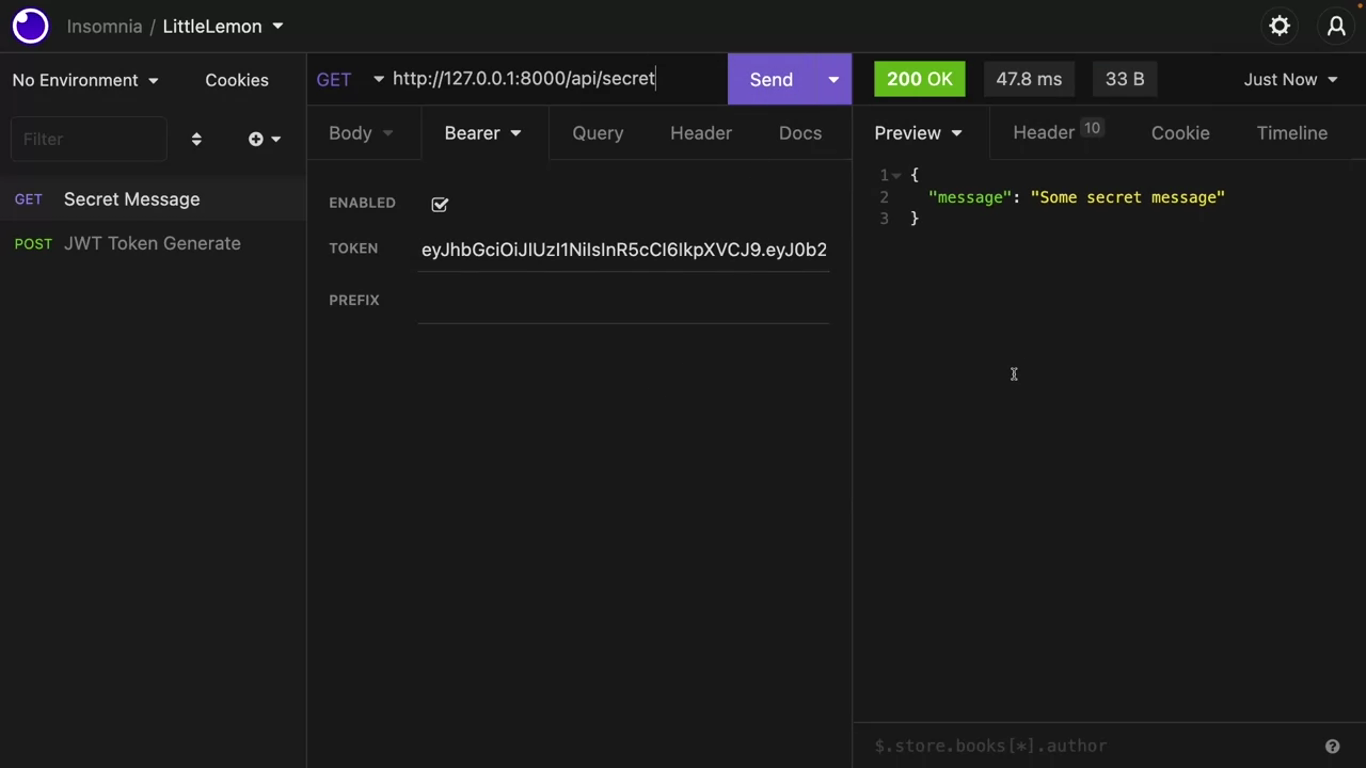
Let’s copy this access token in insomnia, create a new HTTP request to the endpoint api/secret and IsAuthenticated class already protects this endpoint.
Next, click on the “AUTH” tab in insomnia and select “Bearer”, paste this access token in the token field and send the request.
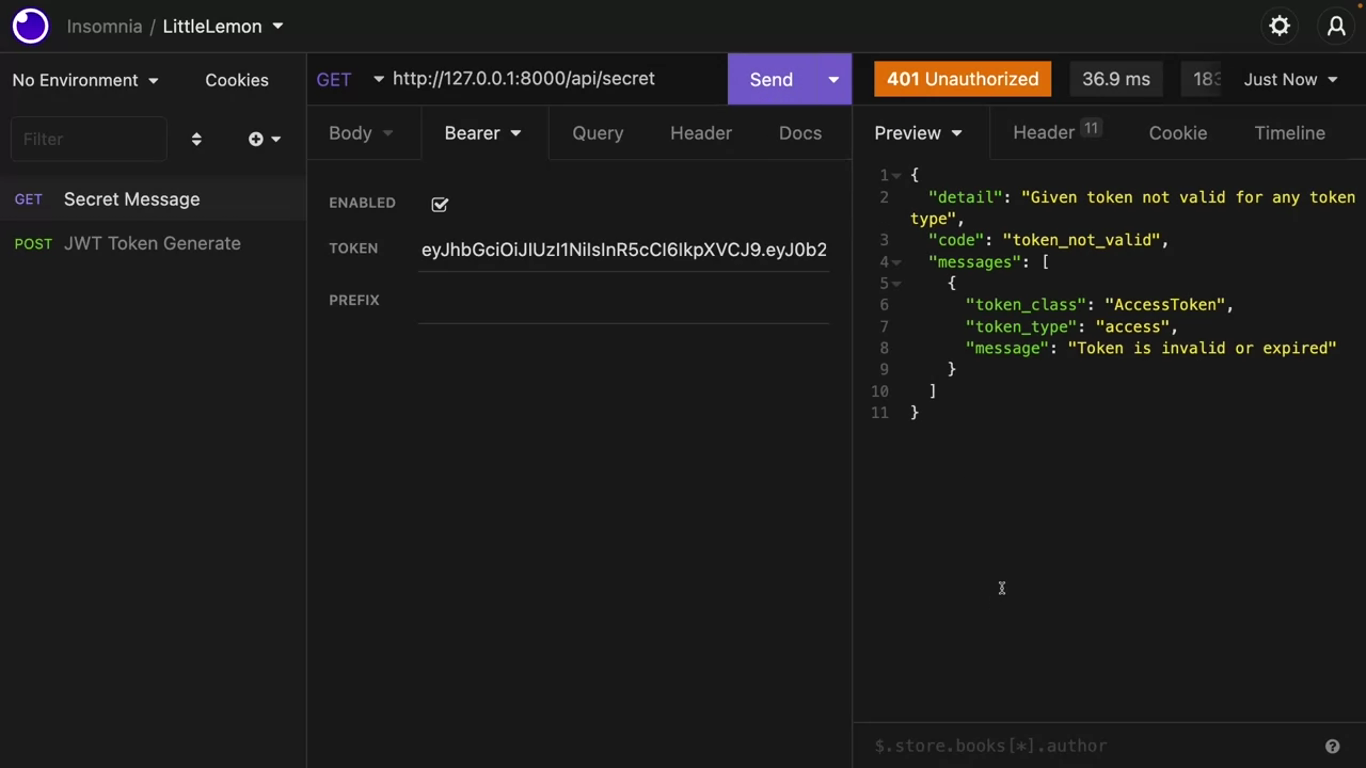
Wait for five minutes and just hit the “Send” button again. DRF is telling you that this access token is expired and is no longer valid.
Refresh
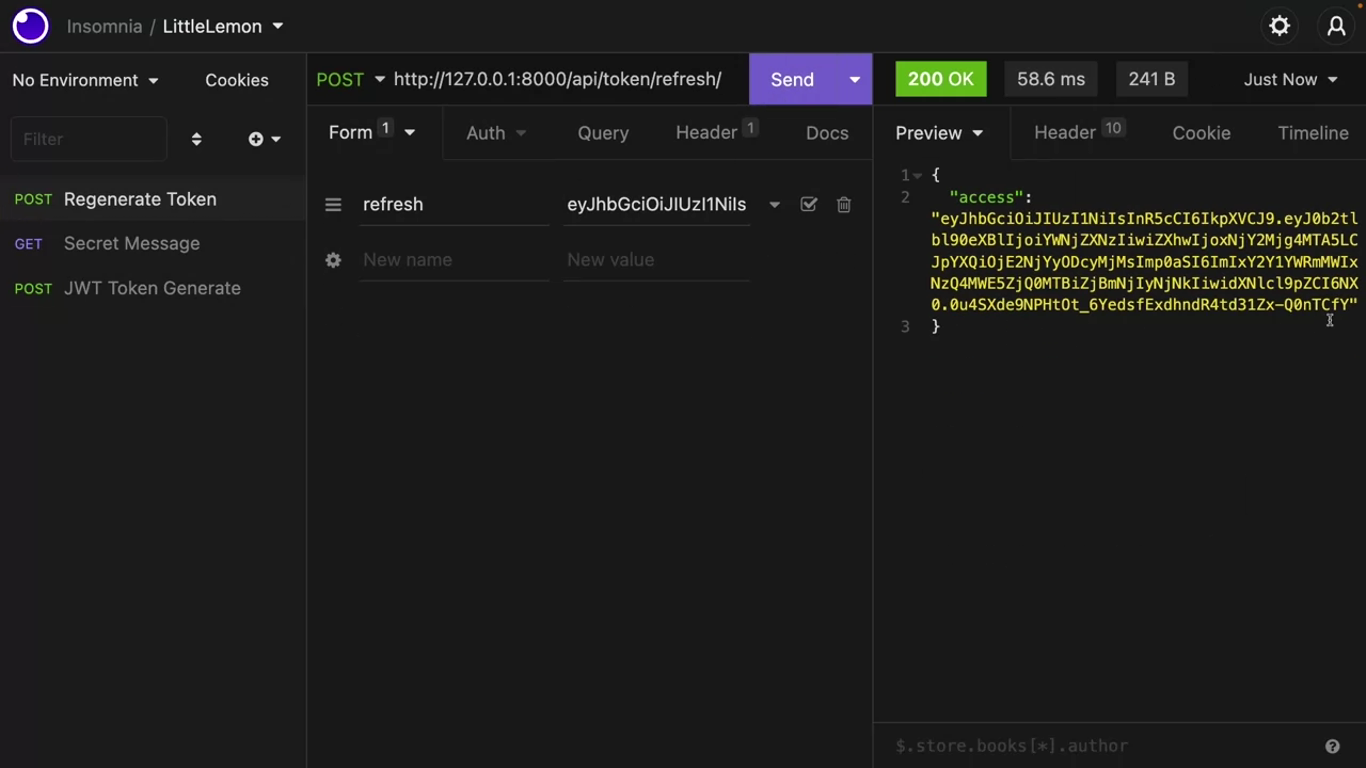
Create another HTTP post call in insomnia. This time, the endpoint should be api/token/refresh.
Click on the “Body” tab and select “Form URL Encoded” type refresh as the key and paste the previously saved refresh token as value.
A new access token has been generated. The client can now use this access token to make authenticated API calls again.
Black list a token
Remember, you cannot manually let a JWT access token expire. If you need to block a client from generating JWT access token, you can do this using a utility blacklisting app provided by the simple JWT package.
This app will be used to blacklist the refresh token so that it cannot generate an access token anymore.
Add rest_framework_simplejwt.token_blacklist in the INSTALLED_APPS section in settings.py file.
To use this token blacklist app, you need to run some migrations. Stop the web server and run this command in the terminal.
python manage.py migrate# urls.py (project)
...
from rest_framework_simplejwt.views import TokenObtainPairView, TokenRefreshView, TokenBlacklistView
...
path('api/token/blacklist/', TokenBlacklistView.as_view(), name='token_blacklist'),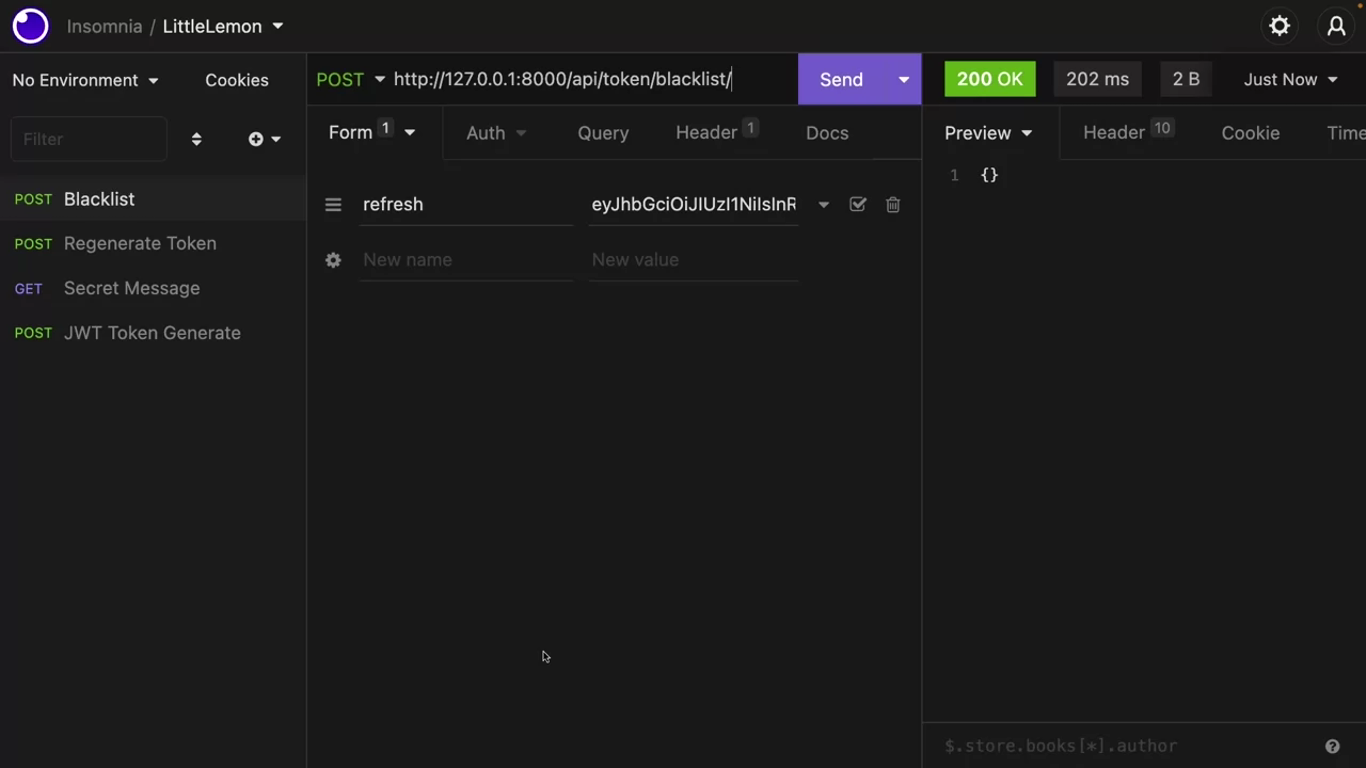
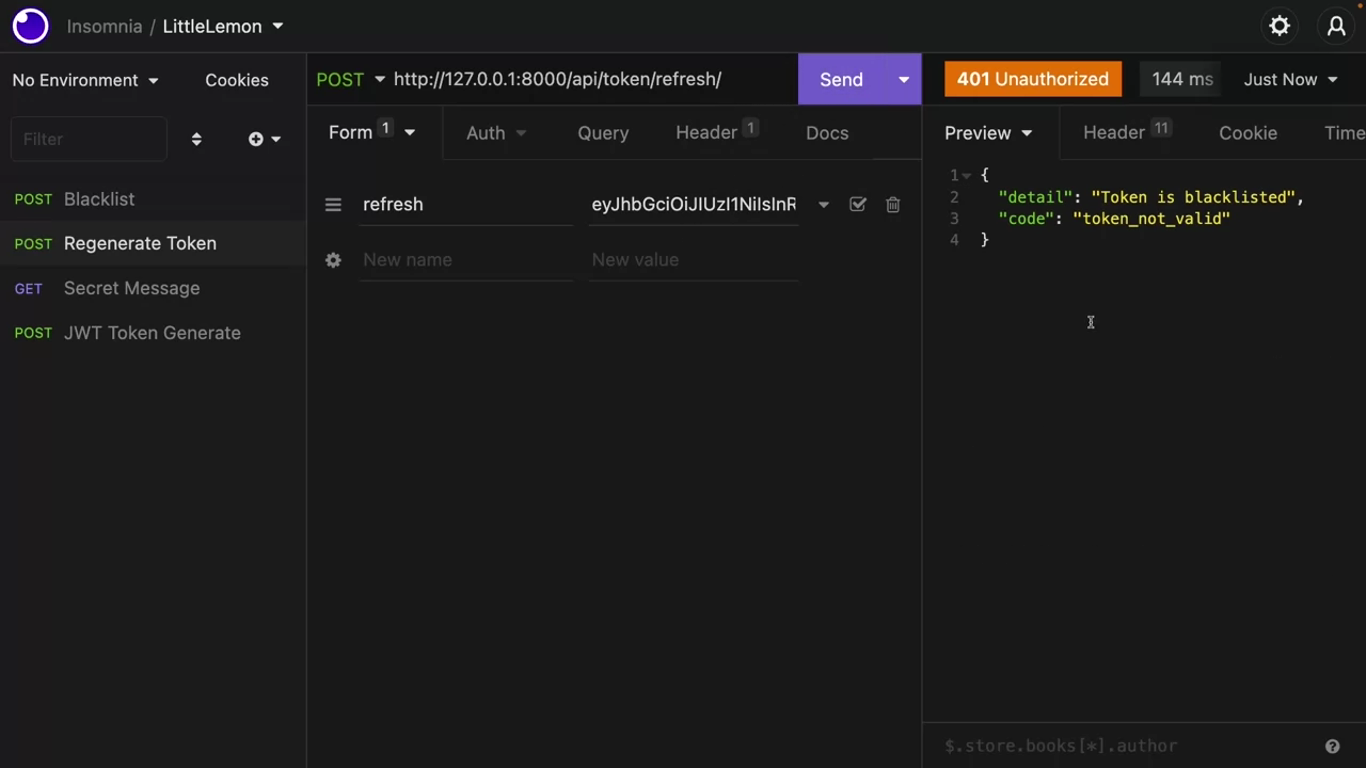
DRF will return an empty response, but that’s okay. Now this refresh token has been blacklisted.
Next, try to regenerate this access token with this blacklisted refresh token.
User account management
NOTE
You will not be using JWT in this video, so it’s best to clean up JWT specific settings and URL patterns from settings.py and urls.py.
User registration system
Djoser has introduced a few URLs, but you are only interested in odd users endpoint.
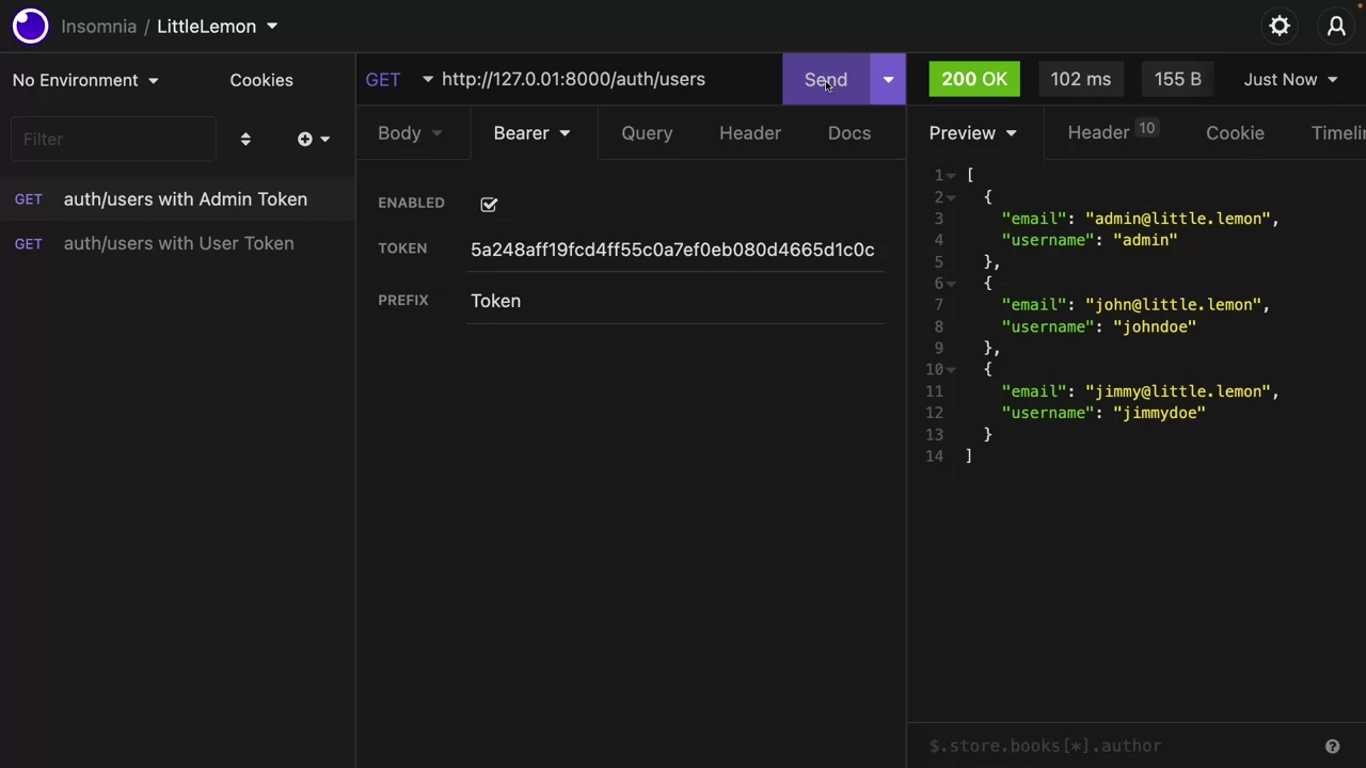
If you login as a super user in the Django admin and then browse this endpoint, all the users will be visible to you, but other people cannot browse this endpoint without a valid token.
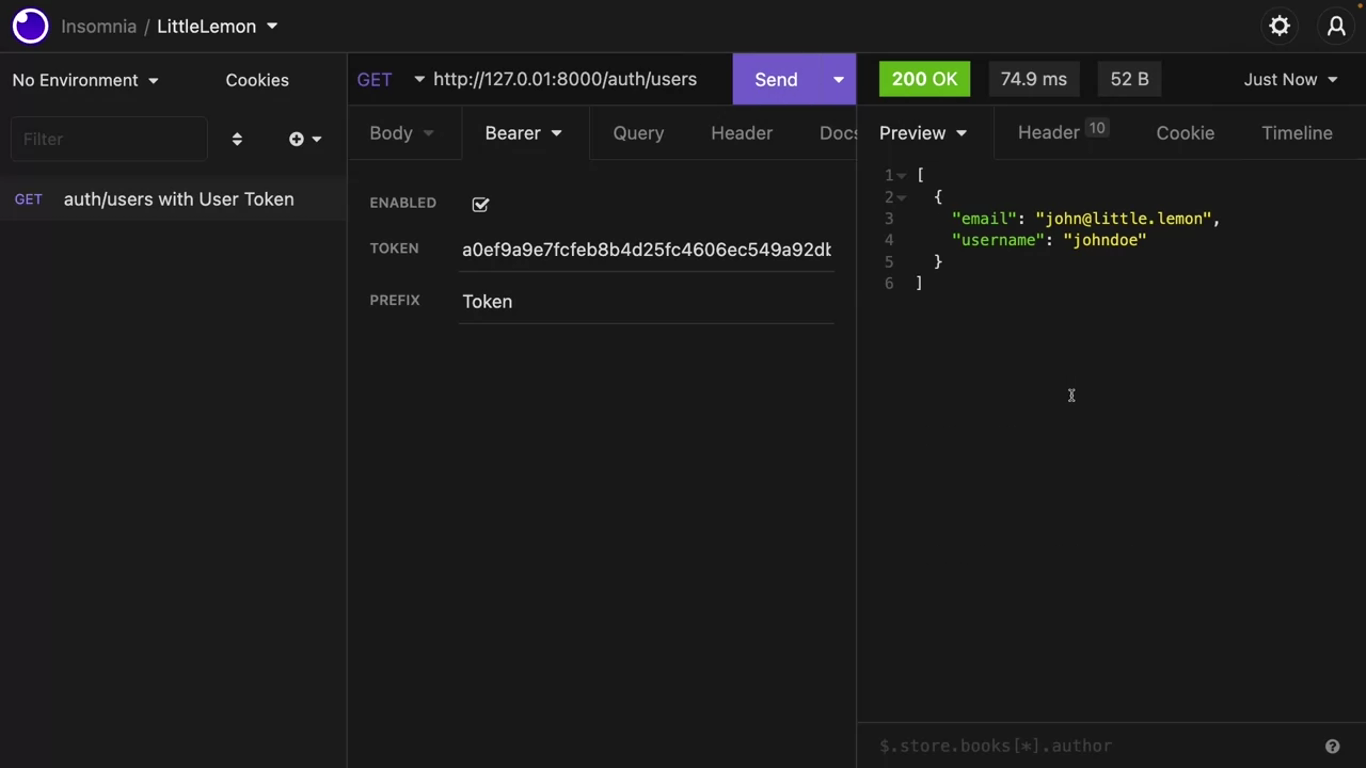
If they make an HTTP GET call to this endpoint with a token, only their username and email will be visible to them.
But with the super admin token, they’re all available to you.
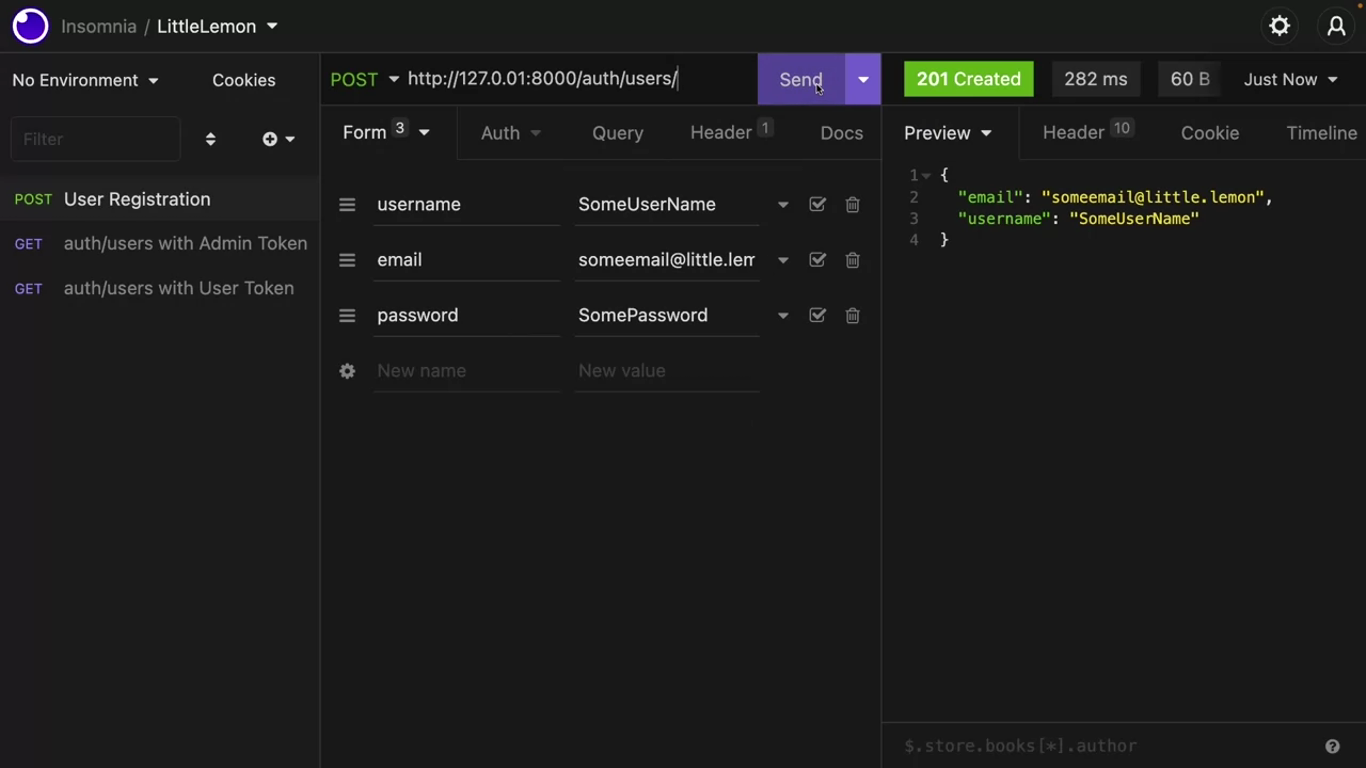
This endpoint can accept public HTTP post calls with email, username, and password without any token. The user will be created if the username is not taken.
You need a particular endpoint for the super admin, which will be used to assign a user to the manager group or remove them from it. http://127.0.0.1:8000/api/groups/manager/users
# views.py

@api_view(['POST'])
@permission_classes()
def manager(request):
	return Response({"message": "ok"})
This endpoint can only be accessed with a super admin token, so you need a special type of permission called is admin user.
# views.py

...
from rest_framework.permissions import IsAdminUser
...
# views.py
@api_view(['POST'])
@permission_classes(['IsAdminUser'])
def manager(request):
return Response({"message": "ok"})Add the path('groups/manager/users', views.managers) in the urls.py file.
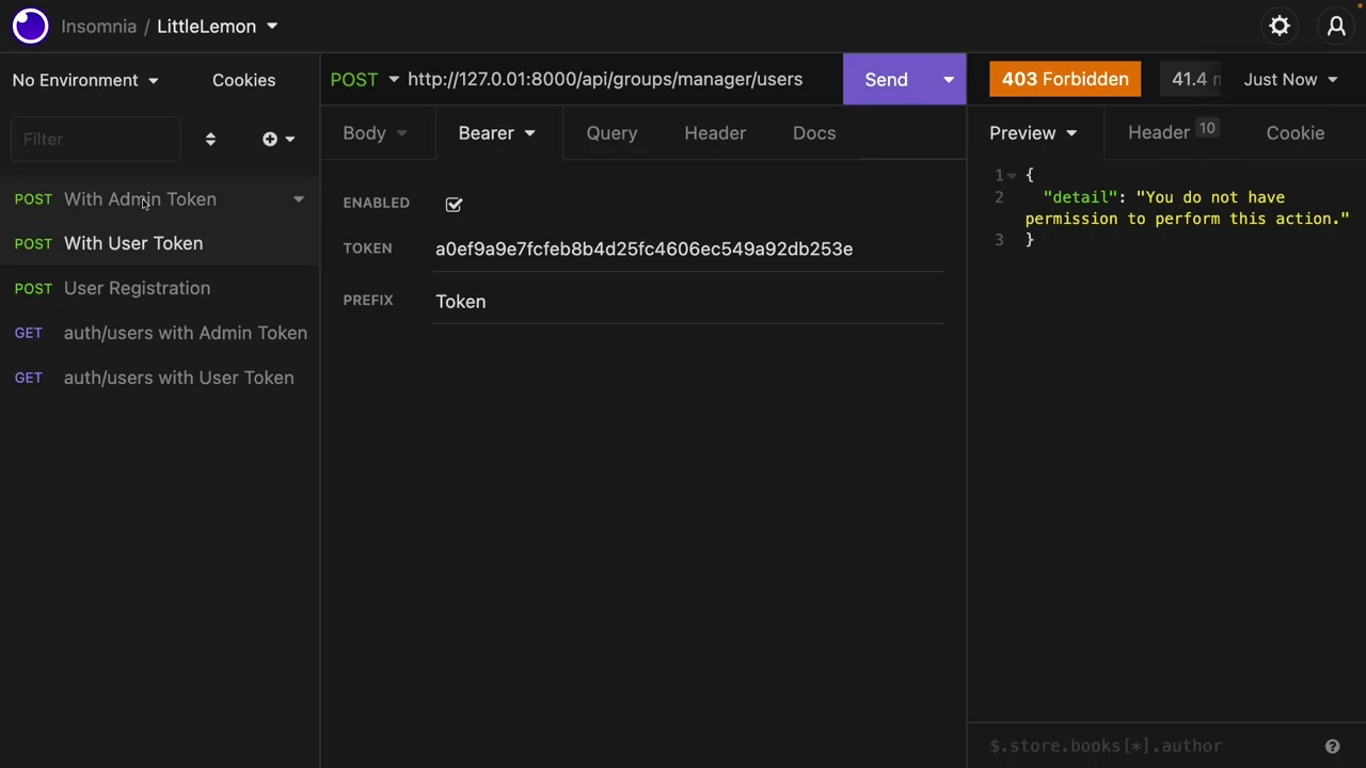
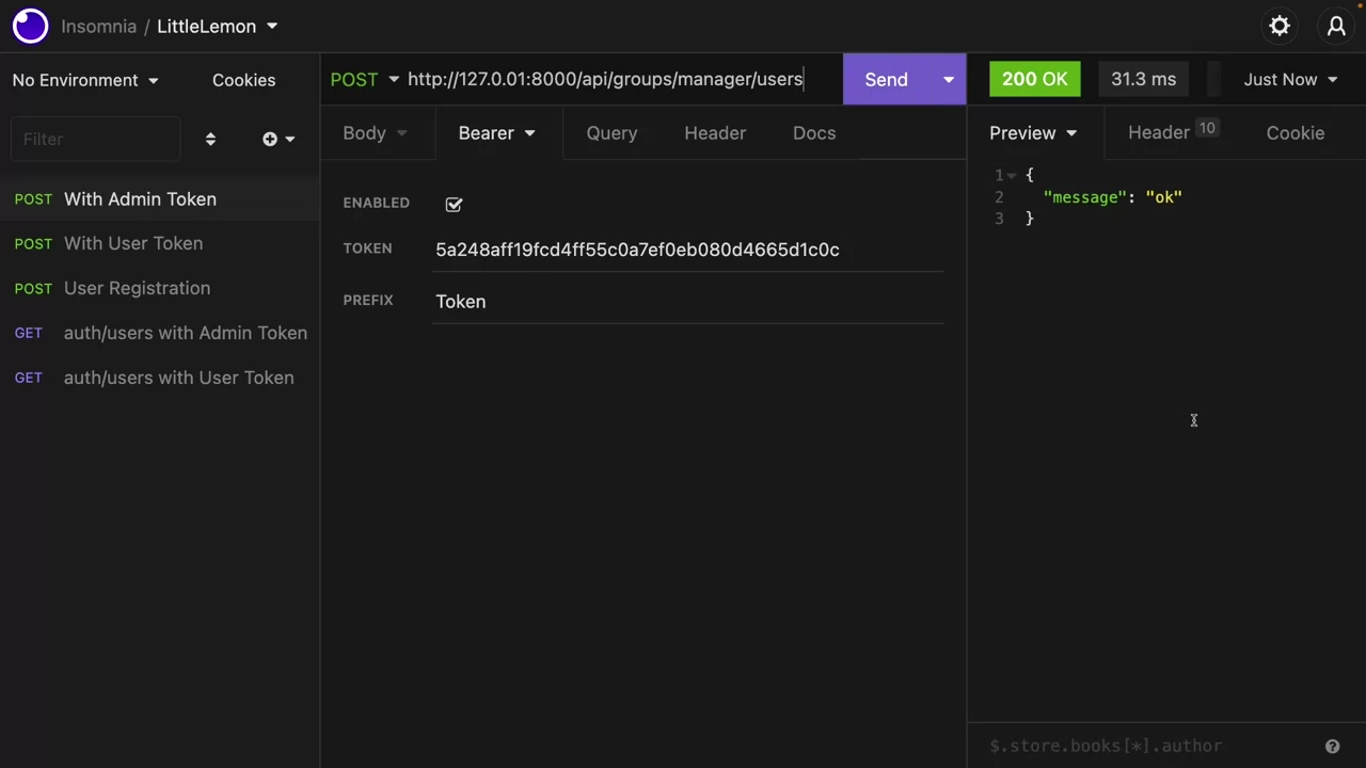
This endpoint should accept one post filled, the username. If the username is present, find the user and add it to the group.
For this, you must import the user and group class like this:
# views.py

...
from django.contrib.auth.models import User, Group
# views.py
@api_view(['POST'])
@permission_classes(['IsAdminUser'])
def manager(request):
username = request.data['username']
if username:
user = get_object_or_404(User, username=username)
managers = Group.objects.get(name="Manager")
managers.user_set.add(user)
return Response({"message": "ok"})
return Response({"message": "error"}, status.HTTP_400_BAD_REQUEST)Now open insomnia and make a post call to this endpoint with a username. Use a super admin token for this call. If everything is fine an Okay message will display.
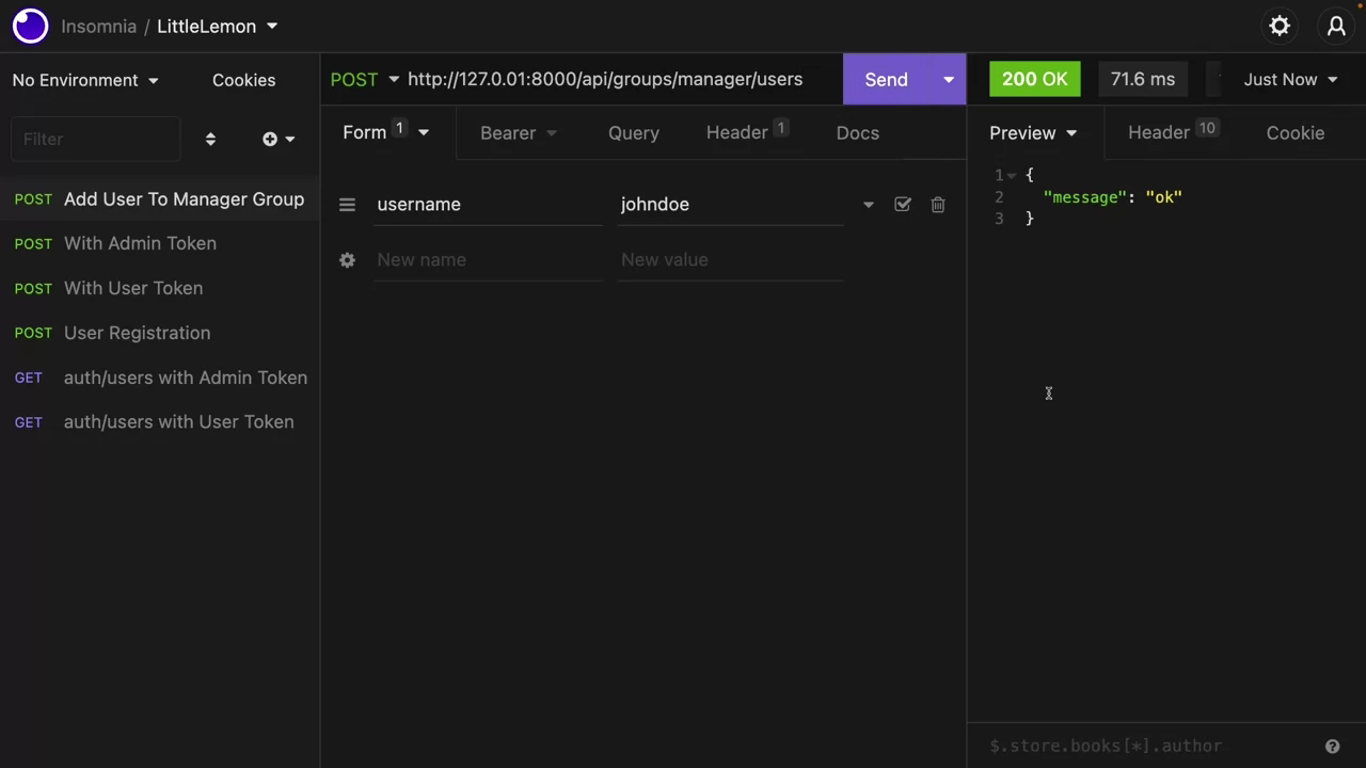
Check what happens if you call this method with a user token.
You also need to add support for delete calls to remove user from this endpoint. You can do it with slight changes to your code.
# views.py

@api_view(['POST'])
@permission_classes(['IsAdminUser'])
def manager(request):
	username = request.data['username']
	if username:
		user = get_object_or_404(User, username=username)
		managers = Group.objects.get(name="Manager")
		if request.method == 'POST':
			managers.user_set.add(user)
		elif request.method == 'DELETE':
			managers.user_set.remove(user)
		managers.user_set.add(user)
		return Response({"message": "ok"})

	return Response({"message": "error"}, status.HTTP_400_BAD_REQUEST)
Exercise: User account management
Goal
In this exercise, you will use authentication and validation mechanisms inside DRF. You need to do this activity using VS code and Insomnia on your computer. If you haven’t set up your development environment yet, revisit Installing VS code, Setting up tools and environment and Create a Django Project using pipenv.
Objectives
By the end of this exercise, you will be able to:
- Add form validators to form data
- Perform token and session authentication while using a DRF form
- Use the Djoser and
authtokenpackages for default routes - Use the Django admin panel for creating new users and tokens
Introduction
The Little Lemon website has grown in popularity since it was launched. While there are many benefits to the website, fake reviews are a cause for concern. The owners understand the need for better security for their review system.
You are tasked with adding some measures to prevent the misuse of the review system on the Little Lemon website.
Instructions
This lab will require you to modify the following files:
- views.py
- serializers.py
- settings.py
- admin.py
You must start the development server on the local host and go to the URL to confirm the desired view on the webpage.
When required, Open the Terminal by selecting New Terminal under Terminal on your VSCode.
For your convenience, the Django project called LittleLemon and Django app called LittleLemonDRF have already been created for you. Download the zip file and save the unzipped content inside a project directory on your local machine. Open the project folder inside VS Code and navigate to the directory containing ‘Pipfile’ inside your command line. If you are unsure how to set up a Django project reference the optional reading about Creating a Django project which includes all the necessary steps and code snippets.
Follow the instructions below and ensure you check the output at every step.
Note: The settings for project level and app level urls.py file have already been updated.
Initial instructions
Now run a command on Terminal to initialize the pipenv environment such as:
pipenv shell
Open the Pipfile created and ensure the dependencies for the project are already added.
Run a command on the Terminal to install the dependencies such as:
pipenv install
Note: You should be able to see the prompt inside the Terminal now has a suffix of round brackets. Follow the steps below to complete the exercise.
Step 1:
Open the models.py file and create a class called Rating inside it and pass models.Model to it as a parameter.
Create the two attributes in the model and assign the respective form fields to them.
Additionally, pass the following arguments to those form fields:
| Attribute | Form field type | Arguments |
|---|---|---|
menuitem_id | SmallIntegerField | |
rating | SmallIntegerField |
Now add a third attribute labelled user and assign it the value of models.ForeignKey() with the following arguments passed to it:
Useron_delete=models.CASCADE
user = models.ForeignKey(User, on_delete=models.CASCADE)Step 2:
Create a file called serializers.py inside the app level LittleLemonDRF directory. Add the code below inside the file:
from rest_framework import serializers
from .models import Rating
from rest_framework.validators import UniqueTogetherValidator
from django.contrib.auth.models import User


class RatingSerializer (serializers.ModelSerializer):
    user = serializers.PrimaryKeyRelatedField(
    queryset=User.objects.all(),
    default=serializers.CurrentUserDefault()
    )
Note: The import statements required have already been added. Additionally, the class RatingSerializer is already declared and updated with the relevant code. Take note of the user variable created and the contents of the code because you will be using it.
Step 3:
Create another class called Meta inside RatingSerializer and add the following code inside the class:
- Assign the
Ratingmodel to a variable calledmodel - Create a
fieldsvariable and assign a list to it that contains the following three string elements:user,menuitem_idandrating
Note: The order of list elements must be maintained.
- Create a variable called
validatorsand assign to it a list that contains:- A
UniqueTogetherValidatorclass that has the following arguments passed to it:- a
querysetvariable that is assigned the value ofRating.objects.all() - a
fieldsvariable that contains three list elements that are strings like:user,menuitem_idandrating
- a
- A
- Create a variable called
extra_kwargsthat has a dictionary assigned to it containing one item that has the following key-value pair:- Key: rating
- Value: A dictionary containing the following two items:
- max_value as key and 5 as value
- min_value as key and 0 as value
Note: Make sure you add a comma after the inner dictionary.
Step 4:
Open the settings.py file inside the project-level directory LittleLemon.
Locate the code in the screenshot and follow the instructions provided below to update the code:

You will be adding three configurations inside the REST_FRAMEWORK this time:
- Create a string called
DEFAULT_AUTHENTICATION_CLASSESand assign a list to it containing the following items:rest_framework.authentication.TokenAuthenticationrest_framework.authentication.SessionAuthentication
Note: Make sure you add a comma after every list item.
Step 5:
Now look for the configuration settings for INSTALLED_APPS namespace inside the settings.py file and update the list with the following string elements:
rest_framework.authtokendjoser
Note: Make sure you add a comma after every new element added to the list.
Step 6:
Open the views.py file.
Note: All the import statements required are already added. Additionally, the class RatingsView is already declared and updated with the relevant code.
Create a function inside the class RatingsView called get_permissions() and pass a single argument inside it called self.
Inside the get_permissions() function, add the following code:
if(self.request.method=='GET'):
    return []

return [IsAuthenticated()]
Make sure you save all the files that have been updated.
Step 7:
Run a command to create a superuser in Django.
Tip: The command to create a superuser in Django is: python3 manage.py createsuperuser
Enter the following details inside the prompts that appear:
- Username: admin
- Email: [email protected]
- Password: lemon@789!
Step 8:
Open the file urls.py and remove the commenting for the line below:
# path('ratings', views.RatingsView.as_view()),Step 9:
Open the Terminal in VS Code and run both the commands to perform the migrations.
Step 10:
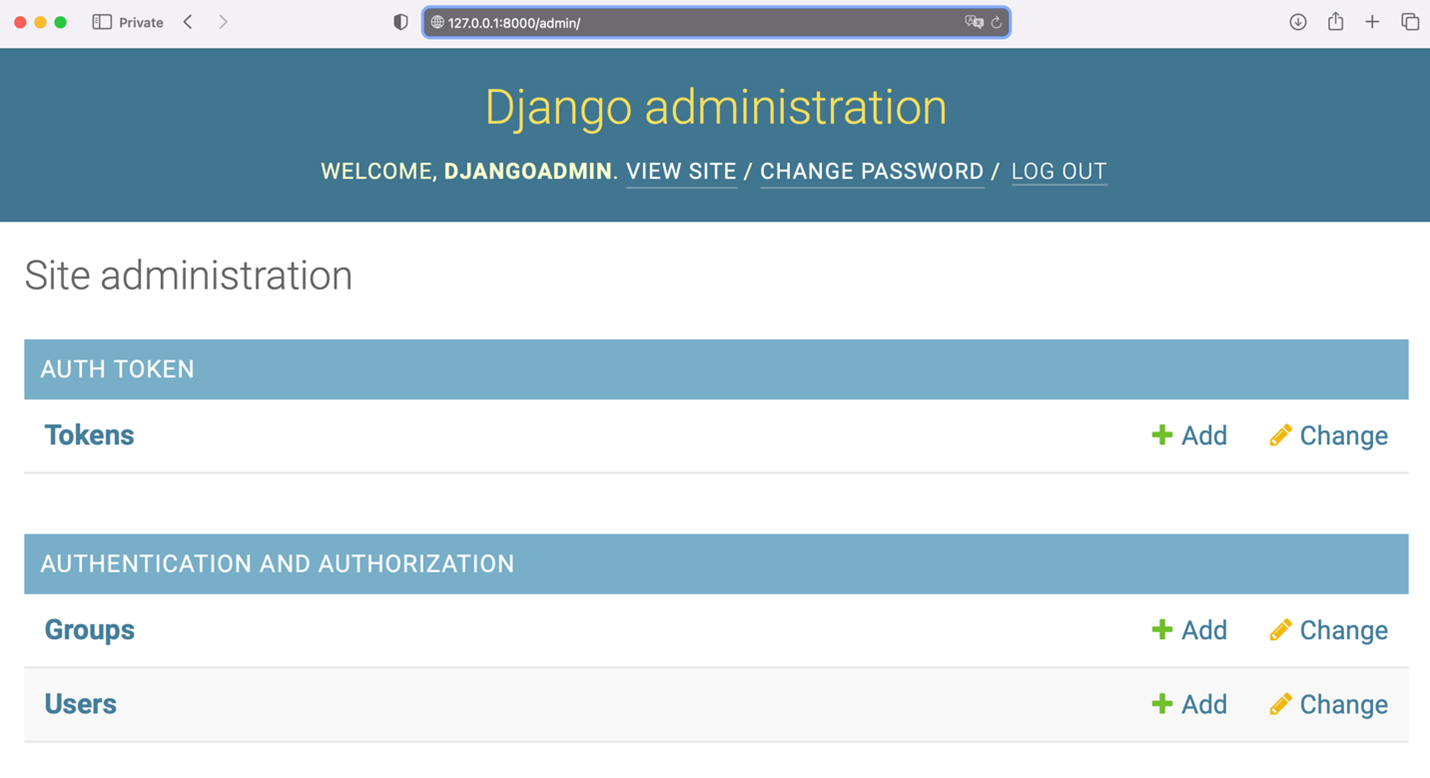
Once the migrations are performed successfully, run the command to start the server on the localhost and go to the URL: http://127.0.0.1:8000/admin
Enter the details of the credentials for the superuser you have created in step 8 and log into the Django admin panel. The Django Admin home page should appear as below:
Step 11:
Click on Users and click on Add User again. Enter the following details for the new user:
- Username: Adrian
- Email: [email protected]
- Password: lemon@adr!
Press the Save button and add another user and enter the following details for the second user:
- Username: Mario
- Email: [email protected]
- Password: lemon@mar!
Press the Save button once again and add a third user with the following details:
- Username: Sana
- Email: [email protected]
- Password: lemon@san!
Press the Save button. Ignore the information on the user details screen that appears and press the Home button in the left-hand corner of the page.
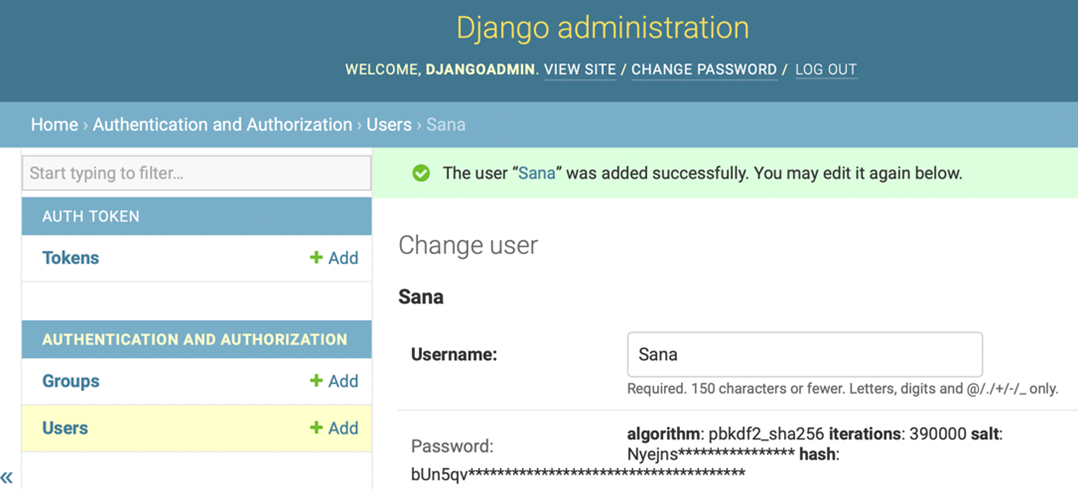
Step 12:
Now press the Tokens option listed under Auth Tokens and press Add Token.
Step 13:
Select Adrian from the dropdown menu and press the Save button.

A screen will appear that contains Adrian’s details along with a unique key generated for him. Follow the same process to generate tokens for the users Mario and Sana. Copy and save these tokens because you will use them later on in Insomnia.

Step 14:
Now open the API request client, Insomnia and perform the following actions:
- Create a POST request to the URL:
http://127.0.0.1:8000/api/ratings
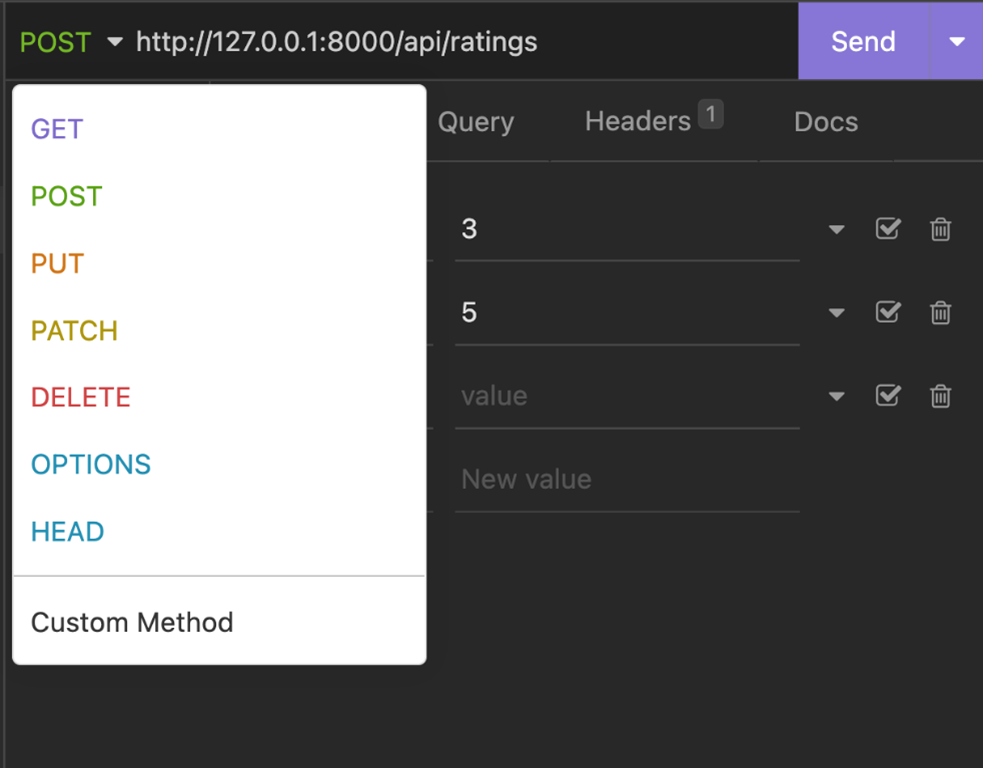
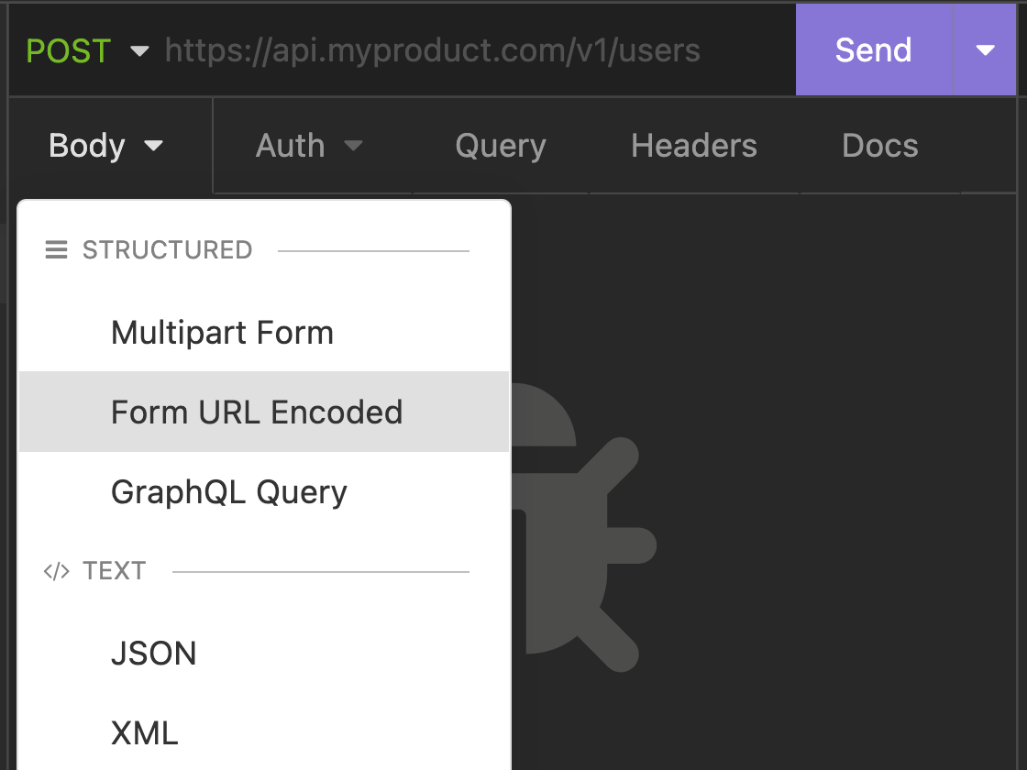
Click on Body and select FORM URL Encoded as the data structure.
- Add the following details inside it:
menuitem_id: 3rating: 4
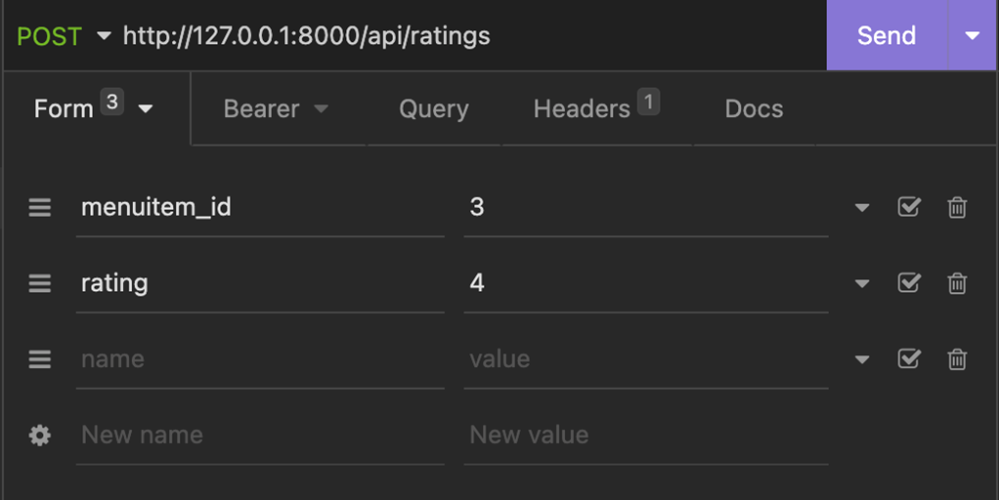
- Under the Bearer section add the token value. For example, for Adrian ad the token
4c7cbdf14c6e5b7cd481bb5bd681c89baba49f9d - Also select the checkbox next to Enabled and update the Prefix with the value Token.
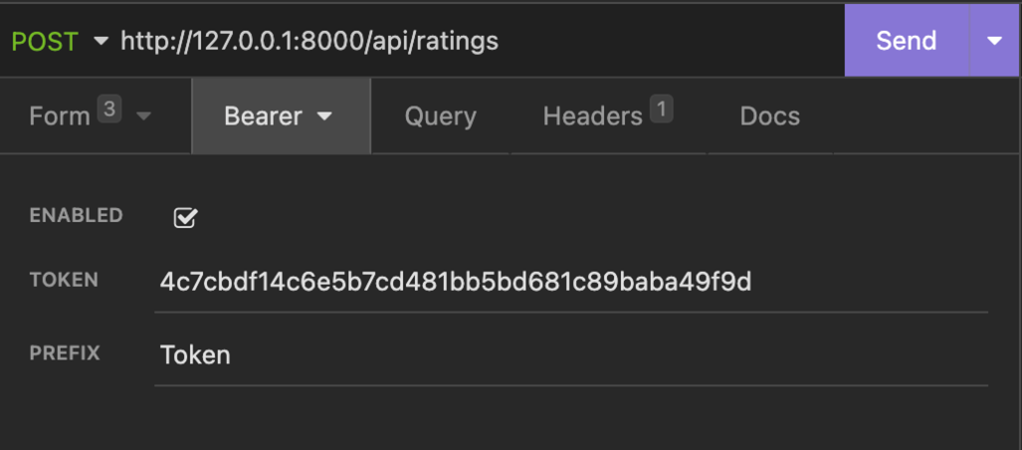
- Press the Send button to generate the POST request. It will generate JSON output like in the screenshot below.
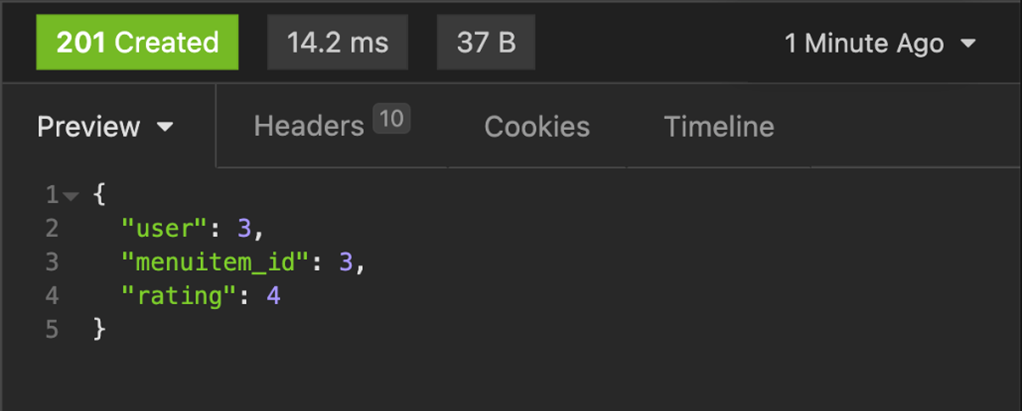
Step 15:
Now keep the value of menuitem_id unchanged but change the rating to 5. It should generate JSON output that is different to before, such as in the screenshot below. The error denotes the throttling limits you have placed on the number of reviews a user can add in a certain amount of time. It means that any given user can add at most one rating for a specific menu item and a unique set must be created for a combination of a user and a menu item.
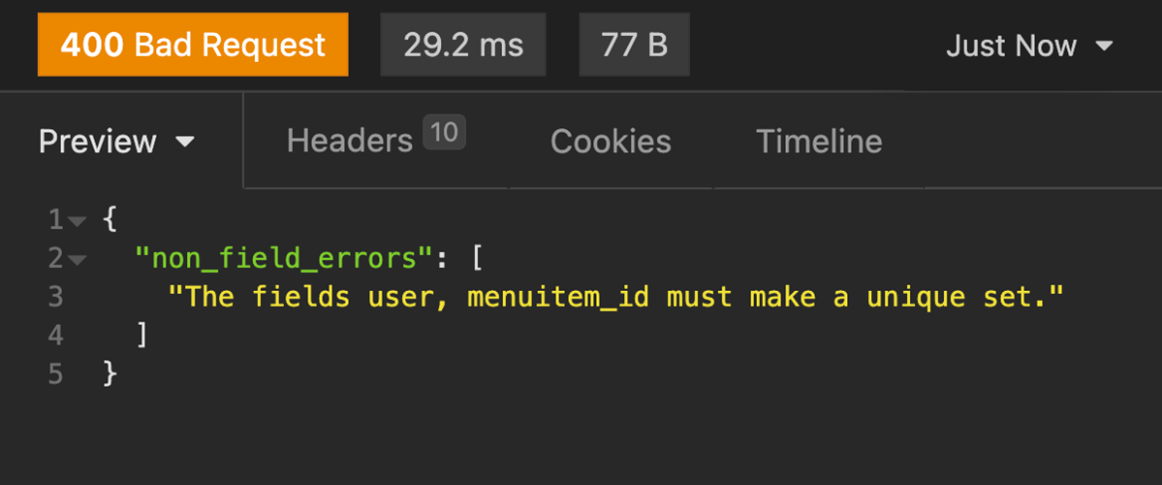
Step 16:
Update the token id with the user Sana and use the same values with which you encountered an error, such as menuitem_id with value 3 and a rating value of 5. This should update the user review without any issue because it is now a new rating given by another user.
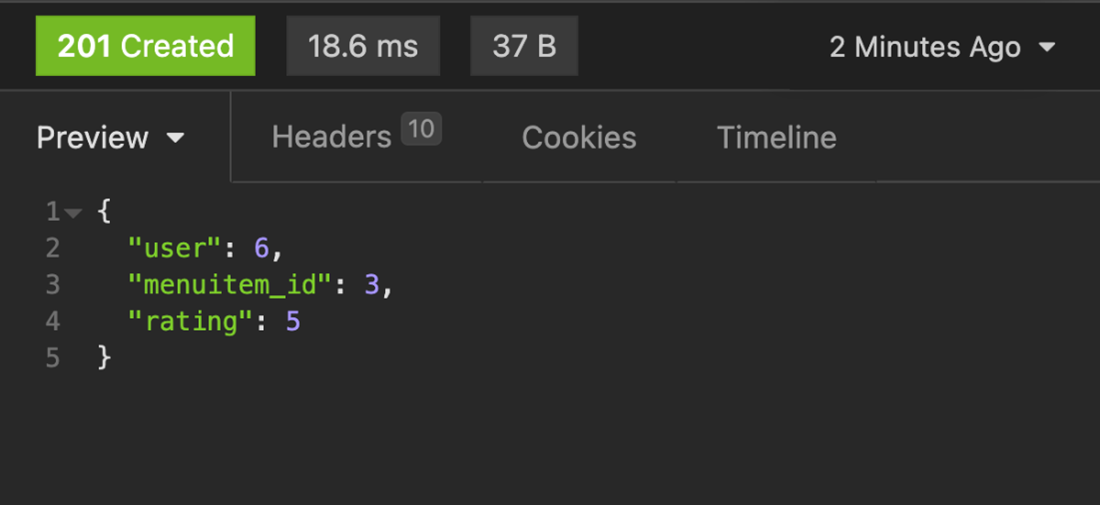
Step 17:
Switch the screen and go back to the webpage on your browser with the URL:
http://127.0.0.1:8000/api/ratings
Refresh the page to see if the entries for the reviews are updated.
Concluding Thoughts
In this exercise, you learned how to create default routes using Djoser and basic authentication and security mechanisms by implementing throttling functionalities in DRF.
Additional resources
Simple JWT: A JSON Web Token authentication plugin for the Django REST framework
PythonDRFDjangoRESTRESTfulAPISecurityAuthorizationAuthenticationJSONJWT
Previous one → 6.Filtering, ordering and searching | Next one → 1.Introduction to the full stack
