Testing your application
Recap: Unit Testing
Introduction
Testing is a vital part of the software development process.
Before pushing the application to the production stage, validating it against the expected output is essential.
Before you commit any change to the source code, it must be verified that your changes don’t affect the application’s behavior.
A developer is always well advised to adopt an approach of test-driven development.
Django’s testing framework provides the API to test your code and check if it is doing as expected.
The test framework of Django is built upon the unit test package bundled with Python’s standard library.
Prerequisites
- Install Django and Django REST Framework in the current Python environment
- Create a Django project named
LittleLemonwithdjango-admincommand - Inside it, create a Django app with the name
LittleLemonAPI - Add the
'rest_framework'and'LittleLemonAPI'to theINSTALLED_APPSlist - Run the
migratecommand
Model
Define the MenuItem model in LittleLemonAPI/models.py file using the following code:
from django.db import models

# Create your models here.

class MenuItem(models.Model):

    title = models.CharField(max_length=255)
    price = models.DecimalField(max_digits=6, decimal_places=2)
    inventory = models.SmallIntegerField()

    def get_item(self):
        return f'{self.title} : {str(self.price)}'
Serializer
Serialization is crucial in building an API with the Django REST Framework. It serializes the model instances into JSON format.
Use the ModelSerializer class to declare a serializer for the MenuItem model. Add the following code in the LittleLemonAPI/serializers.py file.
from rest_framework import serializers
from .models import MenuItem

class MenuItemSerializer(serializers.ModelSerializer):

    class Meta:
        model = MenuItem
        fields = ['id','title','price','inventory']
Views
The next step is to provide the app with the view definitions. DRF has generic view classes. The ListCreateAPIView handles the POST and GET methods to add a model instance and retrieve all instances. Use it as a base for MenuItemsView class.
LittleLemonAPI/views.py
from rest_framework import generics
from .models import MenuItem
from .serializers import MenuItemSerializer

# Create your views here.
class MenuItemsView(generics.ListCreateAPIView):
    queryset = MenuItem.objects.all()
    serializer_class = MenuItemSerializer
Exercise: Adding unit tests
Overview
Testing is the process of validating the result of an operation against an expected output. Django’s test framework internally uses Python’s unit test package.
In this exercise, you will write the unit tests for satisfactory behavior of models and the views you have defined in the Menu API.
Scenario
In your restaurant app, you already have built the Menu API and Booking API. You will write the model test in test_models.py and view test in test_views.py files.
Step 1
When you create the app, an empty test.py file is created in the app package folder. Go ahead and delete it.
In the project container folder, create a new folder with the name tests.
Step 2
Open the definition of the Menu model class.
Add a __str__() method that returns a string representation of the model instance.
#add the following method in Menu class
def __str__(self):
        return f'{self.title} : {str(self.price)}'
Tip: As you have made changes to the model, you must run the migrations to sync the changes.
Step 3
Create a new file in the tests folder named test-models.py.
Import the TestCase class from the django.tests module.
Use it as base and declare a test class, for example, MenuTest.
Define an instance method that adds a new instance of the Menu model.
Call the assertEqual() method of the test class that compares the string representation of the newly added object with the anticipated value.
For example:
#TestCase class
class MenuItemTest(TestCase):
    def test_get_item(self):
        item = MenuItem.objects.create(title="IceCream", price=80, inventory=100)
        self.assertEqual(item, "IceCream : 80")
Step 4
Open a command terminal in VS Code. While in the project container directory, run the test with the following command:
python manage.py test
Check the result of the test if it returns as OK.
Step 5
Open the test_views.py file in tests folder.
Write a MenuViewTest class that subclasses the TestCase class.
Use the setup() method to add a few test instances of the Menu model.
Next, add another test_getall() instance method to retrieve all the Menu objects added for the test purpose.
The retrieved objects must serialized, so make sure the method runs assertions to check if the serialized data equals the response.
Run the test again with the command python manage.py test and verify if the test returns as OK.
Conclusion
In this exercise, you created and ran the unit tests to test the model and view for the Menu API.
Recap: Testing your API
Introduction
Before releasing the API to the end user, it is important that the developer test the API endpoints to check if the desired responses are obtained.
There are various API testing tools available, both for commercial use and as open-source apps. Insomnia is a free-to use tool for testing the REST API performance.
Prerequisites
- Install Django and the Django REST Framework in the current Python environment.
- Create a Django project named
LittleLemonusing thedjango-admincommand. - Inside the Django project, create a Django app with the name
LittleLemonAPI. - Add the code
'rest_framework', and'LittleLemonAPI'to theINSTALLED_APPSlist inside the settings.py file. - The views for the
MenuAPI are defined, and its routes are configured.
Install Insomnia
Insomnia is available as a browser extension for most of the popular browsers. However, it has limited functionality as compared to the desktop application. Hence, you should download and install Insomnia from https://insomnia.rest/download.
Launch the Insomnia app. You’ll find three options in the top menu: Design, Debug, and Test. Make sure that the Debug option is active.
You use the Design window to design API specification documents and the Test window to write the unit tests. It is from the Debug window that you visit the endpoints of your API and test the responses.
Make sure that your Django application is running.
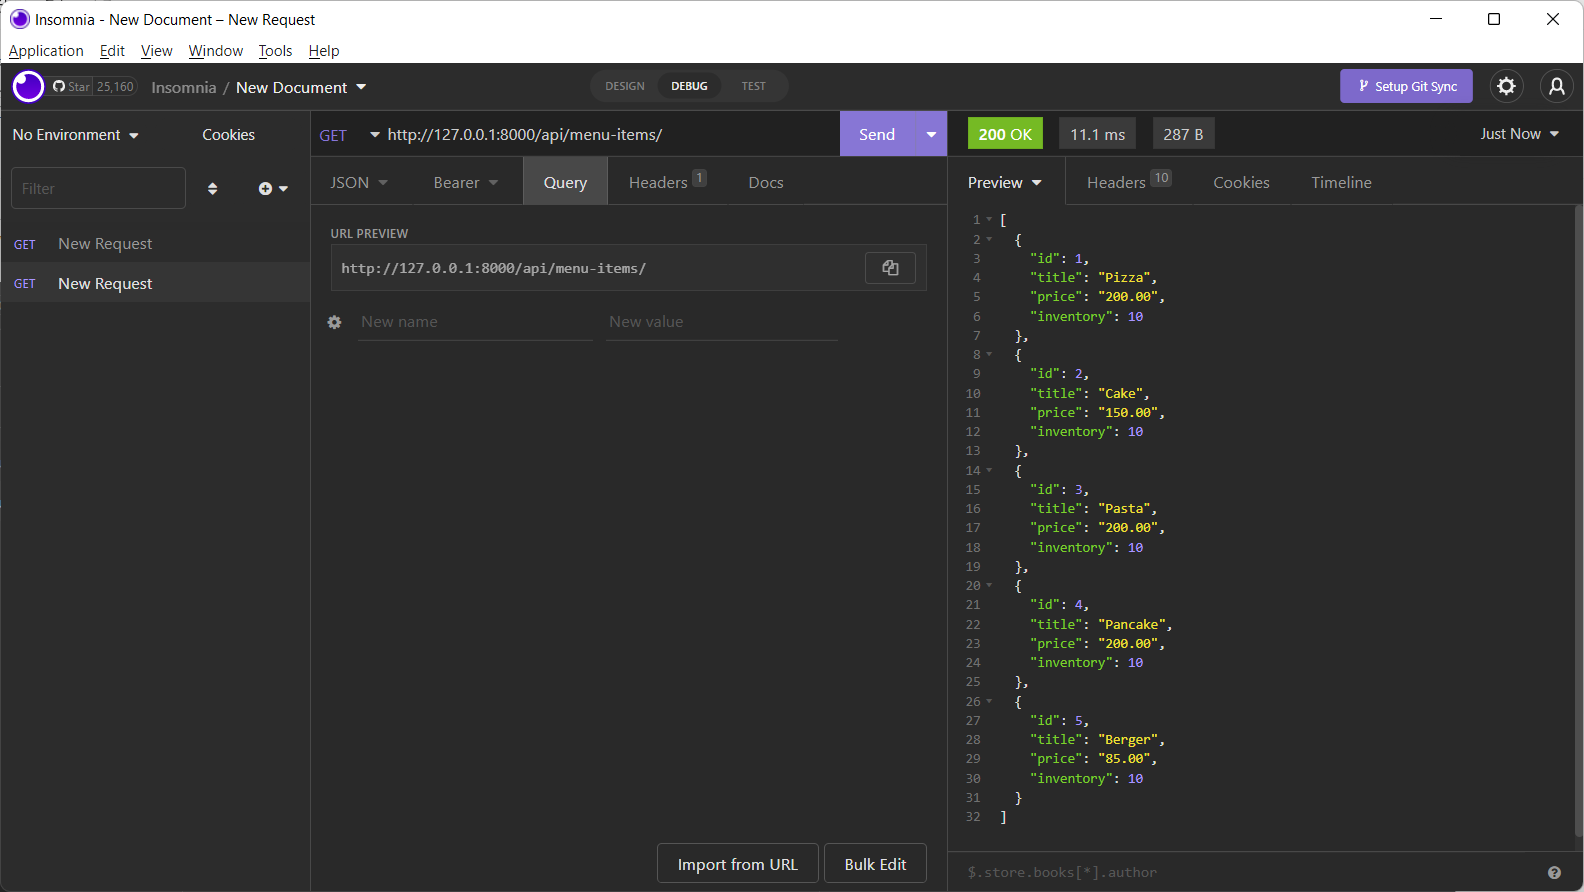
The insomnia interface is arranged in three panels. The left panel shows the requests issued so far.
In the middle panel, you enter various parameters such as body parameters, query parameters, header, etc.
Insomnia renders the responses in the right panel.
Above the middle panel, you have a drop-down menu from which you can choose the type of HTTP request and a textbox to enter the URL.
The top of the right panel displays the response’s status code. Here is a typical view of the Insomnia app:
You have defined the SingleMenuItemView class that handles GET, PUT and DELETE requests for a given ID.
To test the functionality of retrieving a single menu item, change the URL by appending the item’s ID and send the request to the Django server. The response panel shows the details with 200 OK status code on top.
The SingleMenuItemView also preforms the POST request operations. Choose the POST option, enter the value for the model fields. On sending the request, new instance is added to the model.
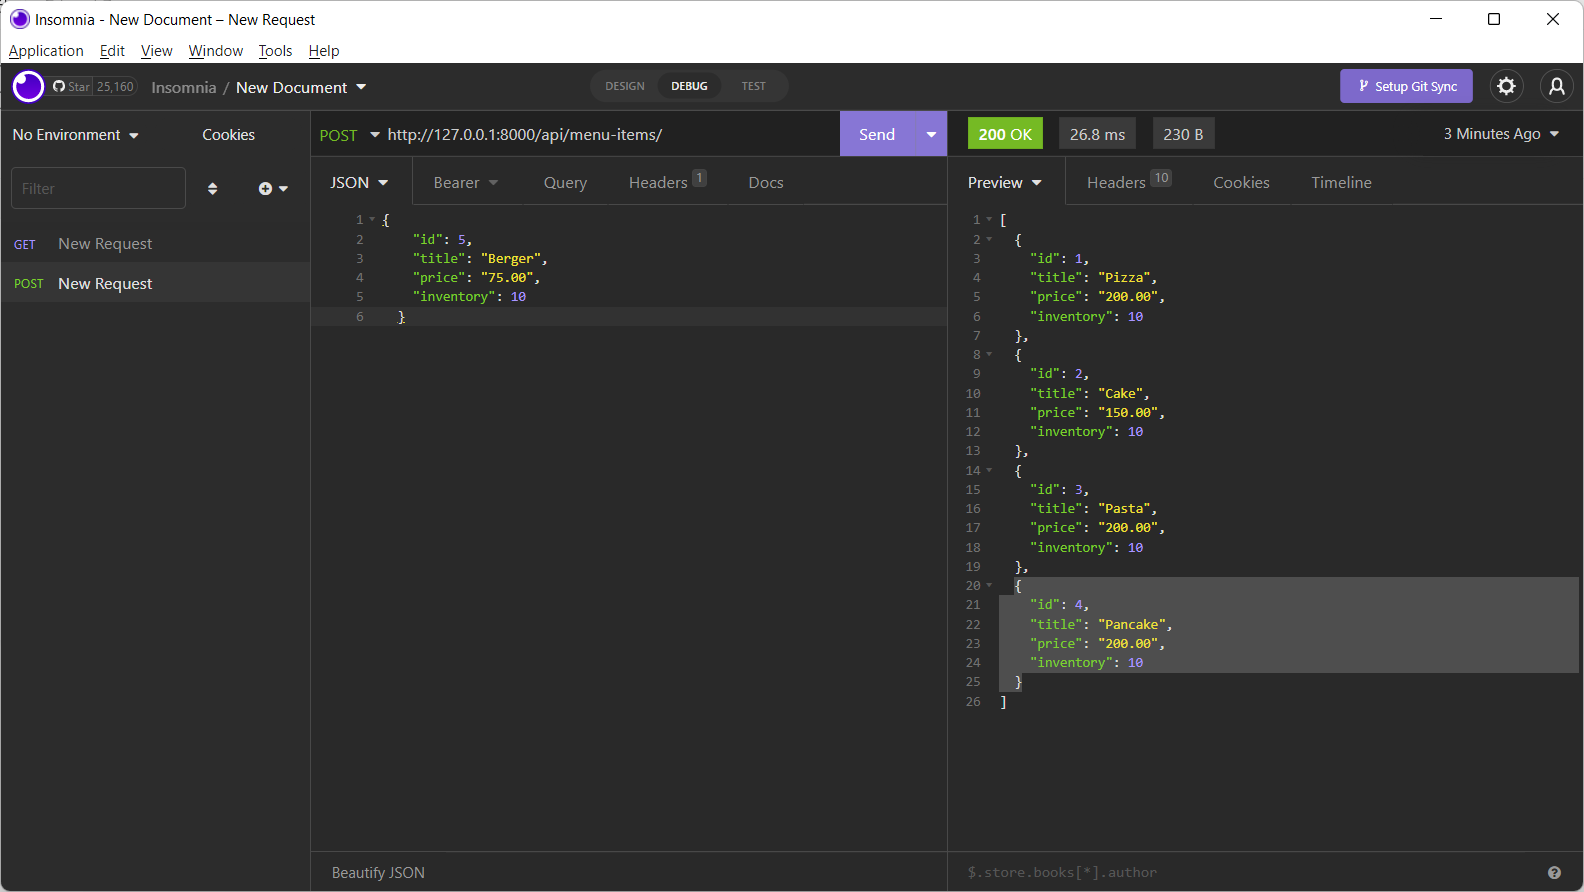
You can confirm that a new instance is created, by visiting the GET endpoint again.
Similarly, you can test the PUT and DELETE requests with Insomnia.
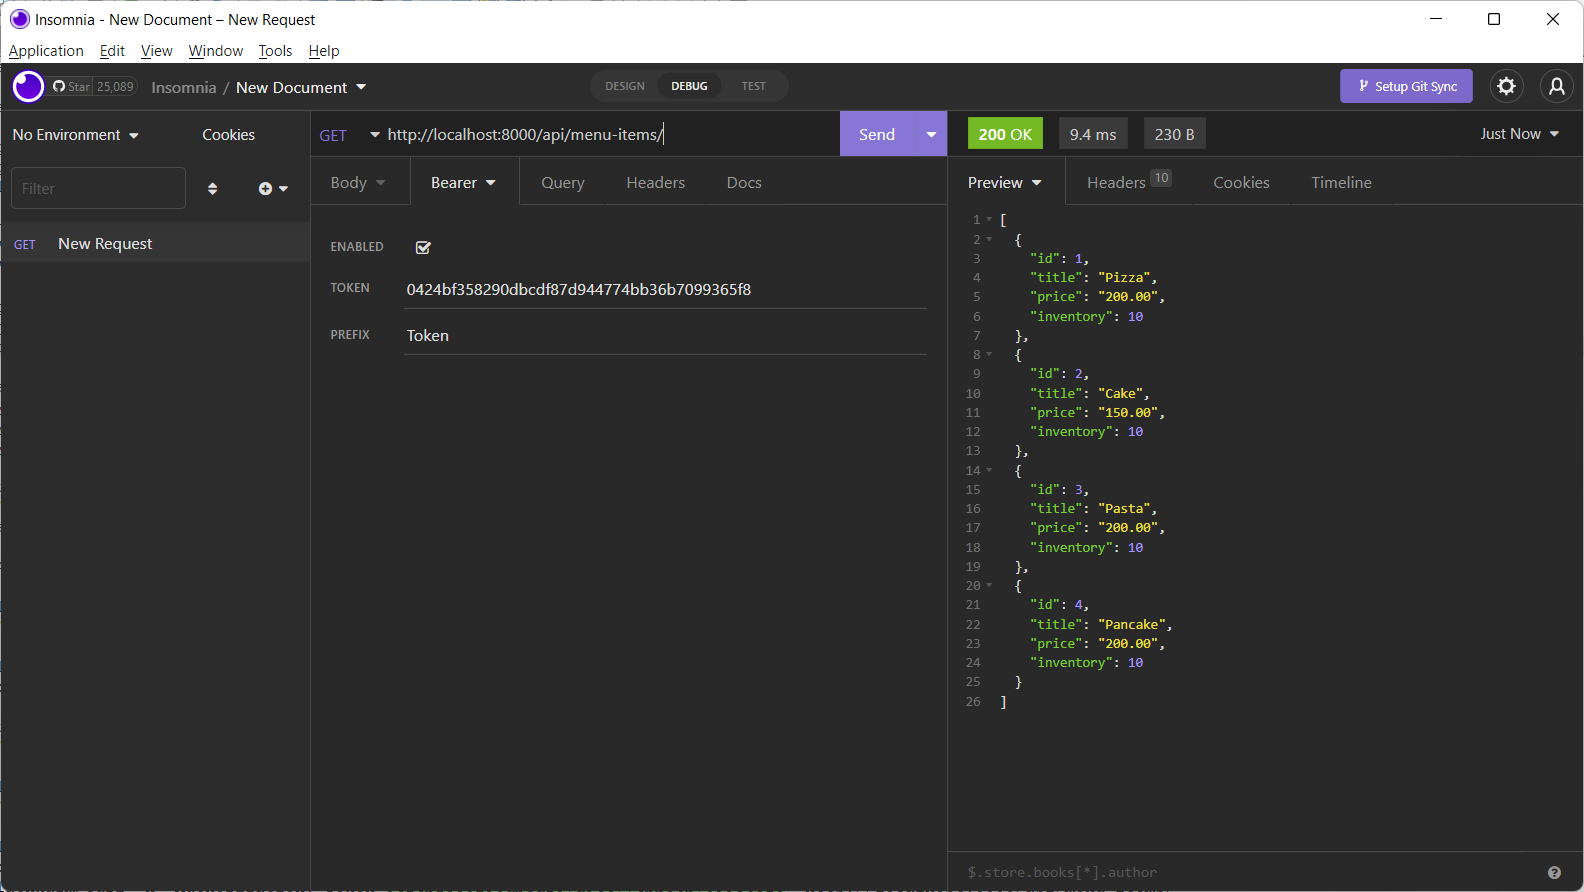
If you have secured your API with the token authorization scheme, you will need to enter the bearer token in Auth tab. Obtain the token from the api-token-auth/ endpoint.
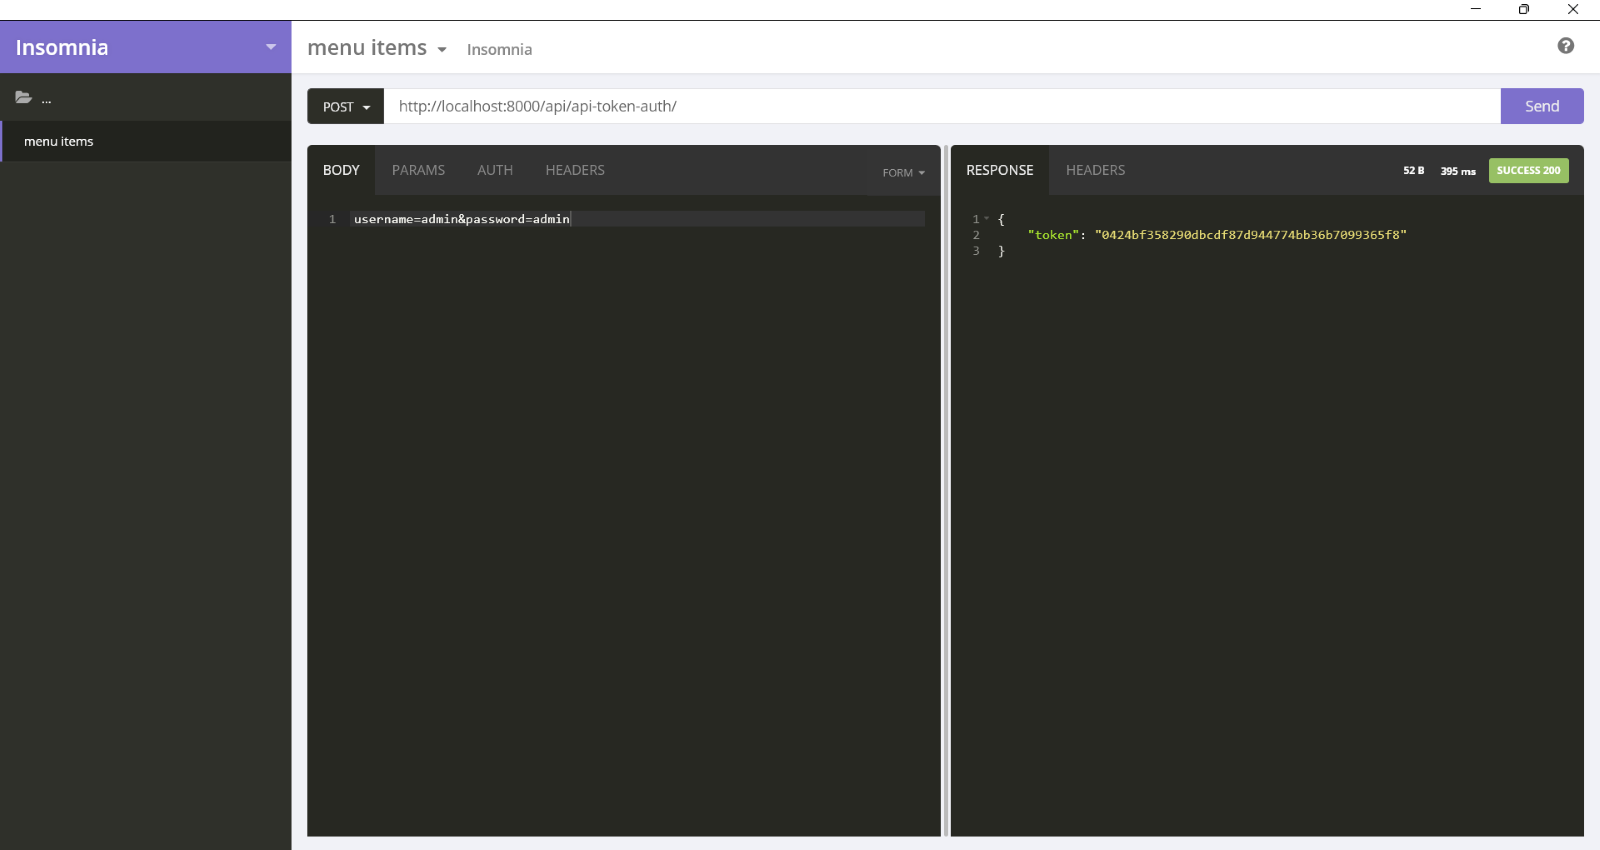
Use the token for all the subsequent operations.
In this reading, you learned how to use Insomnia to test your DRF API.
Exercise: Testing the API using Insomnia
Overview
By now, you have the Django app with Menu API and table booking API built with Django REST framework, up and running.
This is the final exercise of this course. In this exercise, you will use Insomnia to test your API.
Scenario
You can perform CREATE, READ, UPDATE and DELETE operations with the browsable API provided by the Django REST framework. However, Insomnia is a more versatile API client with a lot of useful functionality.
Step 1
Download and install the Insomnia client app from https://insomnia.rest/download.
Step 2
Start the Django server.
Visit the browsable API URL of the Menu API to confirm the satisfactory functioning of the endpoints.
Step 3
Open the Insomnia app that you installed in the step 1.
Step 4
Create a new request. Enter the URL such as http://127.0.0.1:8000/api/menu-items/.
Choose the GET request.
In the responses panel, you will get the list of all the items in the Menu model.
Step 5
To add a new item through the Insomnia interface, change the request type to POST, keep the same URL: http://127.0.0.1:8000/api/menu-items/
Enter the details of the new item in JSON format.
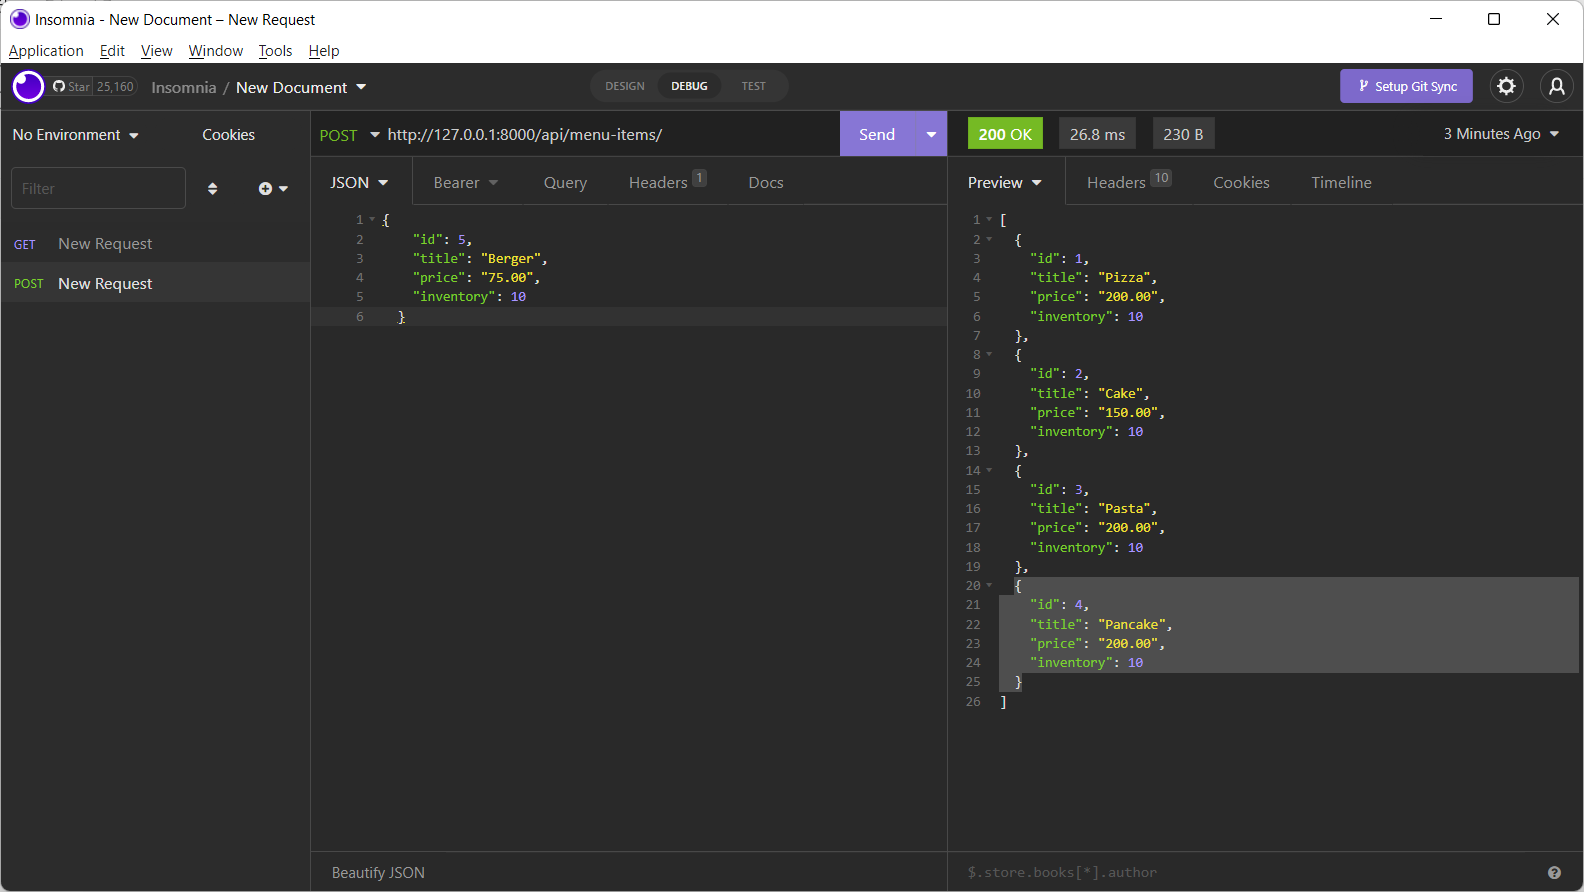
Step 6
To update any existing item data, select the request type to PUT, append the item id to the URL – for example http://127.0.0.1:8000/api/menu-items/5.
Enter the updated data for the item in JSON and send the request. The item is modified. You can confirm by issuing the GET request again.
Step 7
To test the DELETE operation, change the method type to DELETE, the URL should contain the id of the item to be deleted. Simply click the send button.
The item of the given id will be deleted from the model. To confirm, issue the GET request again.
Conclusion
In this exercise, you tested the GET, POST, PUT and DELETE operations on your Menu API.
Additional Resources
Here is a list of resources that may be helpful as you continue your learning journey. These resources provide some more in-depth information on the topics covered in this module.
Testing
Previous one → 6.User Authentication