Projects and Apps overview
Requirements
By now, you should be familiar with the basic structure of a website. It contains web pages consisting of HTML for the page structure, CSS for the look and style, and JavaScript for client-side interaction.
Structure
The purpose of the project structure is to lay out the files in a way that makes them easy to update.
Django structure
Dynamic web app requirements
This can involve working with Internet protocols, web server configuration, and data retrieval, or storage.
Regarding Internet protocols, recall that HTTP is used to get, send, and render web content. Understanding HTTP is essential in web development as every action is always tied into a HTTP request, pointing to some URL.
A web server is required to get the page users want and return it to them via HTTP.
Django comes with its own development server, which is written in Python. This will save the developer a lot of time and avoid any messy configurations. 🎉
Recall that the web is stateless, meaning it does not store anything for future reference. A database is required to keep and retrieve the data associated with the website. For example, every time a user submits a form on a site, this data will need to be stored so it can be retrieved and rendered later.
The Structure
Projects
In Django, a project represents the entire web application. Django provides a set of commands that auto generates a project structure that contains the configuration and setting related to the entire web application.
For now, just note that it’s a way to organize your Python files and folders. This allows developers to focus on code rather than configuration.
Apps
In Django, an app is a sub-module of a project. It is typically used to implement functionality for some specific purpose.
Apps can be self-contained, meaning they do not rely on other apps to function. As a result, they can be used or reused in many different projects.
This leads nicely to the don’t repeat yourself, DRY principles. Write once but use it many times.
WARNING
a Django web application is a project that contains many apps.
Apps are added using the start app command. Like with the project, Django also automatically generates a self-contained directory and its associated files inside the project structure.
WARNING
For Django to recognize an app in a project, it must be added to the installed apps setting.
Additionally, a Django app is a set of code that interacts with various parts of the framework. There are a few places where Django needs to interact with installed applications. This is mainly for configuration and introspection. That’s why the application registry maintains metadata in an app config instance for each installed application.
Applications usually include some combination, such as
- models,
- views,
- templates,
- template tags,
- static files,
- URLs,
- and middleware.
For now, just know that as a developer, you will spend a great deal of time working with apps as they contain all the project’s different parts and as a developer deciding what constitutes an app, and a project can be subjective, and you may encounter various approaches to app design.
For now, it’s best to think that an app should be feature targeted, and is best suited to one thing and one thing only.
Project Structure
When installing Django globally or in a virtual environment, Python recommends using isolated environment libraries and other dependencies required for a particular application.
Python’s standard library contains the venv module.
It installs a command-line utility called Django-admin in the system path and is located in the scripts folder of your current Python environment.
As the name suggests, you use the django-admin utility to perform various administrative tasks.
These tasks include creating the project and app, performing migrations to generate database tables, whose structure matches data models, and running a development server.
What is a project?
When you set out to build a modular, extensible and scalable web application, you need an arrangement that controls the standard features of its various sub-modules.
A Django project is a Python package containing the database configuration used by various sub-modules (Django calls them apps) and other Django-specific settings.
Use the startproject command of Django-admin as follows:
(djenv) C:\djenv>django-admin startproject demoproject
The startproject is Django’s default project template. It creates the following file structure in the Python environment:
C:\djenv\demoproject
│   manage.py
│
└───demoproject
        asgi.py
        settings.py
        urls.py
        wsgi.py
        __init__.py
If you start VS Code in this folder, the file structure appears in its explorer as shown:
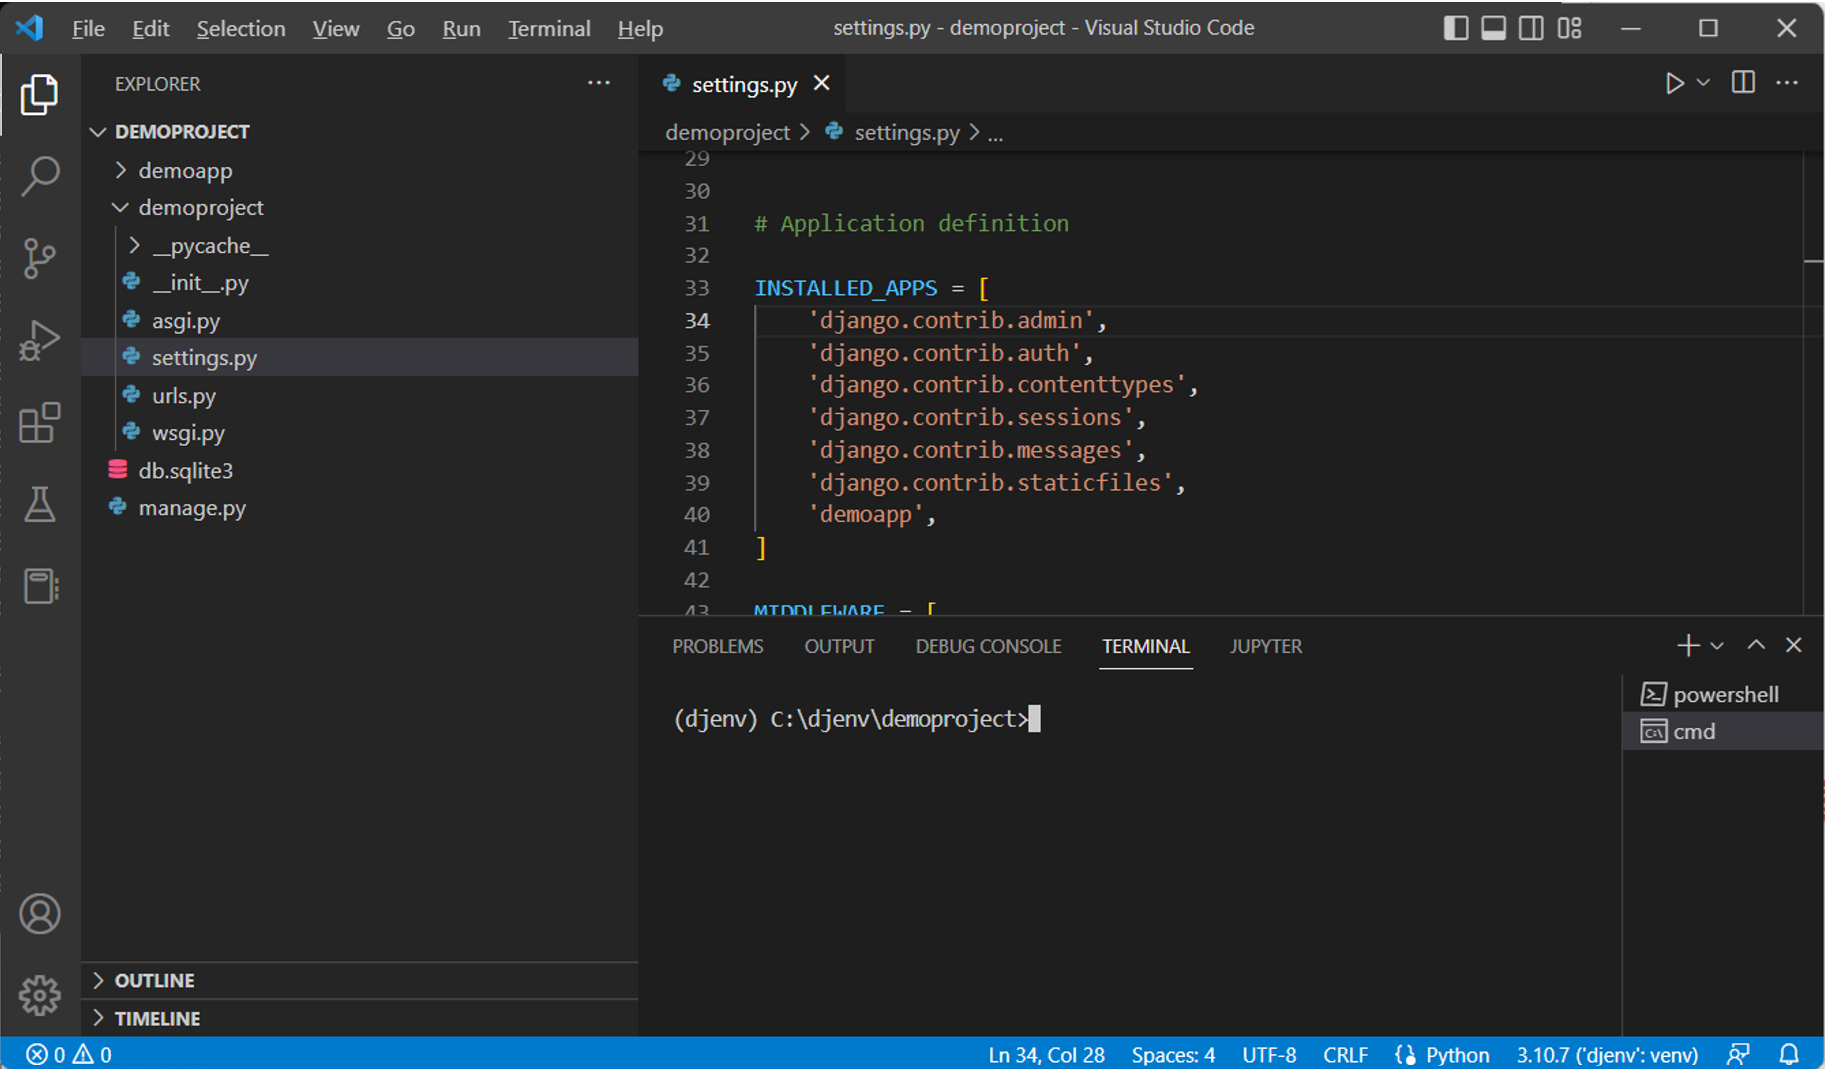
You can see a folder named demoproject is created in the Python environment folder.
It contains a script manage.py and another folder of the same name.
You will learn more about the files in the inner folder later.
The manage.py script inside the outer demoproject has the same role as the django-admin utility.
You can use it to perform various administrative tasks. In that sense, it is a local copy of the django-admin utility.
manage.py
As mentioned above, the manage.py script can perform everything that the django-admin utility does. However, using manage.py is more straightforward, especially if you are required to work on a single project.
If you have multiple projects, use django-adminand specify the settings.
The general usage of manage.py is as follows:
python manage.py <command>
Let’s explore some of the required command options:
startapp
As mentioned above, a Django project folder can contain one or more apps. An app is also represented by a folder of a specific file system. The command to create an app is:
python manage.py startapp <name of app>
You will explore the structure of an app later.
makemigrations
Django manages the database operations with the ORM technique. Migration refers to generating a database table whose structure matches the data model declared in the app.
The following command should be run whenever a new model is declared.
python manage.py makemigrations
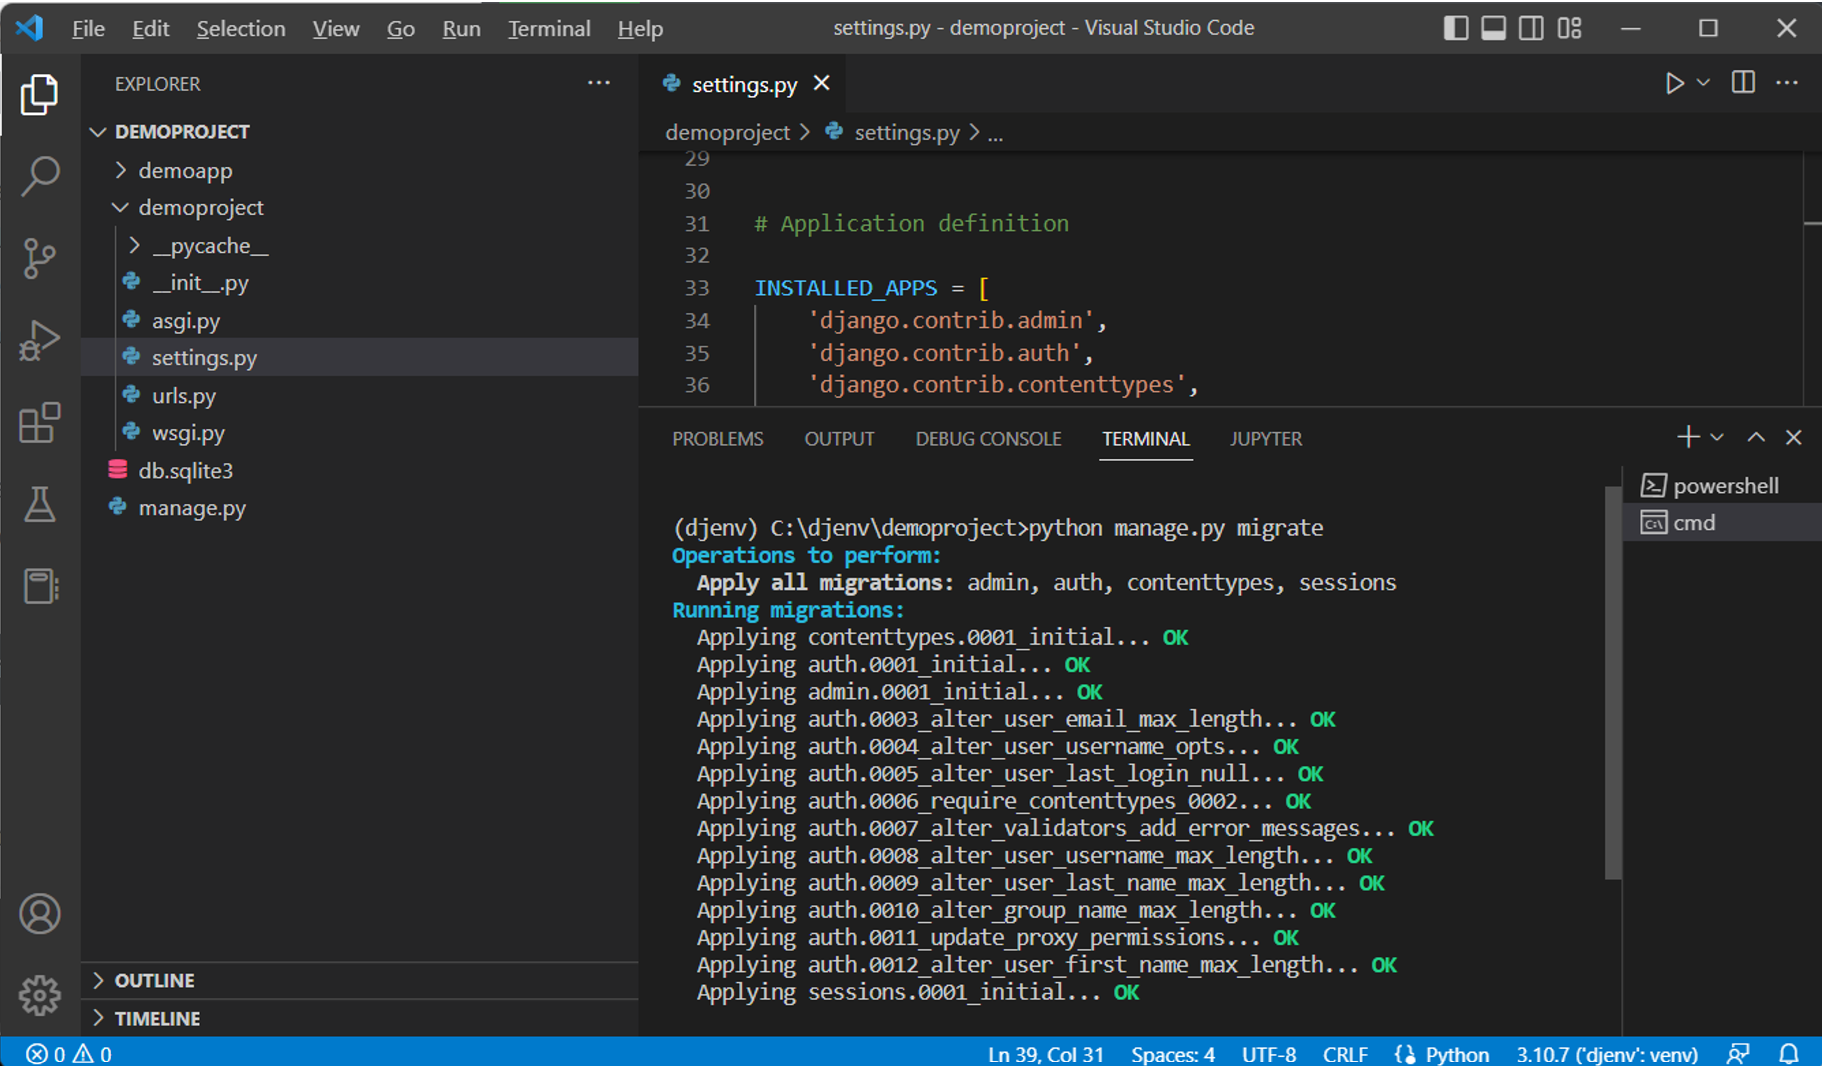
migrate
This command option of manage.py synchronizes the database state with the currently declared models and migrations.
python manage.py migrate
runserver
This command starts Django’s built-in development server on the local machine with IP address 127.0.0.1 and port 8000.
python manage.py runserver
It helps if you don’t use this development server in the production environment.
Shell
This command opens up an interactive Python shell inside the project. This is useful when you are required to perform some quick interactive operations.
python manage.py shell
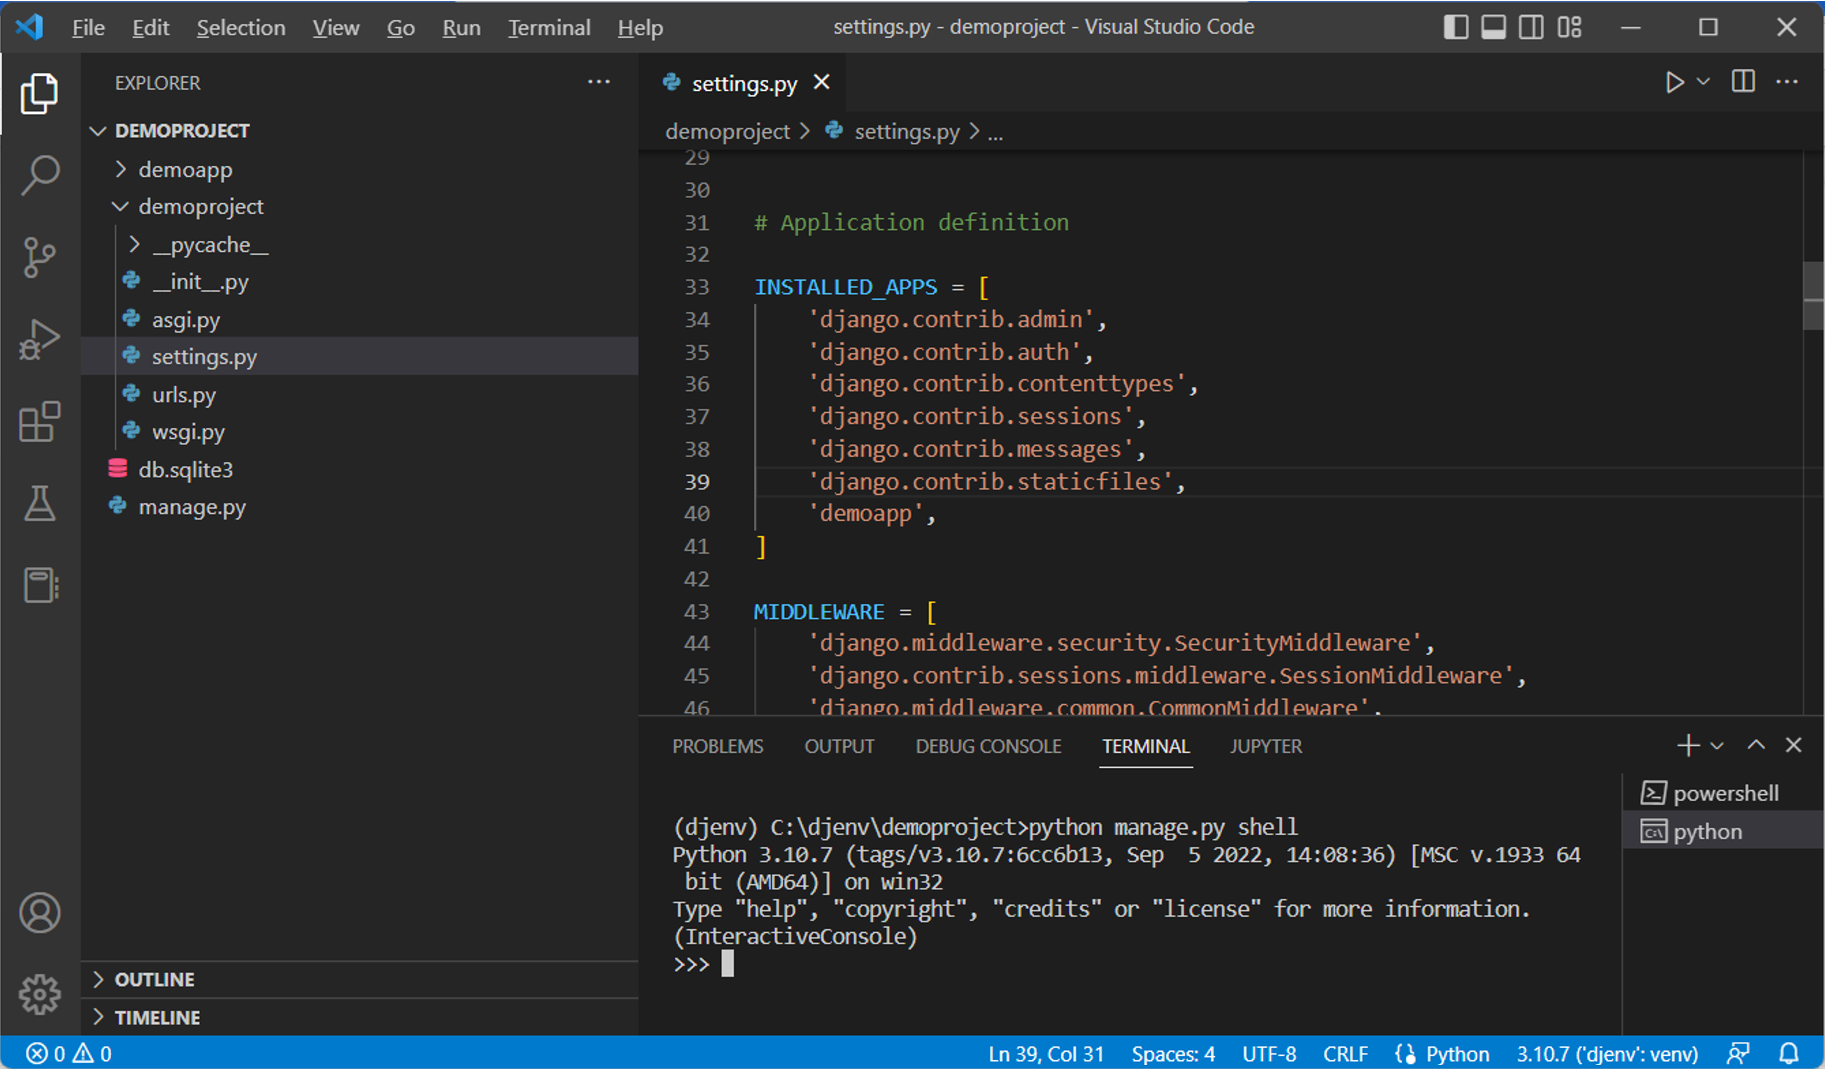
Django prefers IPython if it is installed over the standard Python shell.
Project package
The startproject command option of the Django-admin utility creates the folder of the given name, inside which there is another folder of the same name. For example, the command:
django-admin startproject demoproject
This creates a demoproject folder, inside which there’s another demoproject folder.
The inner folder is a Python package. For a folder to be recognized by Python as a package, it must have a file __init__.py. In addition, the startproject template places four more files in the package folder.
settings.py
Django configures specific parameters with their default values and puts them in this file.
The django-admin utility and manage.py script use these settings while performing various administrative tasks.
urls.py
This script contains a list of object urlpatterns. Every time the client browser requests a URL, the Django server looks to match its pattern and routes the application to the mapped view.
The default structure of urls.py contains a view mapped to the project’s Admin site.
from django.contrib import admin
from django.urls import path

 urlpatterns = [
    path('admin/', admin.site.urls),
]
asgi.py
This file is used by the application servers following the ASGI standard to serve asynchronous web applications.
wsgi.py
Many web application servers implement the WSGI standard. This script is the entry point for such WSGI-compatible servers to serve your classical web application.
settings.py
This file defines the attributes that influence the function of a Django application. The startproject template assigns some default values to these attributes. They may be modified as per requirement during the use of the application.
Let us explain some critical settings.
INSTALLED_APPS
This is a list of strings. Each string represents the path of an app inside the parent project folder. The startproject template installs some apps by default. They appear in the INSTALLED_APPS list.
INSTALLED_APPS = [
    'django.contrib.admin',
    'django.contrib.auth',
    'django.contrib.contenttypes',
    'django.contrib.sessions',
    'django.contrib.messages',
    'django.contrib.staticfiles',
]
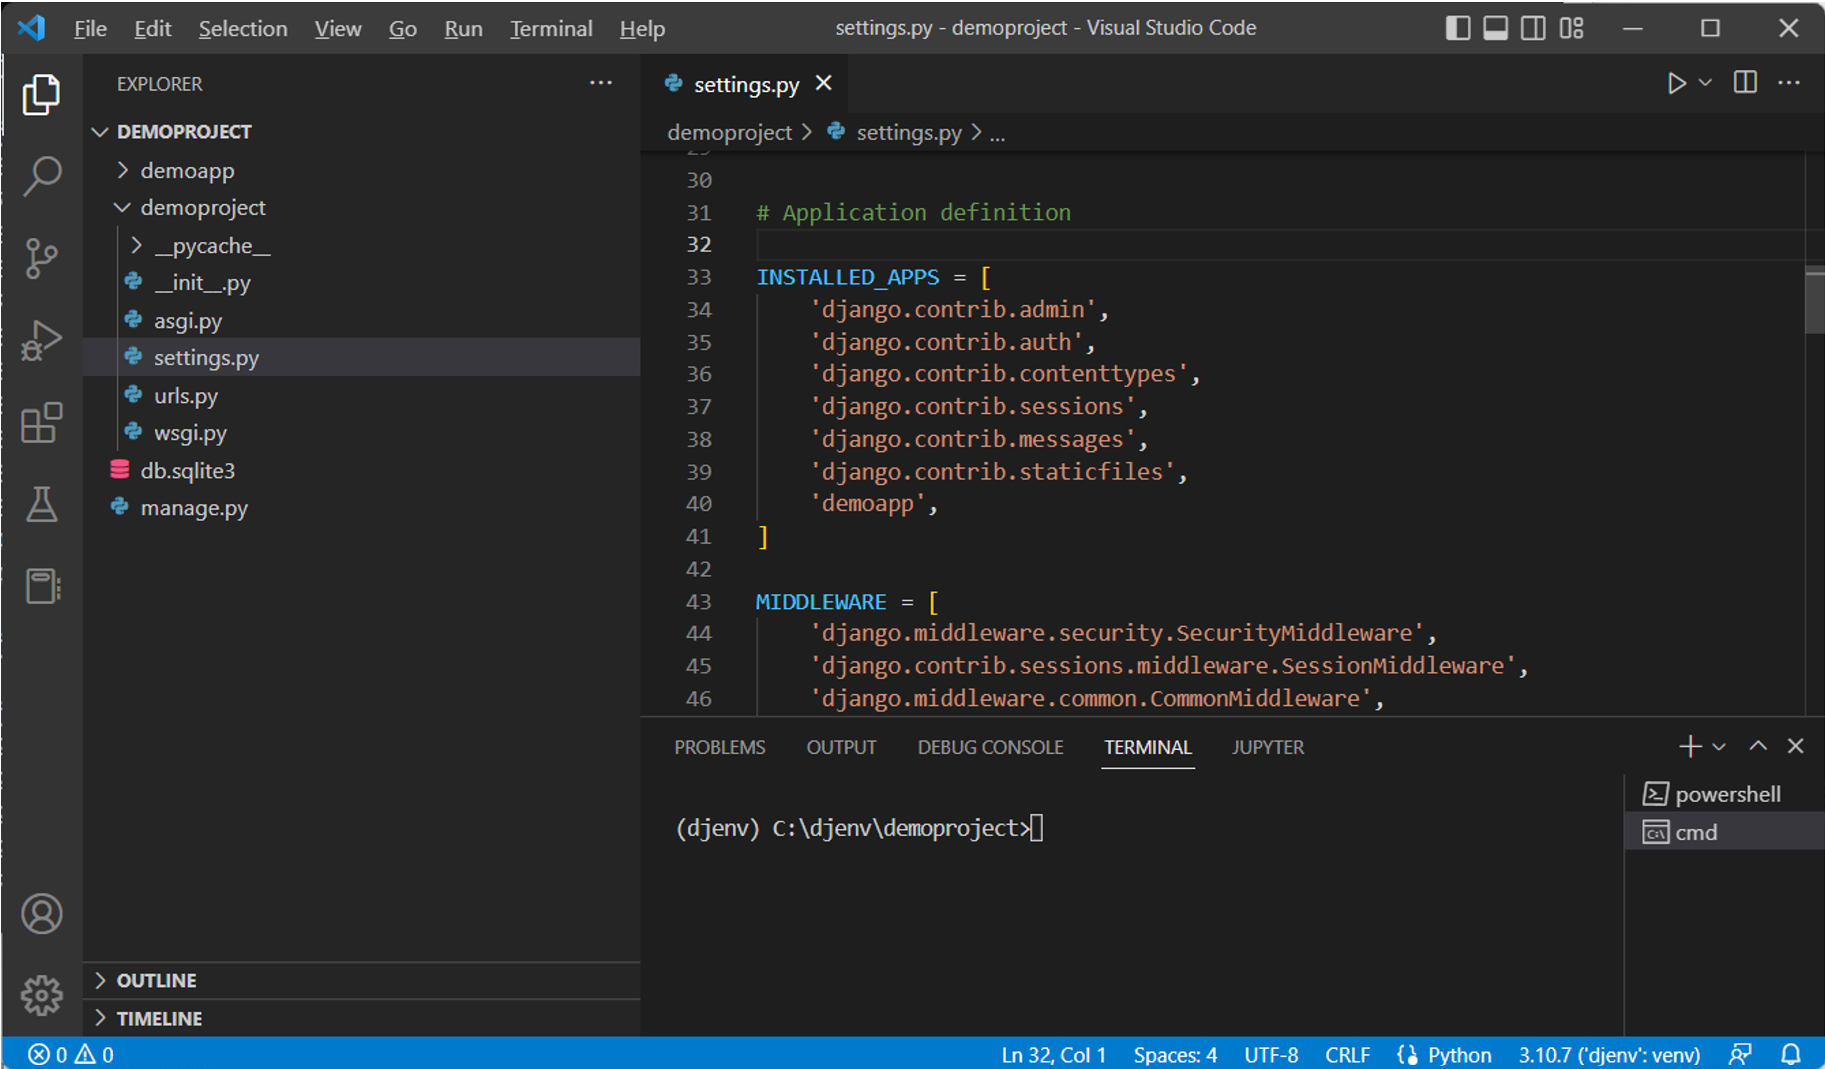
This list must be updated by adding its name whenever a new app is installed.
For example, if we create a demoapp with the following command:
python manage.py startapp demoapp
Then, add the ‘demoapp’ string inside the INSTALLED_APP list.
Databases
This attribute is a dictionary that specifies the configuration of one or more databases to be used by the current Django application. By default, Django uses the SQLite database. Hence, this setting has a pre-defined configuration for it.
DATABASES = {
    'default': {
        'ENGINE': 'django.db.backends.sqlite3',
        'NAME': BASE_DIR / 'db.sqlite3',
    }
}
The default name of the SQLite database is db.sqlite3, which is created in the parent project folder.
In place of SQLite, you may choose to use any other. For example, for MySQL, the database settings could be as follows:
DATABASES = {
    'default': {
        'ENGINE': 'django.db.backends.mysql',
        'NAME': 'djangotest',
        'USER': 'root',
        'PASSWORD': 'password',
        'HOST': '127.0.0.1',
        'PORT': '3306',
    }
}
Note here the default port number for MySQL is 3306 as against the default port number 8000 used with SQLite in Django.
DEBUG = True
By default, the development server runs in debug mode. This helps develop the application as the server picks up changes in the code and the output can be refreshed without restarting. However, it must be disabled in the production environment.
ALLOWED HOSTS
This attribute is a list of strings. By default, it is empty. Each string represents the fully qualified host/domain where this Django site can be served. For example, to make the site running on localhost externally visible, you may add 0.0.0.0:8000 to this list.
ROOT_URLCONF
This setting is a string pointing toward the urls.py module in which the project’s URL patterns are found. In this case, it would be:
ROOT_URLCONF = 'demoproject.urls'STATIC_URL
This setting points to the folder where the static files, such as JavaScript code, CSS files and images, are placed. Usually, it is set to ‘static/’ corresponding to the folder of this name in the parent project folder.
Test the installation
After creating the project, to verify that it is built correctly, start the development server with the following command while remaining in the project’s parent folder:
python manage.py runserver
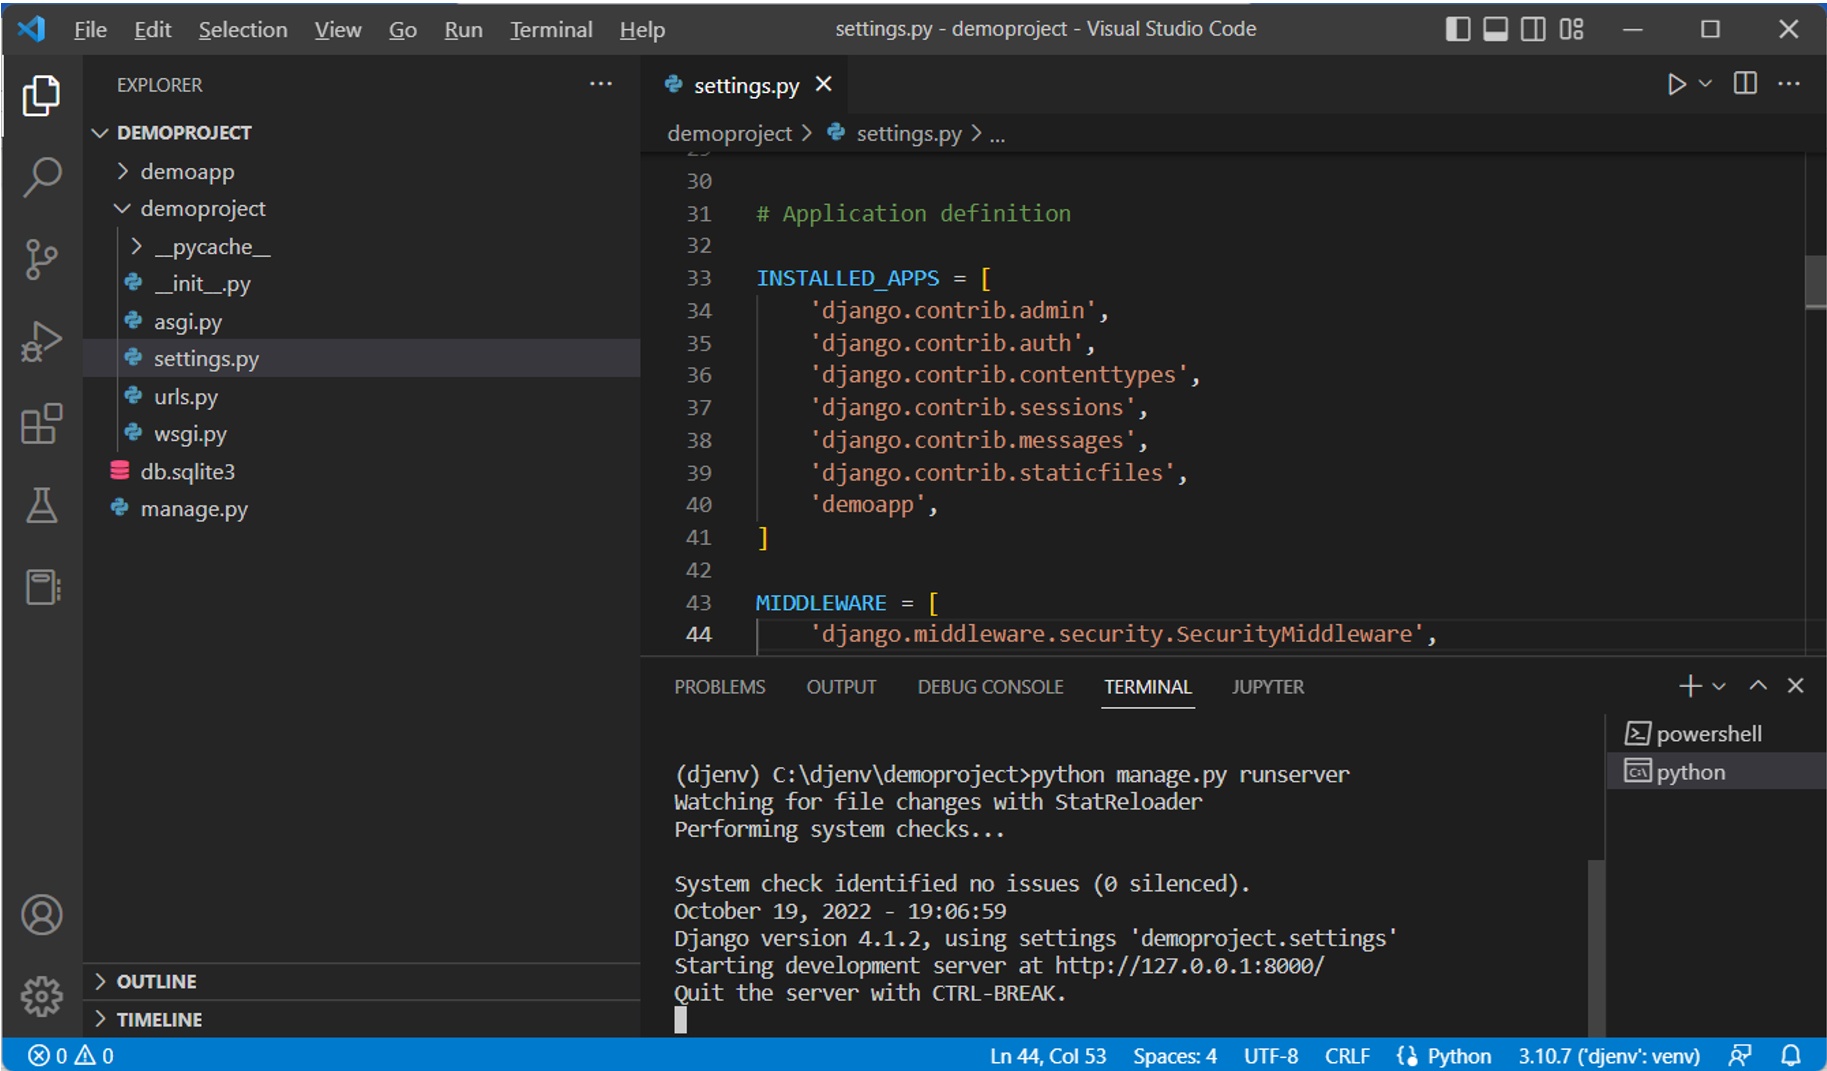
The server starts running at port 8000 of the localhost with IP address 127.0.0.1. Open the browser and enter http://127.0.0.1:8000/.
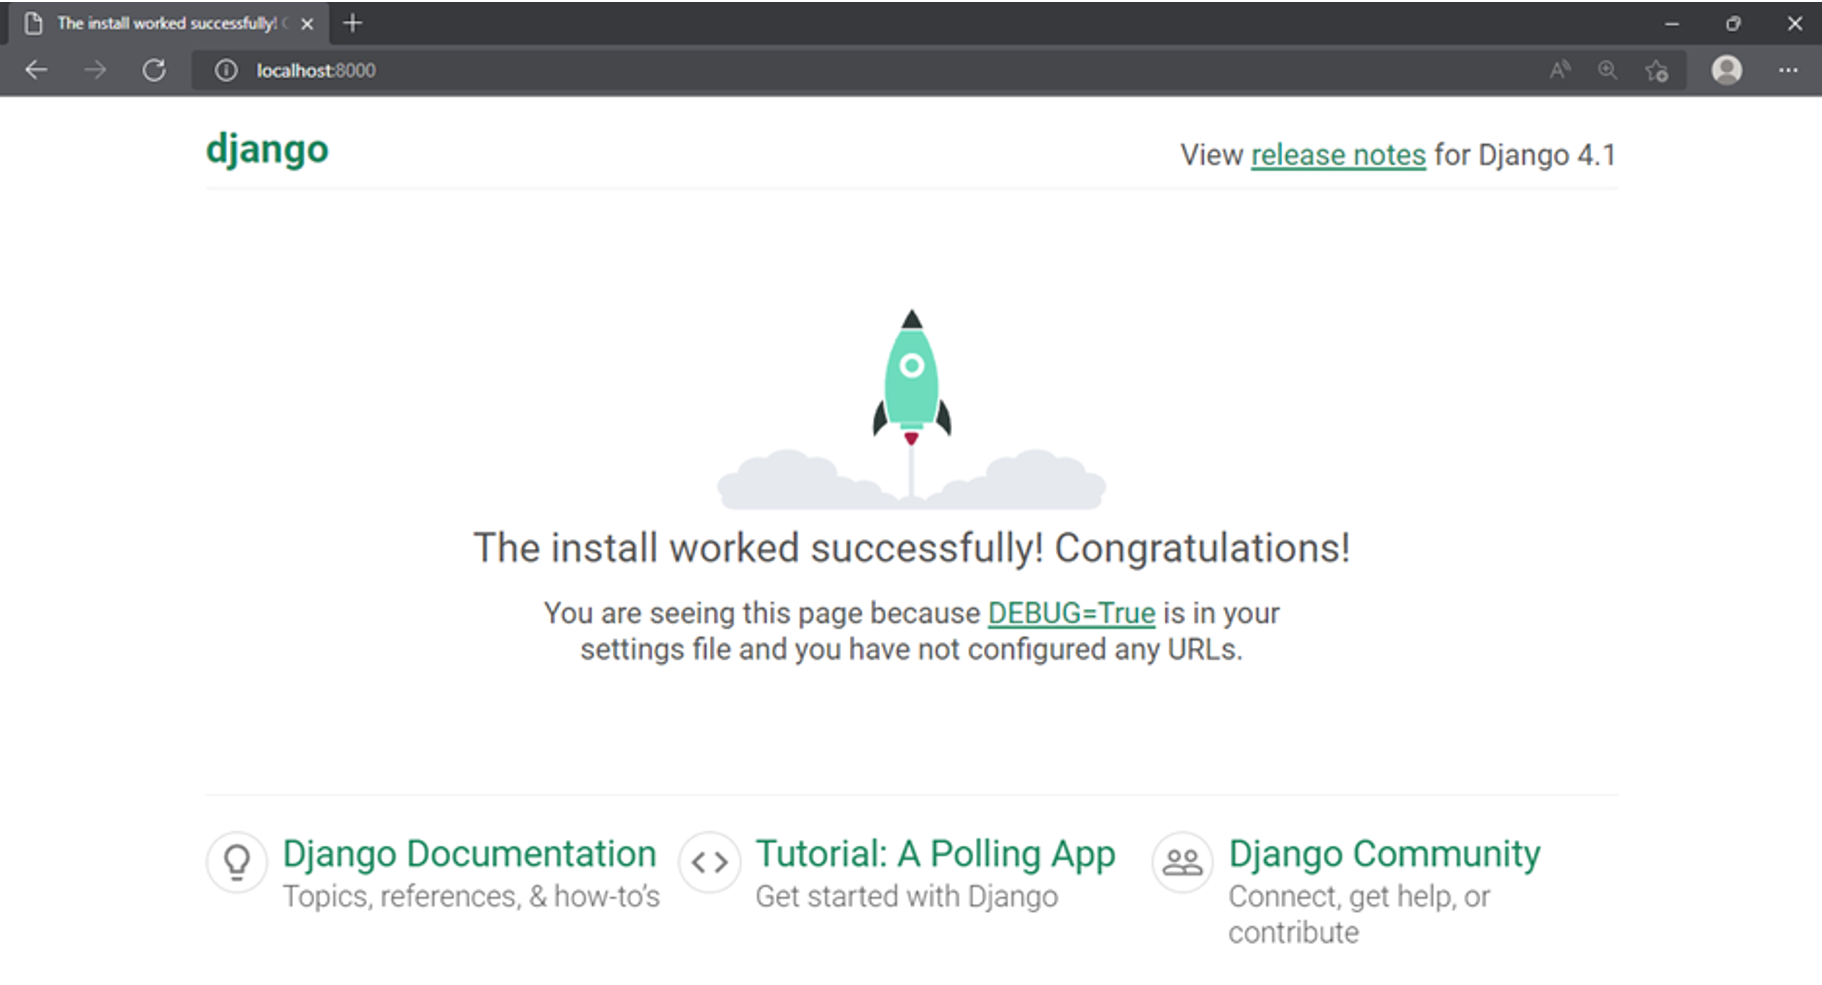
If you get this output, the project has been created successfully.
In this reading, you learned how to create a Django project. The file structure of the project has also been explained here. In the end, the installation of the project has been successfully verified.
[Creating your first project](# Creating your first project)
Virtual Environment
If you are a Python developer working on multiple projects, It’s best practice to keep your projects isolated in a virtual environment.
Django projects can often be quite large and involve specific dependencies for things like packages. For example you could have a package that has a dependency on a specific version. You do not want this conflicting with your other Python or Django projects so it’s best to keep your projects isolated using a virtual development environment.
Virtual environments are isolated spaces you create to manage dependencies and the overall project. This allows you to keep features such as the interpreter, libraries and scripts isolated and installed for a specific project.
Development Server
In addition to the functionalities provided, Django also comes with an integrated development server. This means that the application has a request response relationship with a client.
Project
Your project is an organizational unit that consists of settings and database information. It can be stored anywhere on your development computer but as a best practice, it’s best to keep it in a sub-folder with all your other Django applications.
mkdir buildDjango
cd buildDjango
python3 -m venv tutorial-env
source tutorial-env/bin/activate
Now with the virtual environment being set up, install django:
pip3 install django
python3 -m django version
Build a project using the django built-in command-line tools:
django-admin startproject ProjectName
manage.py
Recall that manage.py is a command line utility that works like the Django admin command. You can replace the Django admin command with manage.py as it uses the project settings.
Now launch the server:
python3 manage.py runserver
NOTE
You can even omit the use of a virtual environment if you wish but this is not recommended.
Previous one → 1.Course Introduction | Next one → 3.Admin and structures