Recap: What you know about forms and ModelForms
Fetching data using JavaScript
JavaScript, as you have learned, is a scripting language that dynamically updates data, multimedia and other components on a website. While you can use JavaScript and Django in the infinite number of ways to develop a full stack application, developers primarily follow one of two major approaches. Client-first or server-first.
Client-first
In-client first architecture, front end is the highest priority. When following this architecture, you first build applications using JavaScript and other frameworks such as React and processes such as templating and URL routing.
Django is then later used primarily for coding the interaction with the database and utilizing utility apps such as the DRF.
Server-first
On the other hand, with server-first architecture, you start by building the components of an application using Django APIs before you work with the front end.
Fortunately, Django makes it possible to add JavaScript components inside HTML templates. The missing gaps can then be filled using JavaScript, AJAX, and simple event handling mechanisms to build a solid foundation for web applications.
A back end developer will prefer taking a server-first approach. While there are several supportive libraries for JavaScript, you can build a simple form by just using the native JavaScript functionalities.
Creating comment section following Server-first approach
Outline of the process
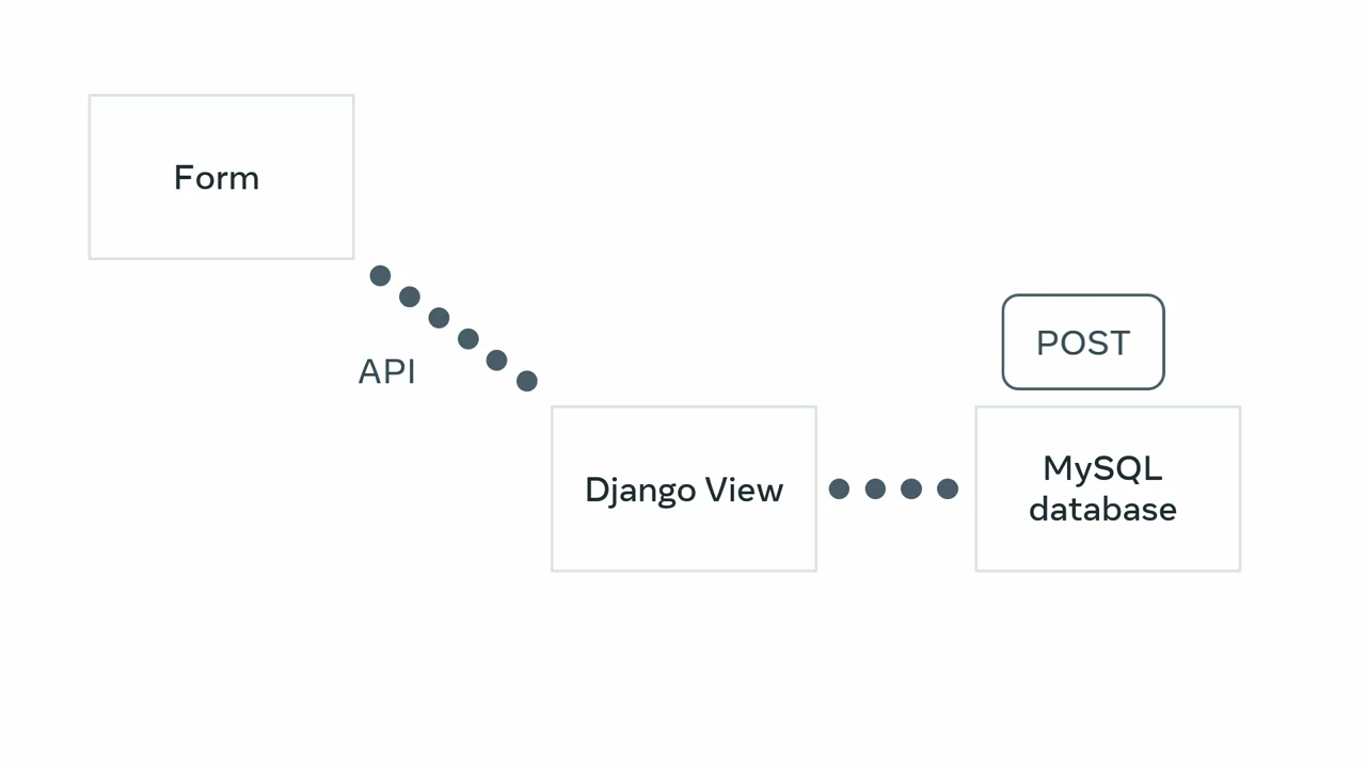
The form will be updated by an API endpoint which uses a post method to send a request to the Django view.
The entered user data or comment is then added to a MySQL database which was created earlier using models in Django.

So, using the DOM event type in JavaScript called addEventListener and fetch API in JavaScript, you make a POST request to the forms action URL before converting it into JSON data and sending it to the database.
You have created your Django project an app and configured the URLs. Additionally, you have already updated database settings for MySQL inside the settings.py file with blog_db as your database name. You have set the user name and password to root for simplicity. It is not good practice to assign them the root value in production environments.
# models.py

from django.db import models

class UserComments(models.Model):
	first_name = models.CharField(max_length = 200)
	last_name = models.CharField(max_length = 200)
	comment = models.CharField(max_length = 1000)
# forms.py
from django import forms
from .models import UserComments
class CommentForm(forms.ModelForm):
class Meta:
model = UserComments
fields = '__all__'You’re going to use this view function for two things, rendering and processing the form data and then sending it to your model.
# views.py

from django.shortcuts import render
from myapp.forms import CommentForm
from .models import UserComments
from django.http import JsonResponse

def form_view(request):
	form = CommentForm()

	if request.method == 'POST':
		form = CommentForm(request.POST)
		if form.is_valid():
			cd = form.cleaned_data
			uc = UserComment(
				first_name = cd['first_name'],
				last_name = cd['last_name'],
				comment = cd['comment'],
			)
			uc.save()
	return render(request, 'blog.html', {'form': form})
Create a templates folder in the app directory and make a blog.html in it.
<!doctype html>
<html lang="en">
<head>
	 <!-- Required meta tags -->
	 <meta charset="utf-8">
	 <meta name="viewport" content="width=device-width, initial-scale=1, shrink-to-fit=no">

	<!-- Bootstrap CSS -->
	<link rel="stylesheet" href="https://stackpath.bootstrapcdn.com...">
	<title>Comment Section</title>
</head>
<body class="bg-light">
<div class="container pt-4">
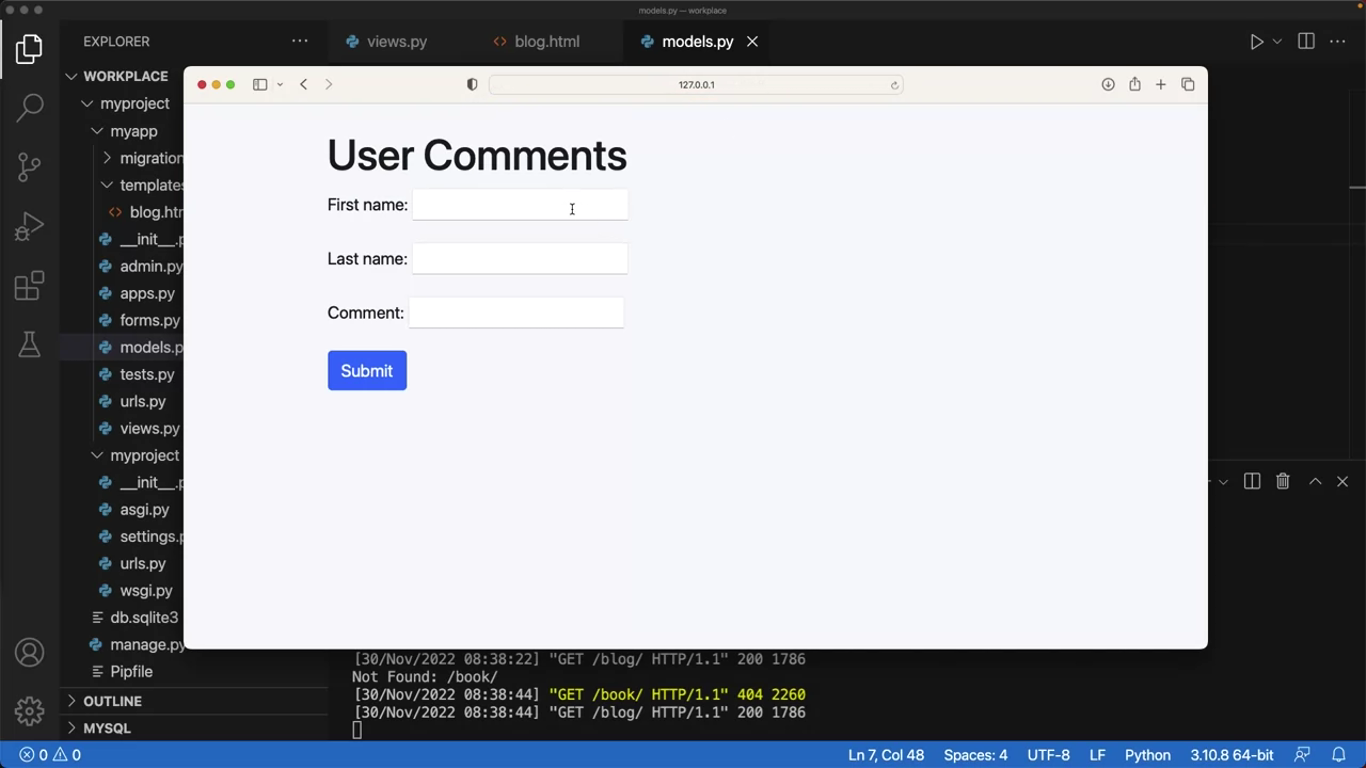
	<h1>User Comments</h1>
	<form method="POST" id="form">
		{% csrf_token %}
		{{ form.as_p}}
		<button type="submit" class="btn btn-primary">Submit</button>
	</form>
</div>

<script>
	const form = document.getElemetById('form');
		form.addEventListener("submit", submitHandler);

		function submitHandler(e){
			e.preventDefault();

			fetch(form.action, {method: 'POST', body: new FormData(form)})
			.then(response=>response.json())
			.then(data=>{
				if (data.message === 'success'){
					alert('Success');
					form.reset()
				}
			})
		}
</script>
</body>
</html>
Call the fetch function and pass some arguments inside it. This line makes a POST request to the form’s action URL. The dot that follows is a promise made by the fetch function that represents an eventual completion of an operation that may be a synchronous.
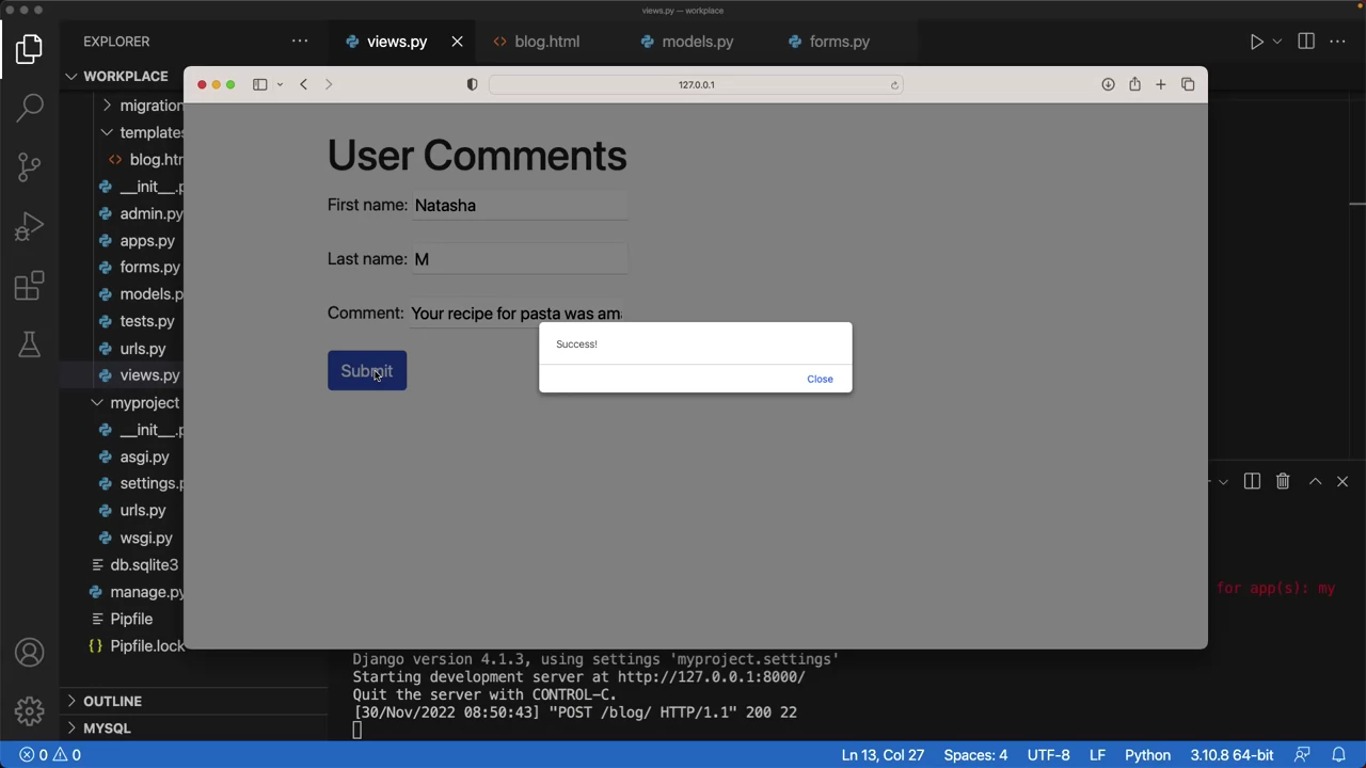
Inside it, pass the response object that is first converted into JSON. In the next dot then function the JSON data gets processed. If the processing is completed, JavaScript will send a successful submission alert. Finally, add a line to reset the form after submission.
# views.py

from django.shortcuts import render
from myapp.forms import CommentForm
from .models import UserComments
from django.http import JsonResponse

def form_view(request):
	form = CommentForm()

	if request.method == 'POST':
		form = CommentForm(request.POST)
		if form.is_valid():
			cd = form.cleaned_data
			uc = UserComment(
				first_name = cd['first_name'],
				last_name = cd['last_name'],
				comment = cd['comment'],
			)
			uc.save()
			return JsonResponse({'message': 'success'})
	return render(request, 'blog.html', {'form': form})
python manage.py makemigrations
python manage.py migrate

Querying APIs using JavaScript
Introduction
After the lesson on JavaScript you know you can do exciting things with it. You can use it for client-side programming, to make a web application interactive or to send and receive data from the server. JavaScript really is the default choice when it comes to front-end programming.
But it can also be used for back-end purposes and in this reading you will learn how to use JavaScript to fetch and send data to an API using the native fetch function.
Native solution versus third-party libraries
When it comes to fetching data from APIs you might ask yourself, should I use the native fetch function XMLHttpRequest object, or should I go with libraries like jQuery or Axios? Let’s contextualize the question with some background information.
Previously, fetching data from APIs with XMLHttpRequest object was difficult because you have to write quite a lot of code to make a simple request. But, at the time, there was no alternative option. Then came third-party libraries that work as a wrapper around XMLHttpRequest and which provide a simpler interface. These libraries quickly became popular. Later versions of JavaScript came with another native API called fetch, which is powerful, simple and easy to use.
Though using the fetch API is easy, you still have to manually adjust a few things and write extra code for error checking and header processing. This is why libraries like Axios are still popular because they provide a simpler interface and automatically take care of a lot of issues so that you don’t have to write so much code. Ultimately, you can use either the native fetch API or Axios library. Both are viable options since both solve the problem of fetching data from APIs in a straightforward manner.
Now let’s explore how you can make GET, POST, PUT, PATCH and DELETE calls using the fetch API and how to make authenticated calls using tokens.
Making a GET call
Placing a GET call using fetch is simple. All you have to do is make the call, convert the response to JSON or text and then process it any way you want. Here is the output from the menu-items endpoint of the Little Lemon restaurant app that was used in the course on APIs. Use the following code to make a GET call to this endpoint:
fetch('http://127.0.0.1:8000/api/menu-items')
    .then(response => response.json())
    .then(data => {
        console.log(data)
    })
POST, PUT and PATCH Calls
How do you make a POST call with data using the fetch API? You have to convert the JSON payload that contains all the data to a string using the JSON.stringify() function and pass it as body in the second argument to the fetch function. It’s also a good practice to add Accept and Content type headers while making the API calls.
Here is the sample code that creates a new menu item by making a POST call to the http://127.0.0.1:8000/api/menu-items endpoint.
const payload = {
    "title": "Ambrosia Ice cream",
    "price": 5.00,
    "inventory": 100
}
const endpoint = 'http://127.0.0.1:8000/api/menu-items'
fetch(endpoint,
    {
        method: 'POST',
        headers: {
            'Accept': 'application/json',
            'Content-Type': 'application/json'
        },
        body: JSON.stringify(payload)
    })
    .then(response => response.json())
    .then(data => {
        console.log(data)
    })
For PUT and PATCH calls, you just change the method from POST to PUT or PATCH. These requests typically operate on a single resource, which is identified by including an ID in the URL. Everything else remains the same.
DELETE calls
For DELETE calls, change the method to DELETE and that’s all. In most cases, there is no body passed to a DELETE call. Here’s the code for a sample DELETE call to the menu-items endpoint:
const endpoint = 'http://127.0.0.1:8000/api/menu-items/17'
fetch(endpoint,
    {
        method: 'DELETE',
        headers: {
            'Accept': 'application/json',
            'Content-Type': 'application/json'
        }
    })
    .then(response => response.json())
    .then(data => {
        console.log(data)
    })
Making authenticated calls with tokens
If you want to make authenticated API calls using bearer tokens, pass the Authentication header in the second argument in the fetch function. Here is an authenticated POST call. Note how the bearer token is passed in the header section.
const endpoint = 'http://127.0.0.1:8000/api/menu-items/17'
const token = “Some token”
fetch(endpoint,
    {
        method: 'POST',
        headers: {
            'Accept': 'application/json',
            'Content-Type': 'application/json',
            'Authentictation': 'Bearer ' + token
        },
        body: JSON.stringify(payload)
    })
    .then(response => response.json())
    .then(data => {
        console.log(data)
    })
You can do the same for GET calls as well.
Conclusion
In this reading, you learned about making API calls in JavaScript using the native fetch function and how to process the response. You also learned how to send a JSON payload to make POST, PUT and PATCH calls.
Exercise: Submitting a form with JavaScript
Lab assets
You are provided with a basic setup for a Django environment for the project and app inside the zip file below.
The zip file contains a template to be used along with supportive files to run the lab.
Note that the virtual environment using pipenv has been added as a part of the zip file. You must activate the virtual environment and ensure dependencies are installed.
Objectives
- Set up a JavaScript event to submit form data as a JSON object
- Display a successful form submission alert using JavaScript
Introduction
Your goal is to submit form data as a JSON object using JavaScript event handling and display submission alert.
Initial lab instructions
This lab will require you to modify the following files:
- views.py
- templates/feedback.html
Starter code has already been added to the following files:
- settings.py
- forms.py
- models.py
- urls.py (app-level)
- urls.py (project-level)
Additionally, you are required to use the command line console inside the terminal of VS Code.
If not open already, go to Terminal on the Menu bar at the top of your screen and select New Terminal.

The project named myproject and an app inside the project called myapp are preconfigured.
Follow the instructions below and ensure you check the output at every step.
Note: Make sure you have installed MySQL on your local machine and that you have set up the root user. In this lab, to keep it simple, you are going to begin with the root user credentials. The root user by default has the password which is either password or <blank>__. In case of a blank password, simply press Enter__. Also, note that the password won’t be visible as it’s being typed.
Steps
Step 1:
Open the file settings.py and double-check that the configurations in place for MySQL match the local machine. Create the database name present inside the file to your local machine if not already present. If not added, Django will throw an error.

Note: Before you deal with the database, make sure the user created for the database and added inside the settings.py file in Django has all the privileges required for accessing and modifying the database.
Run the necessary commands to make sure the user is created and can access the database.
Step 2:
Open the file models.py and observe the model created for the lab. Now open the file forms.py and note the form created for the purpose of the lab. Take note that form fields present inside both the form and the model are the same. You will understand the reasons for this shortly.
Note: There are easier ways of creating forms from a model using Meta class. The code added here is for clarity.
Step 3:
Run the following command to activate the virtual environment:
pipenv shell
Note: Make sure you run this command in the main working directory containing the manage.py file.
Step 4:
To make sure you have the necessary dependencies in place, run the command inside pipenv:
pipenv install django
pipenv install mysqlclient
Step 5:
Now run both commands to perform migrations.
Note: Make sure you are inside the directory that contains manage.py file.
On running migrations, you may encounter an error such as the one below:

If this happens, there is a conflict in the rows present inside your table from your earlier migration. The easy solution is to select option 1 and provide a one-off value such as null as a string.
Step 6:
Open the file views.py to create a configuration for the template you want to create.
The necessary imports are already added and the view function called form_view() is created.
Follow the steps below to implement the pseudo code and add the code inside the view function:
- if value of
request.methodis‘POST’- assign value of
MenuForm(request.POST)to a variable calledform - if
form.is_valid()- assign value of
form.cleaned_datato a variable calledcd - assign the value of
Menu()to a variable calledmfand pass the following arguments inside it:item_name = cd[‘item_name’]category = cd[‘category’]description = cd[‘description’]
- initialize the
save()function on the object variable mf - return
JsonResponse({‘message’ : ‘success’})
- assign value of
- assign value of
- return
render()function with following arguments passed inside it:request‘menu_items.html’{‘form’: form}
Save the views.py file and ensure the code has no errors.
Note: The template name does not have to be the same as the database name which in this case is menu_items.
Step 7:
Open the menu_items.html file and add the following starter code inside it:
<!doctype html>
<html lang="en">
<head>
    <!-- Required meta tags -->
    <meta charset="utf-8">
    <meta name="viewport" content="width=device-width, initial-scale=1, shrink-to-fit=no">

    <!-- Bootstrap CSS -->
    <link rel="stylesheet" href="https://stackpath.bootstrapcdn.com/bootstrap/4.4.1/css/bootstrap.min.css"
          integrity="sha384-Vkoo8x4CGsO3+Hhxv8T/Q5PaXtkKtu6ug5TOeNV6gBiFeWPGFN9MuhOf23Q9Ifjh" crossorigin="anonymous">

    <title>Menu Items </title>
</head>
<body class="bg-light">
<div class="container pt-4">
    <h1>Menu Items </h1>
    <form method="POST" id="form">
        {% csrf_token %}
        {{ form.as_p }}
        <button type="submit" class="btn btn-primary">Submit</button>
    </form>
</div>
Note: Pay attention to the Bootstrap added as a part of the HTML code inside your template.
Step 8:
Below the code added, you will add a code for the <script> tag. Make sure you also add the closing tag for the script tag.
Step 9:
The code for enabling the JavaScript functionality is written inside the script tag. Follow the pseudo-code below and add the JavaScript code inside the enclosing <script> tags:
Note: Make sure you add a semi-colon (;) after each line of code. Unlike Python, JavaScript requires a semi-colon to end a code block.
Create a constant called form using the keyword const and assign it the value of document.getElementbyId(‘form’);.
Call the addEventListener() over the form variable by using the dot operator and pass the following arguments inside it:
“submit”submitHandler
Create a function called submitHandler() using the keyword function and pass the variable called e to it as an argument.
- Add the following code inside the function:
e.preventDefault()fetch()function with following arguments passed inside it:form.action- dictionary with following two key-value pairs:
- method:
‘POST’ - body:
new FormData(form)
- method:
- add
.then()function and the following code inside it:response=>response.json()
- add
.then()function and the following argument inside it:
.then(data=>{
                if (data.message === 'success') {
                    alert('Success!');
                    form.reset()
            }
        });
Make sure the code has no errors and save the menu_items.html file.
Step 10:
Add a command to run the server and go to the localhost URL. Observe the web page that renders the form.
Step 11:
Add one random item with the item name, category and description in the form. On entering the form data and pressing the submit button, observe that the Success! message is displayed as an alert in your browser. Repeat this process for the other entries.
Step 12:
In the terminal, run the command that will enable access to mysql and enter the mysql shell by passing the -u and -p flags that will enable the MySQL console to prompt for a password.
Note: The password set for mysql here will be the same as set for root.
Step 13:
Run the commands to enter the database you have created for your Django project and enter the table name myapp_menu that is generated.
Run the command to observe if the database entry you have created inside the form has been added inside the database.
Alternatively, you can also use a third-party database tool for MySQL to observe the contents of the database.
Note: You will not see any entry in the table if it is empty and the code will need to be updated accordingly.
Conclusion
In this lab, you have learned how to set up JavaScript events to submit to form data as a JSON object and display an alert on successful form submission.
Solution: Submitting a form with JavaScript
Commands to activate and install the virtual environment
pipenv shell

pipenv install django
pipenv install mysqlclient
Commands to perform migrations and run server
python3 manage.py makemigrations

python3 manage.py migrate

# Command to run the server

python3 manage.py runserver
views.py
from django.shortcuts import render
from myapp.forms import MenuForm
from .models import Menu
from django.http import JsonResponse

def form_view(request):
    form = MenuForm()

    if request.method == 'POST':
        form = MenuForm(request.POST)
        print(request.POST)
        if form.is_valid():
            cd = form.cleaned_data

            lf = Menu(
                item_name = cd['item_name'],
                category = cd['category'],
                description = cd['description'],
            )

            lf.save()
            return JsonResponse({
                'message': 'success'
            })
    return render(request, 'booking.html', {'form': form})
templates/booking.html
<!doctype html>
<html lang="en">
<head>
    <!-- Required meta tags -->
    <meta charset="utf-8">
    <meta name="viewport" content="width=device-width, initial-scale=1, shrink-to-fit=no">

    <!-- Bootstrap CSS -->
    <link rel="stylesheet" href="https://stackpath.bootstrapcdn.com/bootstrap/4.4.1/css/bootstrap.min.css"
          integrity="sha384-Vkoo8x4CGsO3+Hhxv8T/Q5PaXtkKtu6ug5TOeNV6gBiFeWPGFN9MuhOf23Q9Ifjh" crossorigin="anonymous">

    <title>Menu Items</title>
</head>
<body class="bg-light">
<div class="container pt-4">
    <h1>Menu Items</h1>
    <form method="POST" id="form">
        {% csrf_token %}
        {{ form.as_p }}
        <button type="submit" class="btn btn-primary">Submit</button>
    </form>
</div>


<script>
    const form = document.getElementById('form');
    form.addEventListener("submit", submitHandler);

    function submitHandler(e) {
        e.preventDefault();

        fetch(form.action, {method:'POST', body: new FormData(form)})
        .then(response=>response.json())
        .then(data=>{
                if (data.message === 'success') {
                    alert('Success!');
                    form.reset()
            }
        });
    }

</script>
</body>
</html>
Additional resources
The following resources will be helpful as additional references in dealing with different concepts related to the topics you have covered in this section.
FormDRFDjangoFront-endBack-endFull-stackJavaScriptHTMLHTTP
Previous one → 6.Django and MySQL | Next one → 8.Web server environments
