Recap: What you know about Django
Recap: What you know about APIs
Environment check
Introduction
If you set up your full stack development environment with the right tools, you can use your time more effectively during the development process. By using effective tools, you can make the development process fast and fun. This reading will introduce you to some essential tools for full stack development.
The terminal
In full stack development, you must familiarize yourself with using terminals and command-line tools. This is where you can run commands to build Django projects, manage builds and communicate with your server and the database. If you are not using the terminal, you can’t use Django, install the dependencies or use JavaScript to properly build tools. In macOS and Linux, you can use the app called terminal and in Windows, you use PowerShell for this purpose.
Django specific tools
By now you should know that when using Django for your project, it’s always a good idea to avoid using global environments to manage your package dependencies. Pipenv is a fantastic command line tool that only manages your dependencies but also does so in a virtual environment, avoiding any possible conflicts between the packages. Download it from the Pipenv website.
Database
While Django can use SQLite, a file-based database system, it can work with many others. And MySQL and MariaDB are some of the most popular and widely used database engines by developers worldwide. You can install MySQL on your machine using the installer from their website or using the package managers available for your operating system.
Editor
A good code editor can really speed up your development by providing essential features like debuggers, quick refactoring and syntax highlighting. Additionally, there are many add-ons or extensions that you can install which provide even more functionalities. Visual Studio Code is a great editor that has everything you need to start developing in different programming languages. And the best part is, it’s free. Download VS Code here.
API testing
To test the APIs that you build, you need a REST API client to make different API calls and send JSON or form URL encoded payloads and headers. Postman, Insomnia, and HTTpie are three popular REST clients you can use for free. They are cross-platform and very user-friendly. Here are a few helpful links to get you started with API testing:
- Postman API platform for building and using APIs
- Postman Echo service to test REST clients and make sample API calls
- Insomnia homepage
- Getting started with Insomnia
- Httpbin HTTP request and response service
Version control
An effective version control system is a must-have for any full stack developer. Using a version control system like Git, you can maintain different versions of your code and you can also roll back to any particular state in the past at any time. Fortunately, these days version control systems are integrated with the build tools.
Front-end tools
When using front-end frameworks like React, you need Node.js installed on your system to access it from the command line. You also need a package manager like NPM or Yarn to deal with the dependencies and a build tool like Vite.jsor Webpack to build the production version of your code. These days, Vite is a popular and fast building tool you can use for free.
Conclusion
With the proper development environment, you can make your development journey really enjoyable and productive. The correct tools help you to write quality code fast and avoid common errors. In this reading, you learned what tools you should have in your toolbelt to become an excellent full stack developer.
Optional: Creating a Django project (steps and code)
Introduction
This reading will give you an overview of the steps you should take when creating a Django project while working with VS Code and using pipenv as your virtual environment. The project structure can be vary according to your preferences, but the one suggested is easy to use.
Note: The instructions in this reading may vary slightly from the instructions in the video about creating a Django project because the video presumes a preconfigured Pipfile.
Note: The commands added below are specific to MacOS. The learner will have to make OS specific changes such as using keyword python instead of python3 for Windows OS.
Step 1
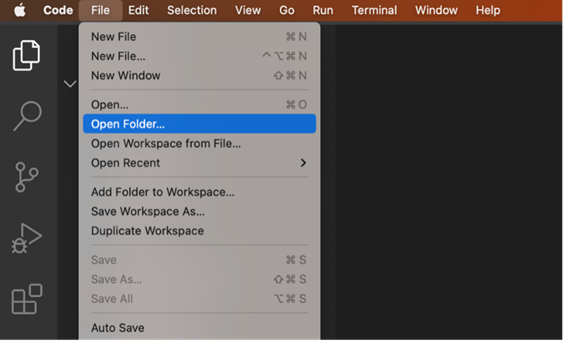
Open VS Code on your computer and click on File. In the drop-down menu select Open Folder and select the folder you have created for the project.

Now click on Terminal and select New Terminal from the drop-down menu. This is the main folder that contains all your files for the Django project you are going to create.
Step 2
Create a directory for the Django project by running the following command:
mkdir LittleLemon
Step 3
Step inside the LittleLemon directory with the command:
cd LittleLemon
Step 4
Run the following command to create a project in this directory:
django-admin startproject myproject .
Note: You can run the command above without using the dot(.) at the end. However, the relative position of directory and commands executed below must change accordingly. Without the dot(.), Django creates a nesting directory with a name same as the nested project name.
Step 5
Run the command to activate pipenv:
pipenv shell
Note: It is expected that pipenv is installed using pip on your local machine.
Step 6
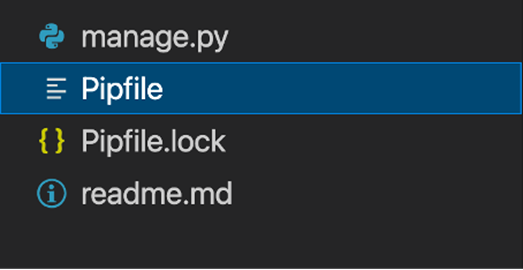
Open the file labeled Pipfile that was created inside the project directory. This file contains details of the dependencies for the project. Update it with the following code and save the file.

[[source]]
url = "https://pypi.org/simple"
verify_ssl = true
name = "pypi"

[packages]
django = "*"
djangorestframework = "*"
djangorestframework-xml = "*"
mysqlclient = "*"

[dev-packages]

[requires]
python_version = "3.9"
Note: The packages added as dependencies are specific to the lab and functionalities you will require.
Note: While copy-pasting the file content above, ensure any special characters added automatically are removed. They may appear in yellow or between code blocks in your VSCode.
Step 7
Run this command to install the dependencies using the updated Pipfile:
pipenv install
Note: Alternatively, you can also use a command like pipenv install django to install specific packages. This will also update the_ Pipfile__.
Step 8
Now run this command to create a Django app:
python3 manage.py startapp myapp
Step 9
Run the command to start the server to test if the installation was successful.
python3 manage.py runserver
Stop the server by pressing Ctrl + C while you are in the Terminal window.
Step 10
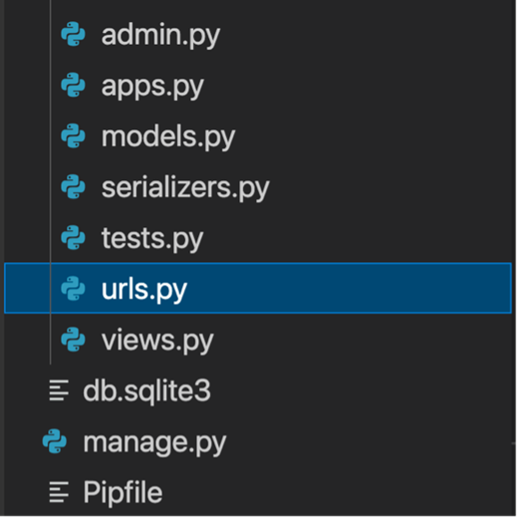
Create the urls.py file in the app-level LittleLemonDRF directory.

Paste the following code inside it:
from django.urls import path
from . import views

urlpatterns = [
    path('ratings', views.ratings),
]
Note: The specific url configurations will differ according to the views created.
Step 11
Open the urls.py file in the project-level directory and update the code as follows:
from django.contrib import admin
from django.urls import path, include

urlpatterns = [
    path('admin/', admin.site.urls),
    path('home/',include('myapp.urls')),
]
Note: The specific url configurations at the project-level will vary according to the name of the app created.
Conclusion
In this reading, you learned about the initial setup you need to make on your local machine while running VS Code with pipenv to create a Django project.
Additional resources
The following resources will be helpful as additional references in dealing with different concepts related to the topics you have covered in this section.
Pipenv: Python developer workflow
MariaDB Server: The open-source relational database
Node.js cross-platform JavaScript runtime environment
Additional information for installing MySQL on Windows
Installing MySQL on Windows general information
Installing MySQL on macOS general information
Installing MySQL on macOS using native packages
MySQL community edition downloads for Mac
DjangoDRFMySQLDataDatabaseAPIAuthorizationAuthenticationORMForm
Previous one → 4.JavaScript | Next one → 6.Django and MySQL