Securing your app
Recap: User Authentication
Introduction
When a REST API exposes the back-end models to the external world, the access needs to be authenticated.
Django framework provides a basic session-based authentication. Certain middleware components are needed for Django’s auth backends authenticate requests.
Django REST Framework presents different other authentication schemes other than session-based authentication.
Token-based authentication is the most suited one when the web application interacts with desktop and mobile clients.
Prerequisites
A Python virtual environment is set up with Django as well as Django REST Framework installed in it.
A Django project with the name LittleLemon is created. Inside it, a Django app with LittleLemonAPI its name is also present.
Enable Token Authentication
Add 'rest_framework', 'LittleLemonAPI', and 'rest_framework.authtoken' in the project’s settings.py file and run the migrate command:
python manage.py migrate
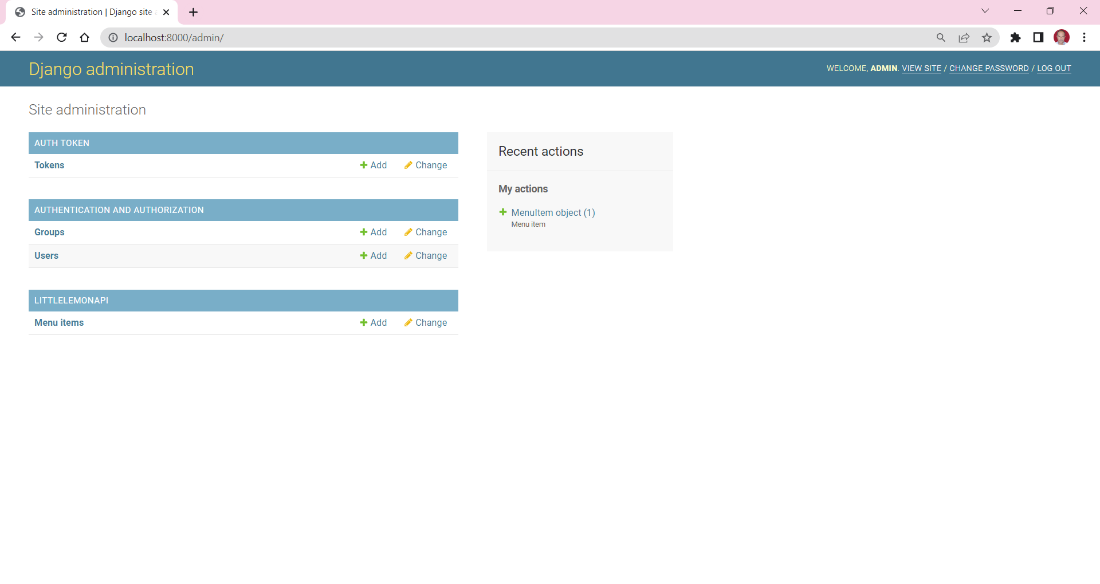
Visit the admin panel with http://localhost:8000/admin URL and log in with superuser credentials.
The site administration dashboard shows the AUTH TOKEN section.
Model
Open the VS Code editor, and ensure that the LittleLemonAPI app contains the definition of the MenuItem model in the models.py file.
from django.db import models

# Create your models here.
class MenuItem(models.Model):
    title = models.CharField(max_length=255)
    price = models.DecimalField(max_digits=6, decimal_places=2)
    inventory = models.SmallIntegerField()

    def get_item(self):
        return f'{self.title} : {str(self.price)}'
Run the commands makemigrations and migrate to create the table structure.
To refresh your understanding of models and migrations, refer to these links:
- Django Web Framework - Video: Creating models
- Django Web Framework - Video: Migrations
- Django Web Framework - Reading: How to use migrations
- Django Web Framework - Video: Working with migrations
Serializers
The Django REST API needs a serializer class to convert the model instances into JSON format. Add a new module serializers.py in the app folder and declare the MenuItemSerializer class subclassing ModelSerializer.
Views
To create the views you must subclass the ListCreateView that handles the HTTP GET and POST operations.
Similarly add a SingleMenuItemView class for PUT, GET and DELETE methods.
To recap different type of views in DRF follow these links:
- APIs course - Video: Function and class-based Views
- APIs course - Reading: Different types of routing in DRF
- APIs course - Reading: Generic views and ViewSets in DRF
URLs
Declare the URL routes of the app.
from django.urls import path
from . import views

urlpatterns = [
    path('menu-items/', views.MenuItemsView.as_view()),
    path('menu-items/<int:pk>', views.SingleMenuItemView.as_view()),
]
Wire up the app’s URLs with that of the project’s URLConf.
from django.contrib import admin
from django.urls import path, include
from LittleLemonAPI import views

urlpatterns = [
    path('admin/', admin.site.urls),
    path('api/',include('LittleLemonAPI.urls'))
]
Authentication
Your API is now ready. Visit http://localhost:8000/api/menu-items to test the POST and GET operations.
Next is the authentication part. The views that were added need no authentication.
Now it’s time to add a view that will need authentication.
This is done by mentioning @permission_classes([IsAuthenticated]) decorator above the function-based view. The following view displays a protected message.
#in views.py
from rest_framework.decorators import api_view, permission_classes
from rest_framework.permissions import IsAuthenticated

@api_view()
@permission_classes([IsAuthenticated])
# @authentication_classes([TokenAuthentication])
def msg(request):
    return Response({"message":"This view is protected"})
Don’t forget to update the app’s URL configuration with URL route of the msg() view
urlpatterns = [
    path('menu-items/', views.MenuItemsView.as_view()),
    path('menu-items/<int:pk>', views.SingleMenuItemView.as_view()),
    path('message/', views.msg),
]
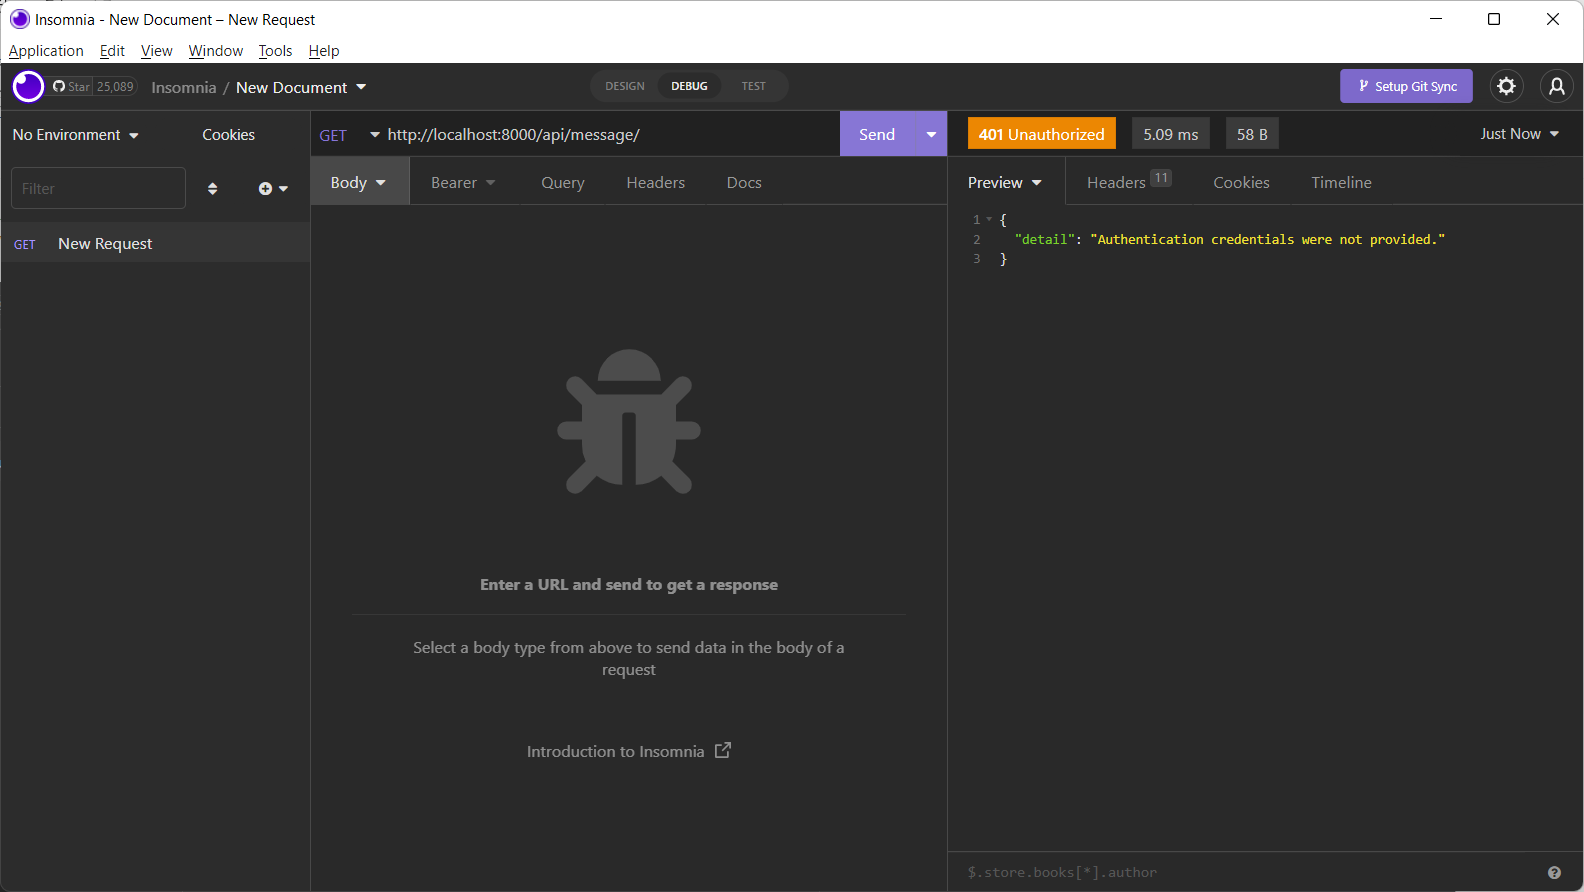
If you try to issue a GET request using the Insomnia client, you get the 'authentication credentials not provided'. So, this view requires authentication.
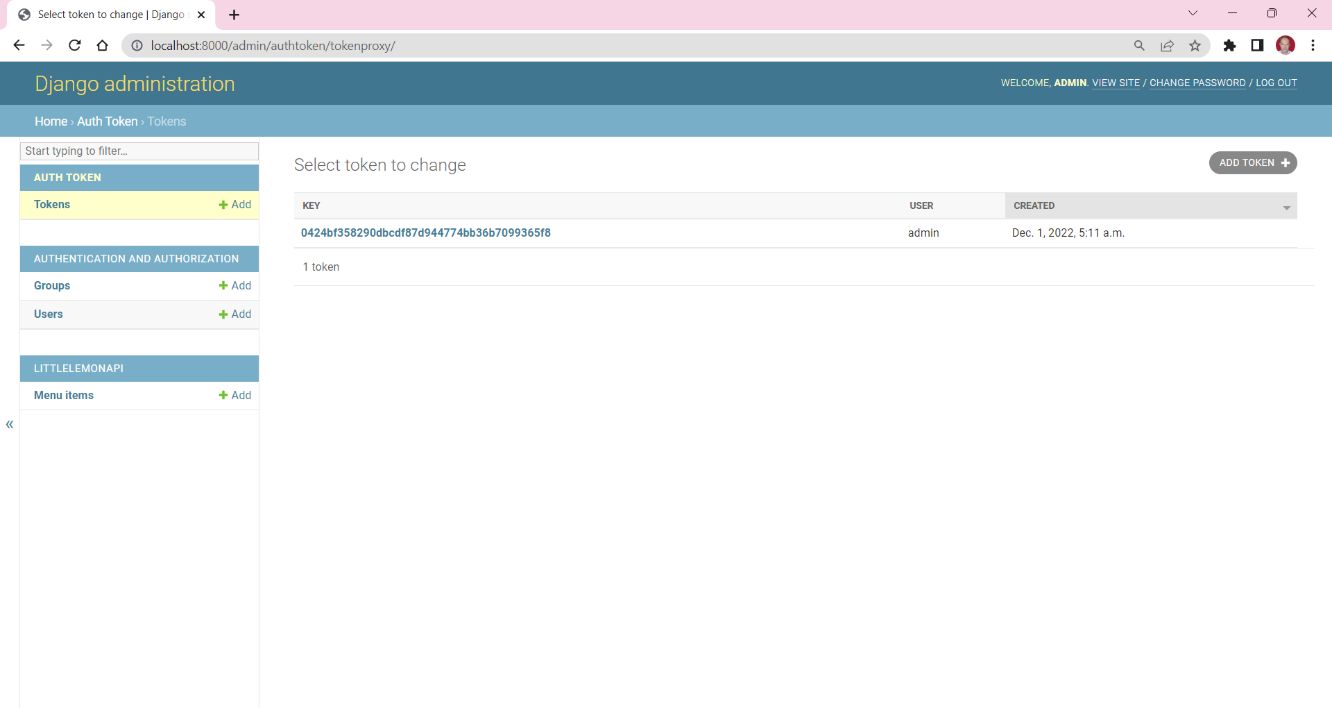
Now go back to the admin panel and obtain the token for admin user.
Open the Insomnia app window and insert the token value to authenticate the request.
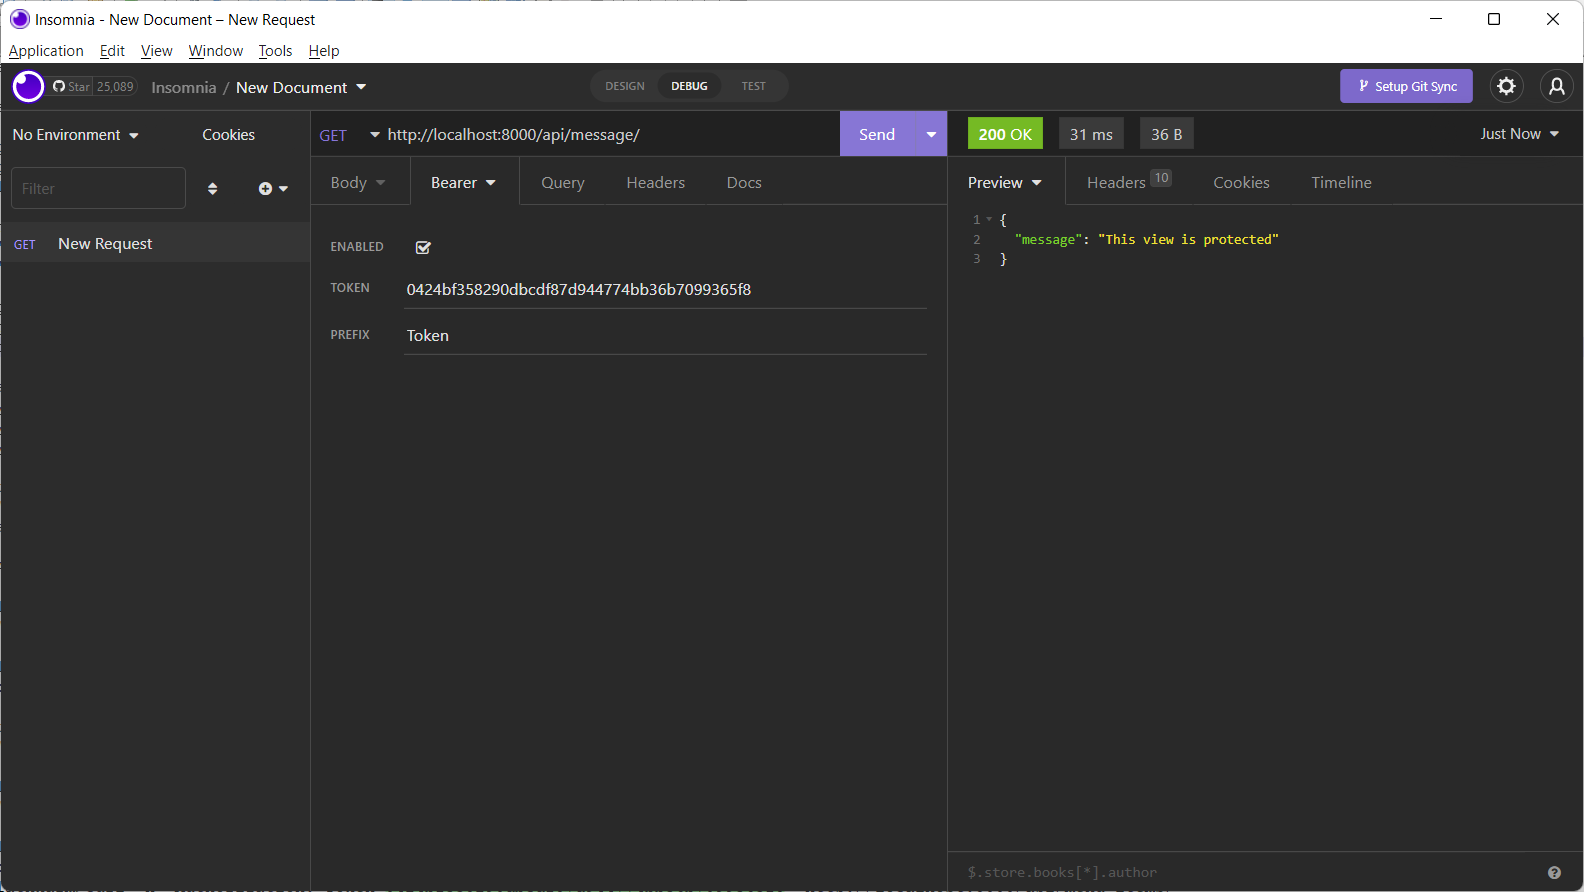
The /api/message/ route now shows the desired response.
You can also obtain the token by visiting the following URL: /api/'api-token-auth/
Add this route in the app’s urls.py file.
from django.urls import path
from rest_framework import routers
from . import views
from rest_framework.authtoken.views import obtain_auth_token

urlpatterns = [
    path('menu-items/', views.MenuItemsView.as_view()),
    path('menu-items/<int:pk>', views.SingleMenuItemView.as_view()),
    path('message/', views.msg),
    path('api-token-auth/', obtain_auth_token)
]
Go to the Insomnia app and visit this URL. Enter username and password in the body.
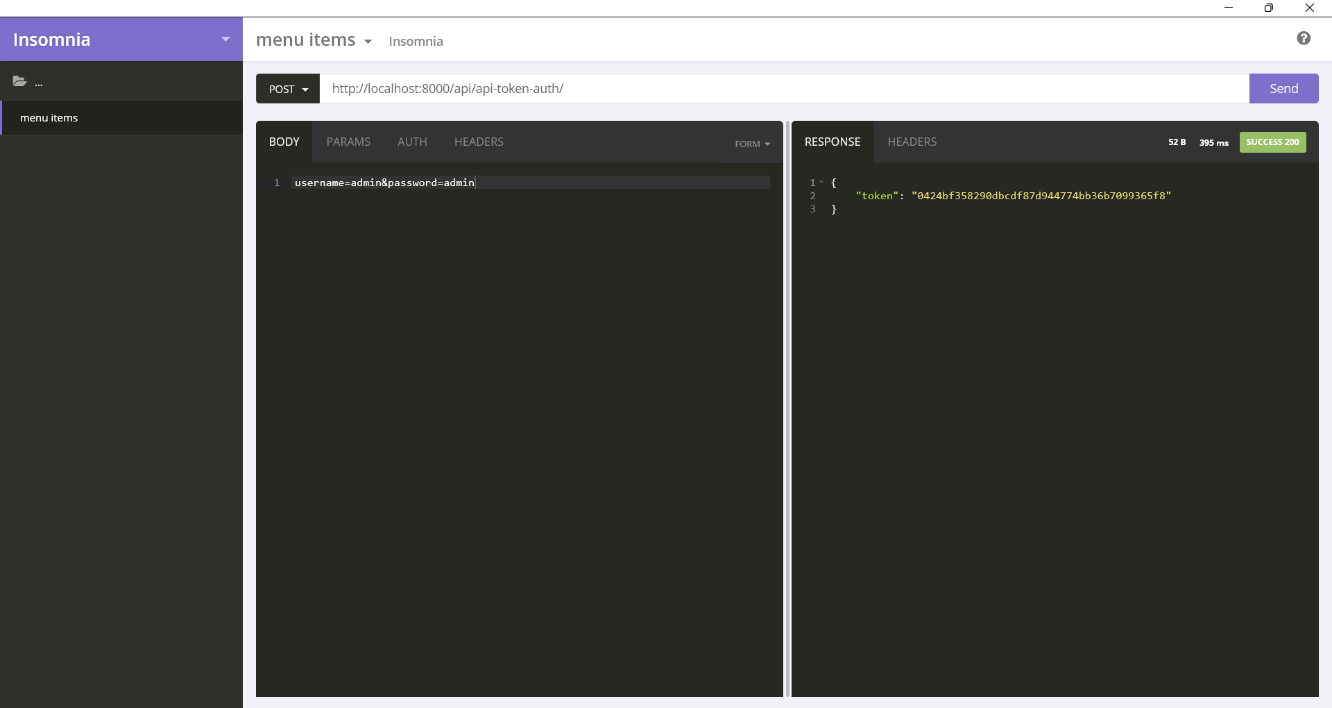
You can also enforce authentication to the model view by adding the IsAuthenticated requirement in the view class.
class MenuItemsView(generics.ListCreateAPIView):
  permission_classes = [IsAuthenticated]
  queryset = MenuItem.objects.all()
  serializer_class = MenuItemSerializer
The list of menu items will be displayed in the response window only after entering the token.
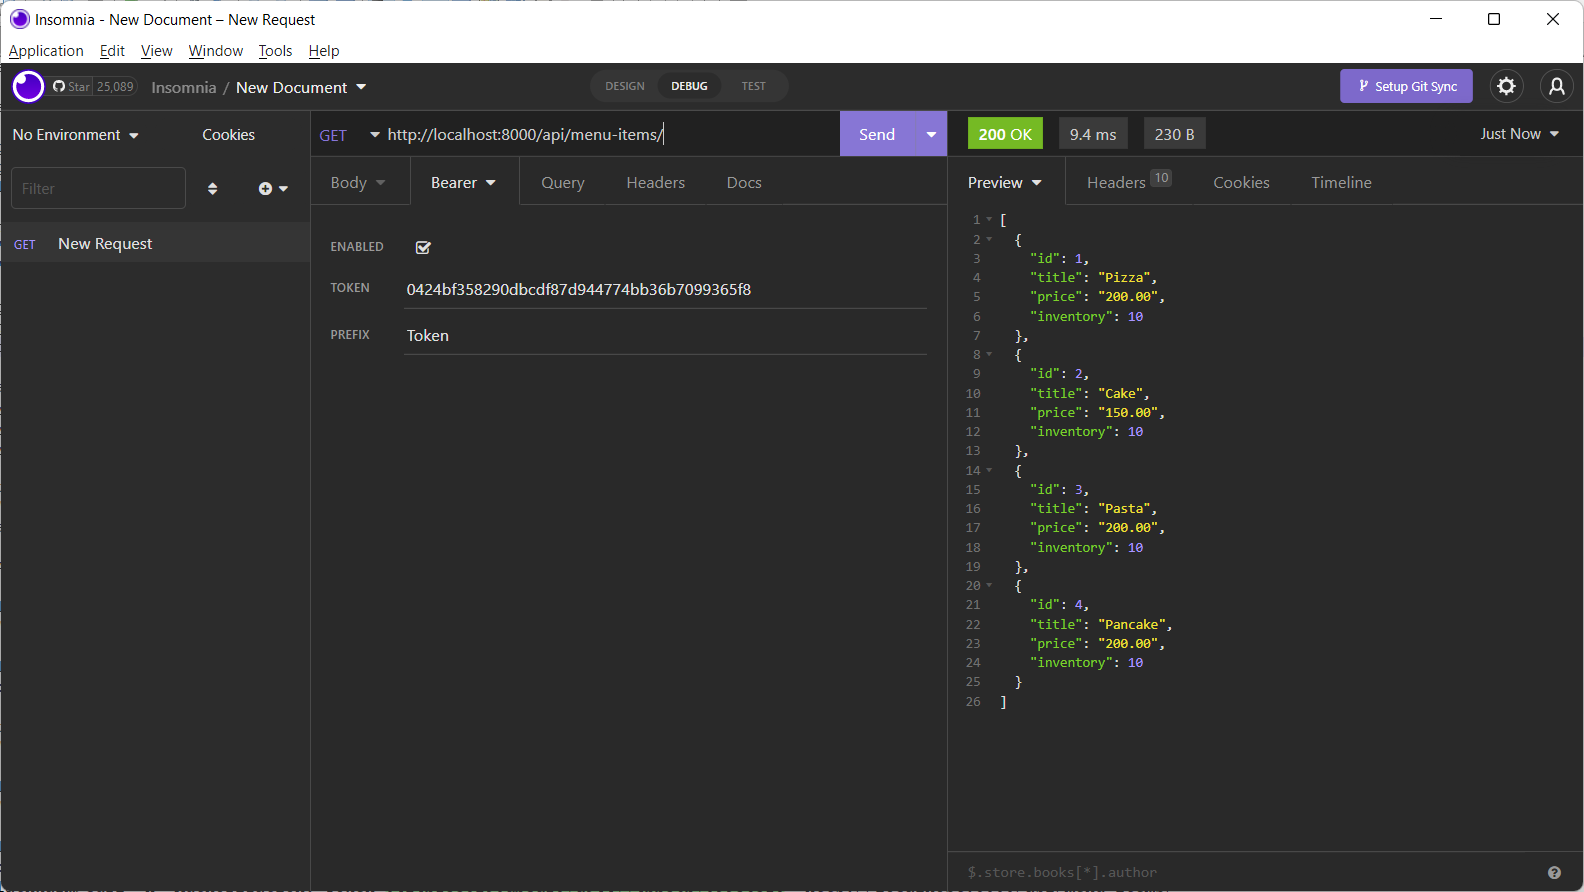
In this Reading, you learned to apply token authentication scheme to the LittleLemonAPI app.
You can revisit the concept of token-based authentication from the following link:
APIS course - Video: Token based authentication in DRF
Exercise: Add the registration page
Overview
So far, you have built the Menu API and Table booking API in your app.
In this exercise, you will add the feature of registering a new user in your Django project.
Scenario
The objective of this exercise is to be able to add a new user, and modify the existing user’s credentials from within the app instead of the admin interface.
You will use the Djoser authentication library. Using the views defined in this library, you can easily implement registration, login and logout actions.
Steps
Step 1
Install the djoser library in the current Django environment with PIP.
Note: You should already have Django REST framework installed.
Step 2
Add the code 'djoser' to the INSTALLED_APPS list in the settings.py file. Ensure that it is placed after the 'rest_framework' app in the list.
Step 3
Add a new section in the settings.py file to set the DJOSER variable.
#add the following line
DJOSER={"USER_ID_FIELD":"username"}
Step 4
Make sure that the TokenAuthentication and SessionAuthentication classes are added to the DEFAULT_AUTHENTICATION_CLASSES section in the REST_FRAMEWORK setting.
Step 5
Enable djoser endpoints by adding the following URL routes in the project’s URL patterns.
#add following lines to update urlpatterns list
path('auth/', include('djoser.urls')),
path('auth/', include('djoser.urls.authtoken'))
Step 6
Run the migrations. Start the server and Login to the admin site with the superuser username and password. You should notice the Tokens section on the dashboard.
Step 7
Visit the Browsable API URL User List – Django REST framework to get the list of users already registered.
Step 8
Next you must register new user. To add a new user, use the form and submit a POST request.

Step 9
To login, visit the djoser generated URL http://127.0.0.1:8000/auth/token/login/.
Enter the username and password to obtain the token.
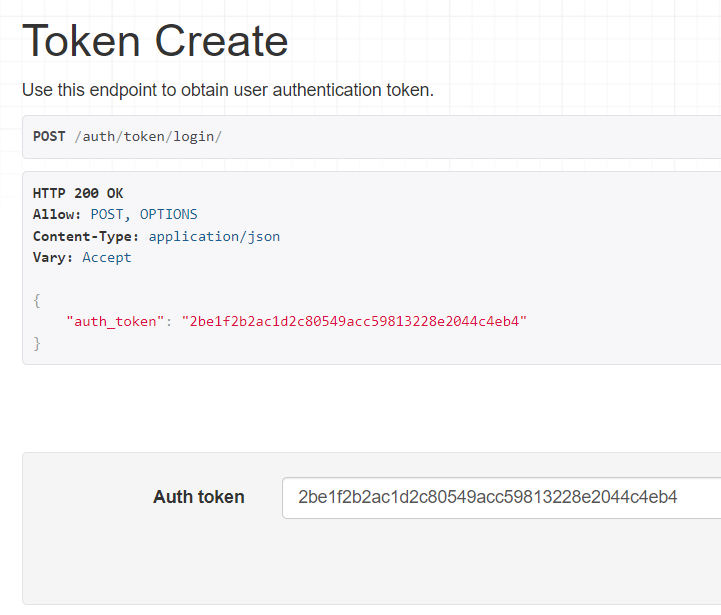
Step 10
To Logout, enter the URL http://127.0.0.1:8000/auth/token/logout/ with a POST method to logout the user.
Conclusion
In this exercise, you used the djoser library to implement registration, login, and logout features.
Exercise: Securing the table booking API
Overview
In earlier exercises you already have the table booking API in the Restaurant app of your Django project with the name LittleLemon.
In this exercise, you will add token-based authentication to secure the Table booking API.
Scenario
When you enable token authentication feature in the app, a random hexadecimal string that is unique for each user can be generated from inside the admin panel as well as from within the app.
The HTTP client passes this token in the request header. You can then restrict a view only for authenticated users.
Step 1
Add the 'rest_framework.authtoken' app to the list of INSTALLED_APPS in the settings.py file
Step 2
Import the IsAuthenticated class from the rest_framework.permissions module in the views.py file.
Step 3
You already have the BookingViewSet class in the views.py file. To secure this view, set the permission_classes property to a list containing IsAuthenticated.
permission_classes = [IsAuthenticated]Step 4
Open the app’s urls.py and import the following function:
#import obtain_auth_token view
from rest_framework.authtoken.views import obtain_auth_token
In the same file add a new URL route to the urlpatterns list:
#add following line in urlpatterns list
path('api-token-auth/', obtain_auth_token)
Step 5
Run the server and visit the URL path api-token-auth/ from the Insomnia client. You should select the POST method, and enter username and password in the body. When submitted, you get the token string as the response.
Step 6
To get the response from a secured URL, select the Auth tab in Insomnia, choose the Bearer token from the drop down, and enter the token generated in the previous step and then press the send button.
Tips:
To secure the view you need to set the permission_classes attribute. Follow the following example for the views in booking API.
from rest_framework.decorators import permission_classes
from rest_framework import generics
from rest_framework.permissions import IsAuthenticated
#set permission_classes attribute
from .models import MenuItem
class MenuItemsView(generics.ListCreateAPIView):
   permission_classes = [IsAuthenticated]
   queryset = MenuItem.objects.all()
   serializer_class = MenuItemSerializer
Conclusion
In this exercise, you implemented the TokenAutentication feature of Django REST framework to secure table booking API.
Additional Resources
Here is a list of resources that may be helpful as you continue your learning journey. These resources provide some more in-depth information on the topics covered in this module.
Securing the API
- Token-based authentication in DRF
- Introduction to Djoser library for better authentication
- Registration and authentication endpoints with JWT
User authentication
AuthorizationAuthenticationAPIDjangoDRF
Previous one → 5.Adding APIs | Next one → 7.Testing the API