Forms
The majority of web applications need to collect data from end-users. This can be anything from user details for login and authentication, registration details for a new application or order details for online shopping.
Recall that web applications use forums to collect data input from users using HTML form tags. Any form elements such as inputs are checkboxes, are sent to the server for processing when the form is submitted.
In Django, the most common form submission is a post request, which will send the data down in the post body. The server-side code handles the incoming request and processes the data on the backend.
For example, suppose you create a basic form using HTML to submit a name, you can use a label to display text describing what the inputs should have. The input set to type text accepts input from the end-user.
In this example, the inputs stores their name. The second input of type submit is a button that displays the text send name. When the button is pressed, the action will be triggered to make a post request to be processed by the order view.
This is all defined in the form action and form method attributes.
<form action="/order" method="post">
	<label for="your_name">Your name: </label>
	<input id="your_name" type="text" name="your_name" value="{{ current_name }}">

	<input type="submit" value="OK">
</form>
While this process works well, code can become tedious and complex when dealing with large forms. For example, forums can have many different ways of gathering data with conditional flows. Also, designing forms in this way can lead to errors as each form element’s name or ID attribute needs to match what the back-end code expects.
To assist developers with form creation and processing, Django uses a form class. In this class, you can define all the expected attributes that will be passed down in the request.
This means that you can use a form class to represent the expected attributes and render the form elements in the HTML.
Example
The submit name form can be represented by creating a class.
- First, you create a class called
NameForm, which accepts a parameter of forms dot form. - Next, you create a variable called your name, which is assigned forms dot CharField to represent the HTML input element. Notice that you also can set some validation by setting the max length value to 100.
from django import forms

class NameForm(forms.Form):
your_name = forms.CharField(label='Your name', max_length=100)- Finally, When the name form class is rendered, it’s rendered to a view containing the HTML form code.
<label for="your_name">Your name: </label>
<input id="your_name" type="text" name="your_name" maxlength="100" required>
NOTE
It’s important to know that the form tags are not represented. You need to add the form tags and then use the templating to append the form elements inside.
<form action="/your-name/" method="post">
	{{ form }}
	<input type="submit" value="Submit">
</form>
For developers, the advantage of creating forms in this way makes it much easier to manage any changes to the form. Instead of worrying about the names on inputs matching with the server-side code, this is handled entirely by the forum class.
Also because you are working with classes, you get all the benefits of object oriented programming. For example, you can split complex forms into subclasses to make them more manageable.
Use of forms with models
Sending data to the back-end using the post method requires you to persist the data somehow. For example, suppose you are setting up a new user to gain access to your site, you will need to persist their details such as email and password and some general user information such as name or address.
Locally, developers can solve this by using models. A model in your application will represent the table to store this information. The model itself can then be used and be directly converted into a Django form. This makes sense as you want your forms to map to what you need to persist. This feature is excellent for ruling out any potential issues or errors.
The code for the model form is placed in the file forms.py and implements the structure of the model, and you will learn more about both form types in more detail later in this lesson.
Working with Django form fields and data types
Often web applications collect data from the user through a HTML form and it’s sent to the server for processing. You create a HTML form using various form elements such as input elements Radio buttons, Drop-down lists, and Checkboxes.
Suppose the manager of Little Lemon has asked you to build a customer form containing a customer’s name and age. First, you build a HTML form that contains three input elements, one for the name, one for age, and one for the submit button.
Previously, you learned that Django creates and processes forms using the Form class. This class defines all the expected attributes that will construct and process the form.
Form Fields
Once you lay out the structure of the form, Form fields are the building blocks that help build the form. While fields are an integral part of models, they are especially important while using forms as they help define the visual element of the form.
The custom logic behind the fields is defined in the Fields class used inside the Form class in Django. When defining attributes, you can choose from various field types.
Field Types
CharField: which accepts any string input and is equivalent to the text input element in HTML.EmailField: which accepts input that follows email format. It’s equivalent to the email input element in HTML.IntegerField: accepts only integers and is equivalent to the number type input element in HTML.MultipleChoiceField: offers the choice of multiple options. It’s equivalent to the select and option elements in HTML.FileField: allows you to choose a file for upload and is equivalent to the file type input element in HTML.
Field Arguments
Additionally, these form fields have different arguments that can be passed to them while specific arguments that can be passed vary according to the field and use. There are a few core arguments that are accepted in common among all the fields.
- Required : each field assumes the value is required by default. You can change this by setting required equal to false.
from django import forms

class MyForm(forms.Form):
	name = forms.CharField(required=False)
age = forms.IntegerField()- Label : the argument helps specify a label for the field.
from django import forms

class MyForm(forms.Form):
	name = forms.CharField(required=False, label='Your name')
age = forms.IntegerField()- Initial : initial values can be set for specific fields.
from django import forms

class MyForm(forms.Form):
	name = forms.CharField(required=False, label='Your name', initial='Enter your name')
age = forms.IntegerField()- Help-text : specify descriptive text for the field.
from django import forms

class MyForm(forms.Form):
	name = forms.CharField(required=False, label='Your name', initial='Enter your name')
	age = forms.IntegerField(help_text='A valid age required.')
It’s important to remember that every form that you build will have different data requirements. For example, a customer feedback form or a survey-style form for a customer’s favorite menu items. Knowing what field type to use is essential to building effective forms.
# forms.py (app)

from django import forms

class DemoForm(forms.Form):
    name = forms.CharField()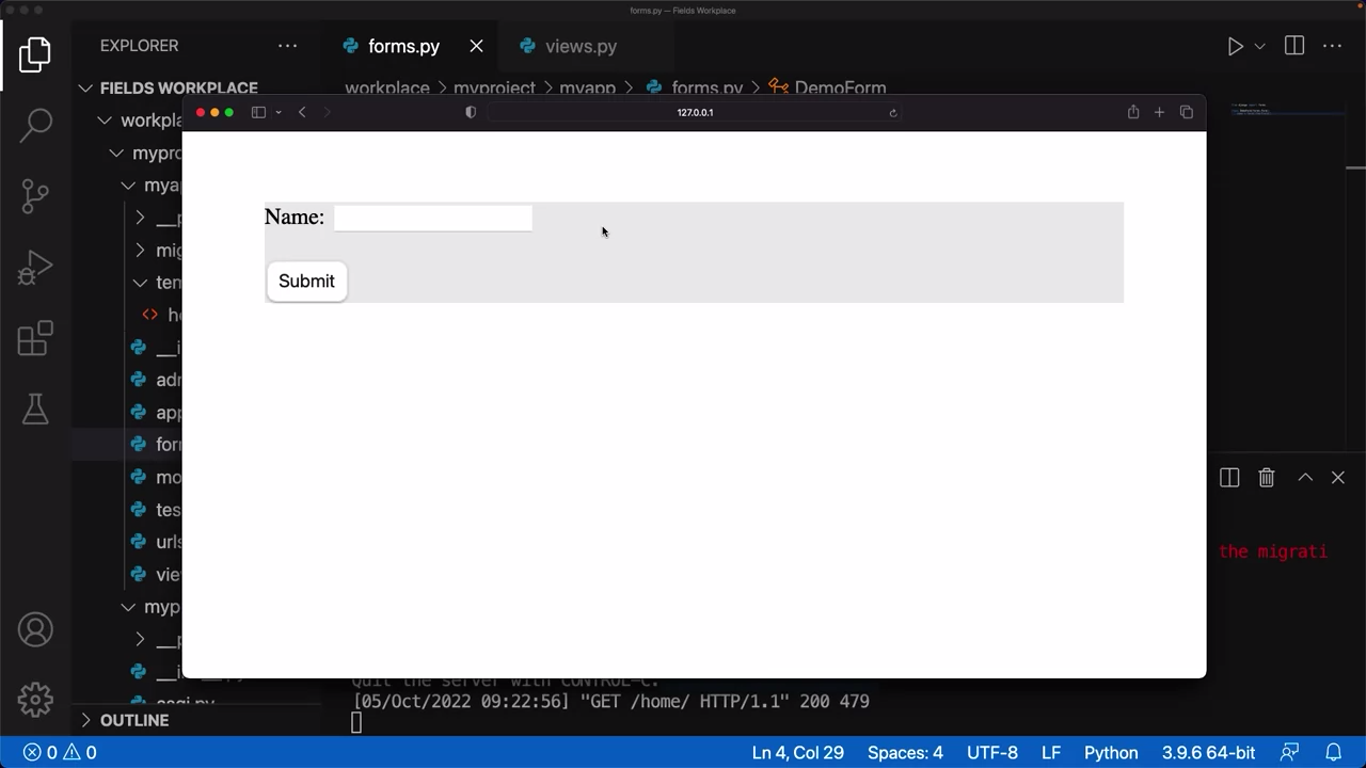
You can edit the form further by passing a parameter such as a widget.
# forms.py (app)

from django import forms

class DemoForm(forms.Form):
    name = forms.CharField(widget=forms.Textarea)
This Textarea will override the default widget for it, which is the equivalent of rendering the input field present in HTML code.
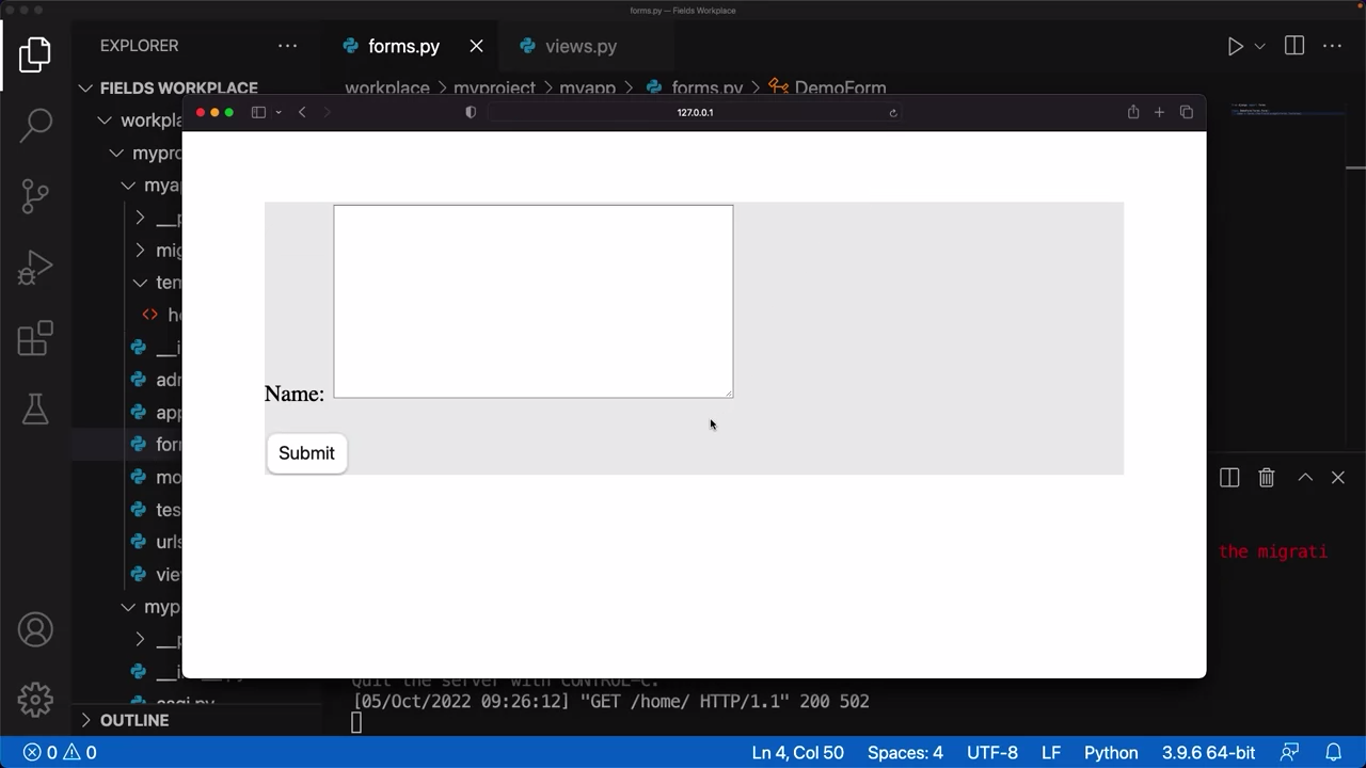
The code works but suppose you want a smaller Textarea to display. You can pass a parameter inside the Textarea such as attributes with a certain number of rows,
from django import forms

class DemoForm(forms.Form):
    name = forms.CharField(widget=forms.Textarea(attrs={'row':5}))
from django import forms
class DemoForm(forms.Form):
email = forms.EmailField()NOTE
It’s also important to note that Django Form Fields have basic validation applied by default.
To help the user know what to add in each form field, you can use the label parameter. For example, add a label parameter with the text to enter an email address.
from django import forms

class DemoForm(forms.Form):
    email = forms.EmailField(label='Enter email address')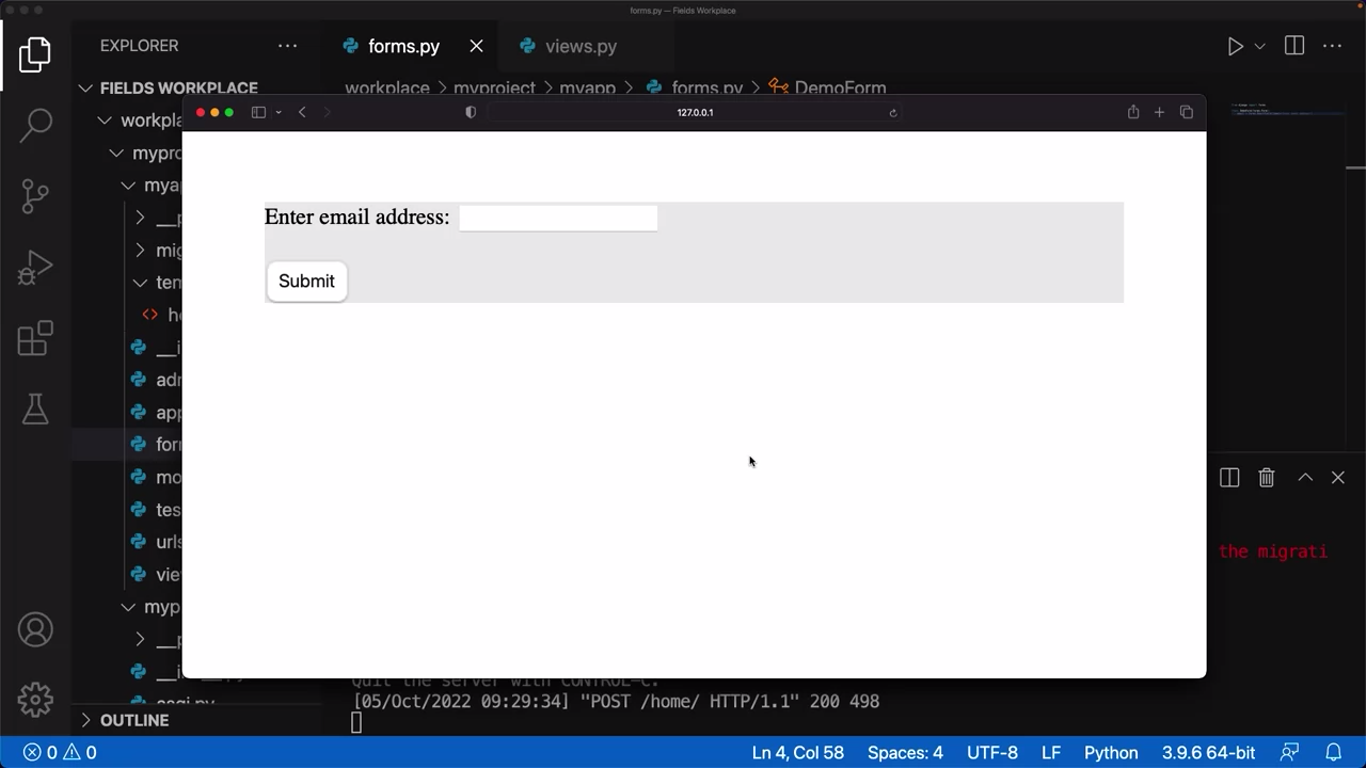
from django import forms

from django.forms.widgets import NumberInput

class DemoForm(forms.Form):
    reservation_date = forms.DateField(widget=NumberInput(attrs={'type':'date'}))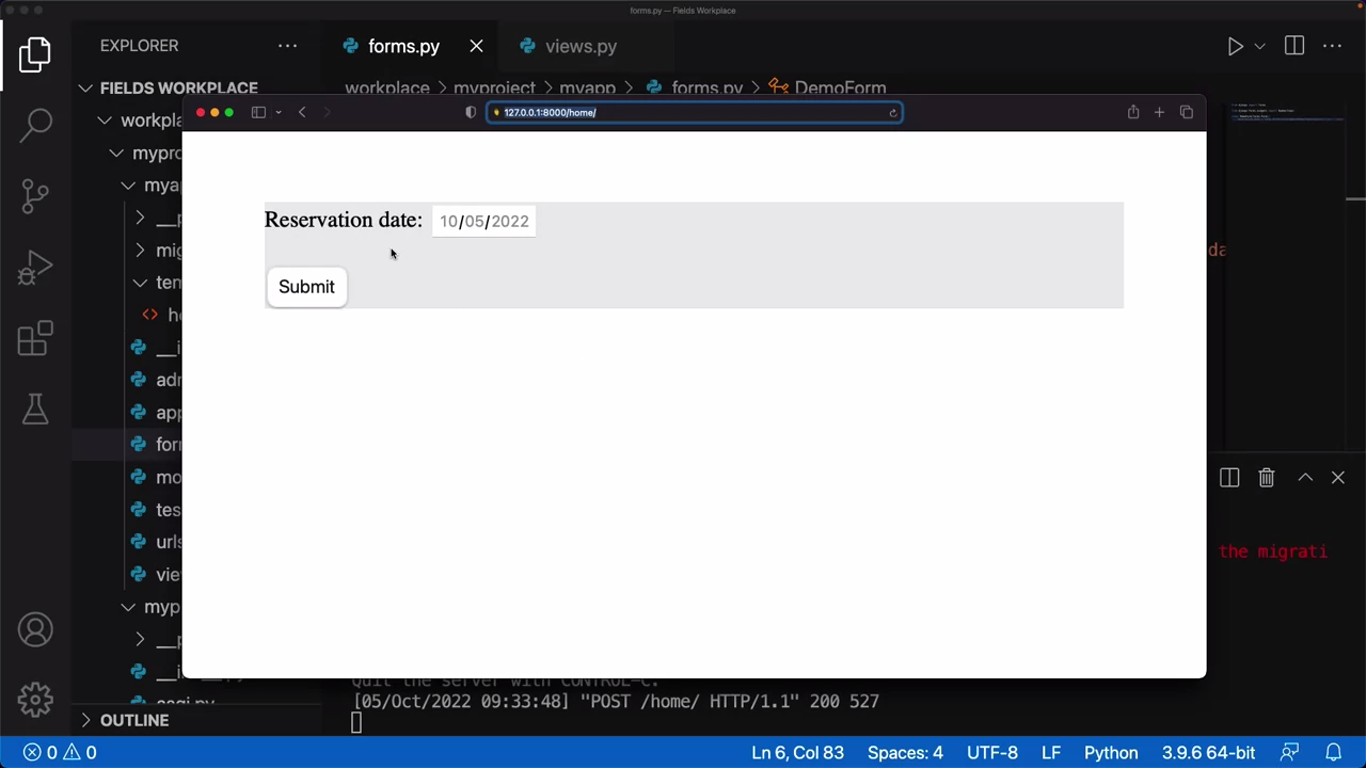
from django import forms

FAVORITE_DISH = [
    ('italian', 'Italian'),
    ('greek', 'Greek'),
    ('turkish', 'Turkish'),
]

class DemoForm(forms.Form):
    favorite_dish = forms.ChoiceField(choices=FAVORITE_DISH)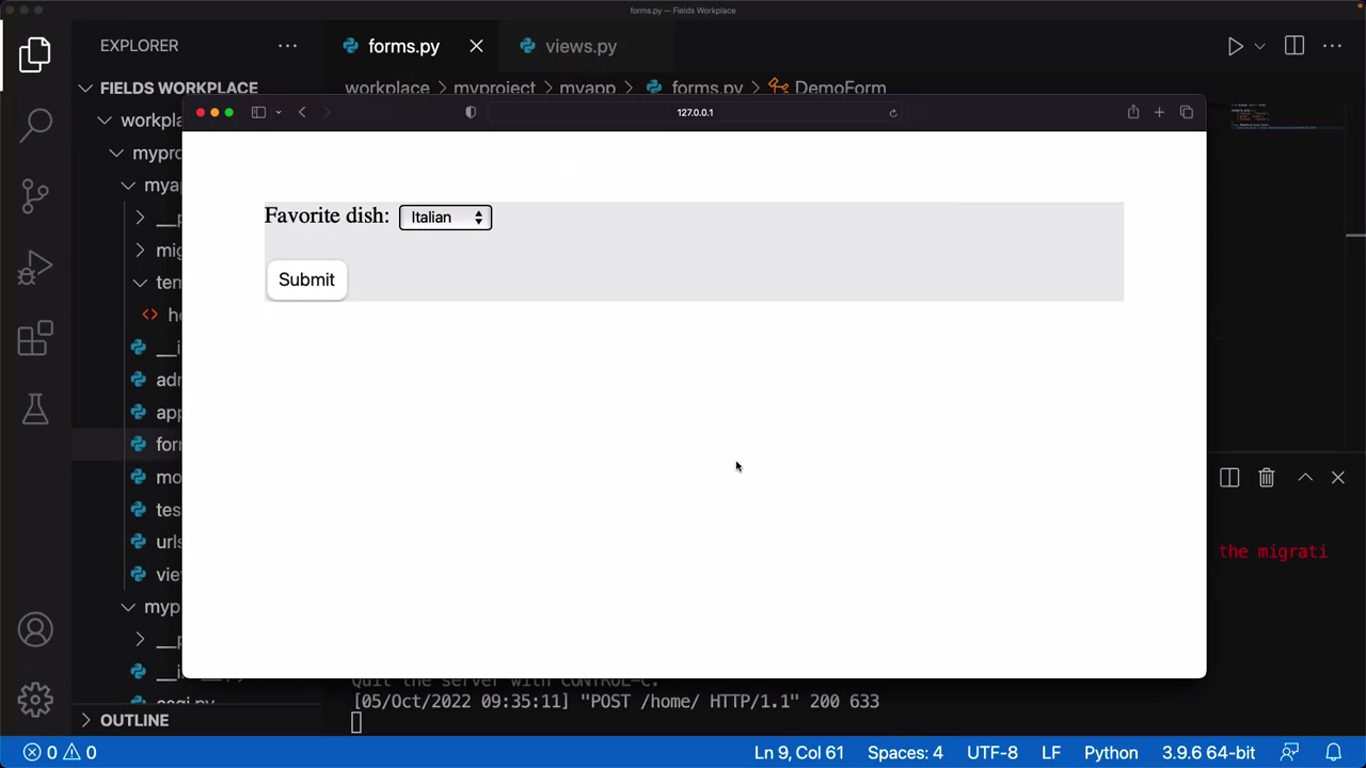
However, suppose you want to display all three choices simultaneously. You can achieve this by using another widget option with the value of RadioSelect.
from django import forms

FAVORITE_DISH = [
    ('italian', 'Italian'),
    ('greek', 'Greek'),
    ('turkish', 'Turkish'),
]

class DemoForm(forms.Form):
    favorite_dish = forms.ChoiceField(widget=forms.RadioSelect, choices=FAVORITE_DISH)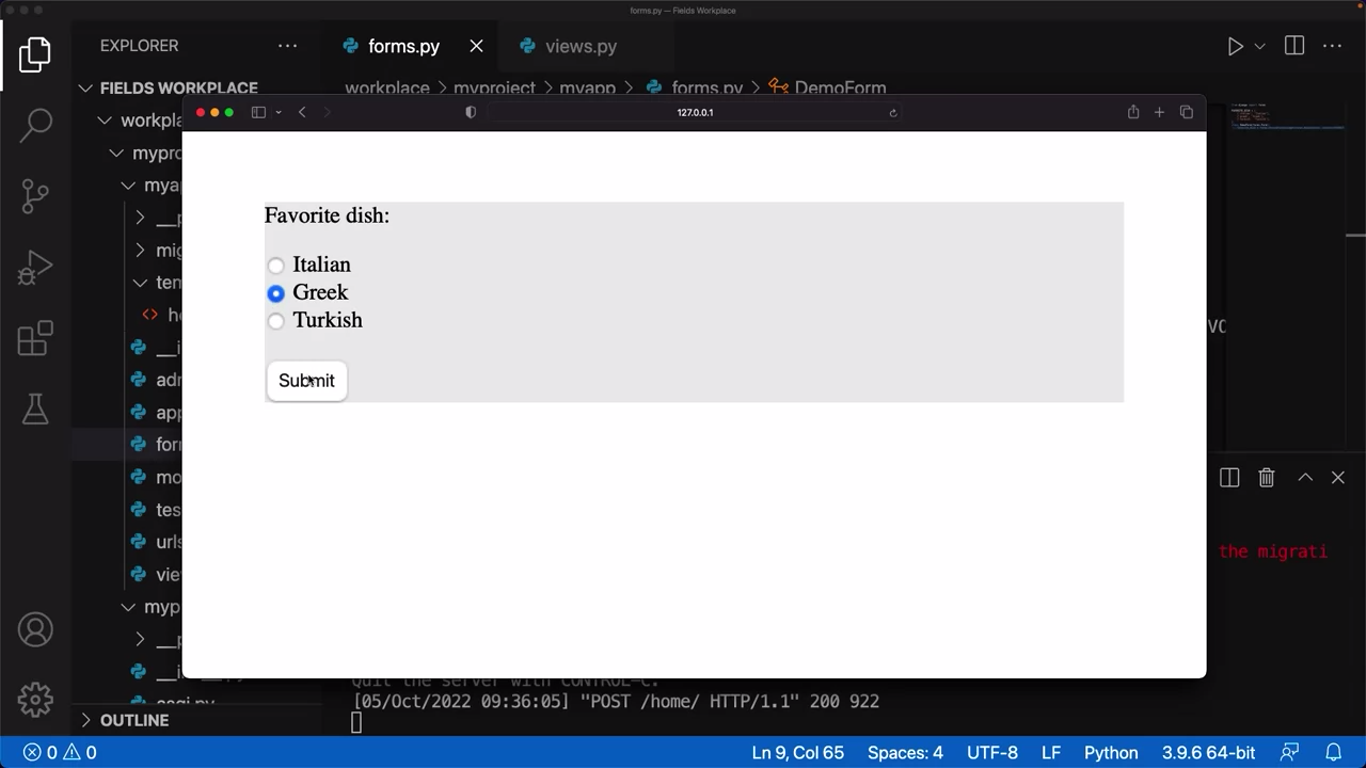
It’s important to know that these examples showcase just some of the available form fields and parameters you can use in Django. Exploring the Django documentation for all available options to help you create forms is a good idea.
Django fields
In this reading, you will learn about different field types in a model class.
Model
A model in Django is like any normal Python class. The ORM layer maps this model to a database table in the Django project. Each attribute of a model class represents a field in the table.
The Django ORM enables storing and retrieving data in tables, not by executing raw SQL queries, but by invoking the model methods.
A model class subclasses the django.models.Model class. A typical definition of a model class is done inside the app’s models.py file.
from django.db import models
class Person(models.Model):
    first_name = models.CharField(max_length=20)
    last_name = models.CharField(max_length=20)
When you migrate this model (you need to include your app in the INSTALLED_APPS setting), the myapp_person table will be created as would be done by the CREATE TABLE query:
CREATE TABLE Person (
    id         INTEGER      PRIMARY KEY,
    first_name VARCHAR (20),
    last_name  VARCHAR (20)
)
Note that the first_name and last_name are the class attributes corresponding to the fields in the table.
Django automatically names the table as appname_modelname, which you can override by assigning the desired name to db_table parameter of the Meta class, to be declared inside the model class.
class Student(CommonInfo):
    # ...
    class Meta(CommonInfo.Meta):
        db_table = 'student_info'
You should choose the model field type appropriate for the data stored in the mapped field.
The types are defined in django.forms module. The choice of type determines the HTML widget to use when the form field is rendered. For example, for a CharField, HTML’s text input type will be used.
Django also auto-creates the form based on model definitions (it is called ModelForm), using field types.
Field properties
A Field object has common properties in addition to the field-specific properties.
primary_key
This parameter is False by default. You can set it to True if you want the mapped field in the table to be used as its primary key.
It’s not mandatory for the model to have a field with a primary key. In its absence, Django, on its own, creates an IntegerField to hold a unique auto-incrementing number.
default
You can also specify any default in the form of a value or a function that will be called when a new object is created.
class Person(models.Model):
    name = models.CharField(max_length=50)
    address = models.CharField(max_length=80, default='Mumbai')
unique
If this parameter in the field definition is set to True, it will ensure that each object will have a unique value for this field.
tax_code = models.CharField(
                    max_length = 20,
                    unique = True
                    )
choices
If you want to create a drop-down from which the user should select a value for this field, set this parameter to a list of two-item tuples.
SEMESTER_CHOICES = (
    ("1", "Civil"),
    ("2", "Electrical"),
    ("3", "Mechanical"),
    ("4", "CompSci"),
)

# declaring a Student Model

class Student(models.Model):
      semester = models.CharField(
        max_length = 20,
        choices = SEMESTER_CHOICES,
        default = '1'
        )
Field types
The django.models module has many field types to choose from.
CharField:
This is the most used field type. It can hold string data of length specified by max_lenth parameter. For a longer string, use TextField.
IntegerField:
The field can store an integer between -2147483648 to 2147483647. There are BigIntegerField, SmallIntegerField and AutoFieldtypes as well to store integers of varying lengths.
FloatField:
It can store a floating-point number. Its variant DecimalField stores a number with fixed digits in the fractional part.
class Student(Model):
    grade = models.DecimalField(
                         max_digits = 5,
                         decimal_places = 2)
DateTimeField
Stores the date and time as an object of Python’s datetime.datetime class. The DateField stores datetime.date value.
EmailField
It’s actually a CharField with an in-built EmailValidator
FileField
This field is used to save the file uploaded by the user to a designated path specified by the upload_to parameter.
ImageField
This is a variant of FileField, having the ability to validate if the uploaded file is an image.
URLField
A CharField having in-built validation for URL.
Relationship fields
There can be three types of relationships between database models:
- one-to-one
- one-to-many
- many-to-many
The django.models module has the following fields for establishing relationships between models.
ForeignKey
It is used to establisha one-to-many relationship between two models. It requires two positional arguments - the model with which it is related, and the on_delete option to define the behavior of the delete operation.
Suppose you have a Customer and Vehicle model with a one-to-many relationship. A customer can have more than one vehicle.
class Customer(models.Model):
    name = models.CharField(max_length=255)

class Vehicle(models.Model):
    name = models.CharField(max_length=255)
    customer = models.ForeignKey(
        Customer,
        on_delete=models.CASCADE,
        related_name='Vehicle'
    )
The on_delete option specifies the behavior in case the associated object in the primary model is deleted. The values are:
CASCADE: deletes the object containing the ForeignKey
PROTECT: Prevent deletion of the referenced object
RESTRICT: Prevent deletion of the referenced object by raising RestrictedError
Now let’s expand upon these values in more detail:
CASCADE
If the on_delete parameter is set to CASCADE, deleting the reference object will also delete the referred object. Suppose a vehicle belongs to a customer. When the Customer is deleted, all the vehicles that reference the customer will be automatically deleted.
PROTECT
The effect of the PROTECT option is the opposite of CASCADE. It prevents the deletion of a referenced object if it has an object referencing it in the database. Suppose a vehicle belongs to a customer.
If a customer has vehicles, it cannot be deleted. It’s important to know that if you forcefully delete the customer, Django raises the ProtectedError.
RESTRICT
The difference between PROTECT and RESTRICT is that when you delete the referenced object, the on_delete option raises the RestrictedError.
The deletion of the referenced object is allowed if it also references a different object that is being deleted in the same operation, but via a CASCADE relationship.
Let’s use the example of an Artist model – a CASCADE relationship with an Album and Song model. The Artist model, in turn, has a RESTRICT relationship with the song model.
class Artist(models.Model):
    name = models.CharField(max_length=10)

class Album(models.Model):
    artist = models.ForeignKey(Artist, on_delete=models.CASCADE)

class Song(models.Model):
    artist = models.ForeignKey(Artist, on_delete=models.CASCADE)
    album = models.ForeignKey(Album, on_delete=models.RESTRICT)
Next, you can create a few instances of these models:
>>> artist1 = Artist.objects.create(name='Danny')
>>> artist2 = Artist.objects.create(name='John')
>>> album1 = Album.objects.create(artist=artist1)
>>> album2 = Album.objects.create(artist=artist2)
>>> song1 = Song.objects.create(artist=artist1, album=album1)
>>> song_two = Song.objects.create(artist=artis1, album=album2)
You can safely delete the artist1 instance. If you try to delete artist2, the RestrictedError is raised.
OneToOneField:
This field in one of the models establishes a one-to-one relationship between the two models.
Although a ForeignKey field with unique=True setting, behaves similarly, the reverse side of the relationship will always return a single object.
The following model definition demonstrates a one-to-one relationship between the college model and a principal model.
A college can have only one principal and one person can be a principal of only one college.
class college(Model):
    CollegeID = models.IntegerField(primary_key = True)
    name = models.CharField(max_length=50)
    strength = models.IntegerField()
    website=models.URLField()

class Principal(models.Model):
    CollegeID = models.OneToOneField(
                College,
                on_delete=models.CASCADE
                )
    Qualification = models.CharField(max_length=50)
email = models.EmailField(max_length=50) ManyToManyField:
This field helps in setting a many-to-many relationship between two models.
Here, multiple objects of one model can be associated with multiple objects of another model.
For example, in the case of Subject and Teacher models, a subject is taught by more than one teacher.
Similarly, a teacher can teach more than one subject. This is represented in the following model definitions:
class Teacher(models.Model):
    TeacherID = models.ItegerField(primary_key=True)
    Qualification = models.CharField(max_length=50)
    email = models.EmailField(max_length=50)

class Subject(models.Model):
    Subjectcode = models.IntegerField(primary_key = True)
    name = models.CharField(max_length=30)
    credits = model.IntegerField()
    teacher = model.ManyToManyField(Teacher)
In this reading you learned about the different fields to be used as the type of attributes in a model class.
Form API
In this reading item, you’ll explore the important features of the Form class defined in django.forms module.
HTML Form
Almost every web application collects certain data from the user by presenting them with a form to fill out and submit. A form is a document wherein the user enters their responses at certain labeled placeholders. For example, a form that is used to register on a certain site, or the one used to fill your travel details for booking a ticket, or a job application form.
You can construct a form using HTML’s form tag and its various input elements (such as text, radio, and checkboxes, dropdowns and lists).
<form action="/form/" method="POST">
    <label for="Name">Name of Applicant</label>
    <input type="text" id="name" name="name">

    <label for="Address">Address</label>
    <input type="text" id="add" name="add">

    <label for="Post">Post</label>
    <select id="Post" name="Post">
      <option value="Manager">Manager</option>
      <option value="Cashier">Cashier</option>
      <option value="Operator">Operator</option>
    </select>

    <input type="submit" value="Submit">
  </form>
HTML has very little validation support for these elements. Hence, you need to use JavaScript functions to validate the data before submitting it to the server.
Django Form
Django framework includes a Form class, its attributes, and methods in the django.forms module. This class is used as a base for a user-defined form design.
from django import forms

class ApplicationForm(forms.Form):
   pass
The attributes of the form are Field class objects. The forms module has a collection of Field types. These fields correspond to the HTML elements they eventually render on the user’s browser. For example, the forms.CharField is translated to HTML’s text input type. Similarly, the ChoiceField is equivalent to SELECT in HTML. The Django form class representing the above Application form would be:
from django import forms

class ApplicationForm(forms.Form):
    name = forms.CharField(label='Name of Applicant', max_length=50)
    address = forms.CharField(label='Address', max_length=100)
    posts = (('Manager', 'Manager'),('Cashier', 'Cashier'),('Operator', 'Operator'))
    field = forms.ChoiceField(choices=posts)
By convention, the user-defined form classes are stored in a forms.py file in the app’s package folder. So, if you have a Django app called myapp, the above code is kept in myapp/forms.py.
Django Form Fields
Out of the many available form field types, some of the most frequently used are as follows:
CharField: Translates to input type=text HTML form element. If you want to accept a longer multiline text, set its widget property to forms.Textarea
forms.CharField(label="Enter first name",max_length=50)IntegerField: Similar to a CharField but customized to accept only integer numbers. You can limit the value entered by setting min_value and max_value parameters.
age = forms.IntegerField(min_value=20, max_value=60)FloatField: A text input field that validates if the input is a valid float number. Its variant DecimalField accepts a float number of specified decimal places.
price = forms.FloatField()FileField: Presents an input type=file element on the HTML form.
upload = forms.FileField(upload_to ='uploads/')ImageField: Similar to FileFieldwith added validation to check if the uploaded file is an image. The pillow library must be installed for this field type to be used.
EmailField: A CharField that can validate if the text entered is a valid email ID.
email = forms.EmailField(max_length = 254)ChoiceField: Emulates the HTML’s SELECT element. Populates the drop-down list with a choice parameter whose value should be a sequence of two item tuples.
gender = forms.CharField(max_length=1, choices=GENDER_CHOICES)The instance of the Form class translates to the HTML script of a form. When returned to the browser, the form is rendered.
Let us open the Django shell and check what the form object returns.
>>> from myapp import forms
>>> f = ApplicationForm()
>>> print(f)
You’ll see the following HTML script:
<tr>
    <th><label for="id_name">Name of Applicant:</label></th>
    <td>

        <input type="text" name="name" maxlength="50" required id="id_name">

    </td>
</tr>
<tr>
    <th><label for="id_address">Address:</label></th>
    <td>
        <input type="text" name="address" maxlength="100" required id="id_address">

    </td>
</tr>
<tr>
    <th><label for="id_field">Field:</label></th>
    <td>
        <select name="field" id="id_field">
            <option value="Manager">Manager</option>
            <option value="Cashier">Cashier</option>
            <option value="Operator">Operator</option>
        </select>
    </td>
</tr>
Form Template
The form object thus translates to HTML script of form – minus the <form> as well as the <table> tag. To render it on a browser, you have to first write an HTML template and put the form object in jinja2 tag. Let us save the following form.html file in the project’s templates folder.
<html>
<body>
    <form action="/form" action="POST">
        {% csrf_token %}
        <table>
            {{ f }}
        </table>
</body>
<html>
Let there be a following view in the app’s views.py file which renders the forms.html template and sends the ApplicationForm object as a context.
from .forms import ApplicationForm

def index(request):
    form = ApplicationForm()

    return render(request, 'form.html', {'form': form})
Inside the template, the form can be rendered in different ways. Instead of a tabular presentation of the form elements you can use the following variations:
{{ form.as_table }}will render them as table cells wrapped in<tr>tags. The form is rendered as a table by default.
<table>
    <tr>
        <th><label for="id_name">Name of Applicant:</label></th>
        <td>
            <input type="text" name="name" maxlength="50" required id="id_name">
        </td>
    </tr>

    <tr>
        <th><label for="id_address">Address:</label></th>
        <td>
            <input type="text" name="address" maxlength="100" required id="id_address">
        </td>
    </tr>

    <tr>
        <th><label for="id_field">Field:</label></th>
        <td>
            <select name="field" id="id_field">
                <option value="Manager">Manager</option>
                <option value="Cashier">Cashier</option>
                <option value="Operator">Operator</option>
            </select>
        </td>
    </tr>
</table>
<input type="submit">
Output:

{{ form.as_p }}will render them wrapped in<p>tags.
<!-- HTML rendered in the browser -->

<p>
    <label for="id_name">Name of Applicant:</label>
    <input type="text" name="name" maxlength="50" required id="id_name">
</p>

<p>
    <label for="id_address">Address:</label>
    <input type="text" name="address" maxlength="100" required id="id_address">
</p>

<p>
    <label for="id_field">Field:</label>
    <select name="field" id="id_field">
        <option value="Manager">Manager</option>
        <option value="Cashier">Cashier</option>
        <option value="Operator">Operator</option>
    </select>
</p>
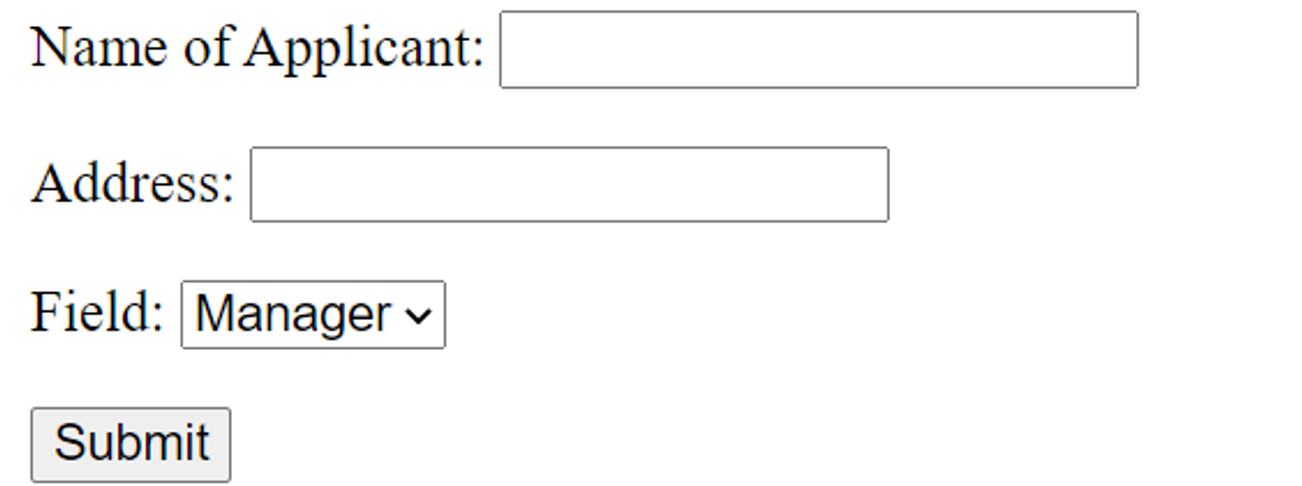
The form is displayed in the browser:
{{ form.as_ul }}will render them wrapped in<li>tags.
<li>
    <label for="id_name">Name of Applicant:</label>
    <input type="text" name="name" maxlength="50" required id="id_name">
</li>

<li>
    <label for="id_address">Address:</label>
    <input type="text" name="address" maxlength="100" required id="id_address">
</li>

<li>
    <label for="id_field">Field:</label>
    <select name="field" id="id_field">
        <option value="Manager">Manager</option>
        <option value="Cashier">Cashier</option>
        <option value="Operator">Operator</option>
    </select>
</li>
<input type="submit">
The form is renders in the browser:

{{ form.as_div }}will render them wrapped in<div>tags.
<div>
    <label for="id_name">Name of Applicant:</label>
    <input type="text" name="name" maxlength="50" required id="id_name">
</div>

<div>
    <label for="id_address">Address:</label>
    <input type="text" name="address" maxlength="100" required id="id_address">
</div>

<div>
    <label for="id_field">Field:</label>
    <select name="field" id="id_field">
        <option value="Manager">Manager</option>
        <option value="Cashier">Cashier</option>
        <option value="Operator">Operator</option>
    </select>
</div>
<input type="submit">
The form is renders in the browser:

Reading Form Contents
Note that the form’s action attribute is set to "/form" path. So, you’ll provide a form() view mapped to this URL. This function fetches the data submitted by the user. It may be used to add a new row in the database table, or for any other processing.
Inside the view, populate the form object with the POST data and check it is valid. The Form class provides is_valid() method. It runs validation on each field and returns True if all field validations are passed.
from .forms import ApplicationForm

def index(request):

   if request.method == 'POST':
        form = ApplicationForm(request.POST)
        # check whether it's valid:
        if form.is_valid():
            # process the data
            # ...
            # ...
            return HttpResponse('Form successfully submitted')
Once the Form instance is validated, you can now access the data in individual field via the cleaned_data attribute. It ensures that the field contains the output in consistent form. In our example, the three values in the three input elements are parsed to Python variables like this:
name = form.cleaned_data['name']
add = form.cleaned_data['address']
post = form.cleaned_data['posts']
In this reading item on Forms API, you learned about Django Form and form fields. You also learned how the form is rendered and processed.
Creating Forms
First I need to create a file called forms.py inside the app directory. In this scenario I will create a form on the little lemon website that allows the employees to log their entry times of work.
The process of building forms in Django is very similar to creating models.
# forms.py

from django import forms

SHIFTS = (
	('1', 'Morning'),
	('2', 'Afternoon'),
	('3', 'Evening'),
)

class InputForm(forms.Form):
	first_name = forms.CharField(max_length = 200)
	last_name = forms.CharField(max_length = 200)
	shift = forms.ChoiceField(choices = SHIFTS)
	time_log = forms.TimeField()
# views.py
from django.shortcuts import render
from django.http import HttpResponse
from myapp.forms import InputForm
def form_view(request):
form = InputForm()
context = {"form": form}
return render(request, "home.html", context)<!--/templates/home.html-->
<p> Hello </p>
<form action = "" method = "post">
{% csrf_token %}
{{form}}
<input type="submit" value="Submit">
</form>It’s important to remember to use the form method of post as I’m sending the data from the form and creating an object from it.
To finish this form code I have to add something called a CSRF token, which is simply a way of telling Django that the form data is safe.
Finally I pass the form that I’ve created.
You may notice that the form does not have any styling applied. Well I could use some CSS, I’m not going to just yet. Instead I want to demonstrate a trick to structure the form elements using paragraph tags.
Back in the file home.html I can modify how the form is rendered by amending the form to form.as_p.
<!--/templates/home.html-->

<p> Hello </p>

<form action = "" method = "post">
	{% csrf_token %}
	{{form.as_p}}

	<input type="submit" value="Submit">
</form>
When I press the submit button, notice that Django also provides basic form validation where all the elements are required. If I want to change this I can pass a parameter inside the forms file. For each attribute I can type required = False.
# forms.py

from django import forms

SHIFTS = (
	('1', 'Morning'),
	('2', 'Afternoon'),
	('3', 'Evening'),
)

class InputForm(forms.Form):
	first_name = forms.CharField(max_length = 200, required = False)
	last_name = forms.CharField(max_length = 200)
	shift = forms.ChoiceField(choices = SHIFTS)
	time_log = forms.TimeField()
Similarly I can pass other parameters. For example inside the time log I can type help_text= and then the text enter the exact time.
# forms.py

from django import forms

SHIFTS = (
	('1', 'Morning'),
	('2', 'Afternoon'),
	('3', 'Evening'),
)

class InputForm(forms.Form):
	first_name = forms.CharField(max_length = 200, required = False)
	last_name = forms.CharField(max_length = 200)
	shift = forms.ChoiceField(choices = SHIFTS)
	time_log = forms.TimeField(help_text = "Enter the exact time")
Finally I can open my HTML file to add some inline styling to the form. Inside the form declaration I add a background color.
<!--/templates/home.html-->

<p> Hello </p>

<form action = "" method = "post" style = "background-color: bisque;">
	{% csrf_token %}
	{{form.as_p}}

	<input type="submit" value="Submit">
</form>
Working with forms can be complex, so developers can use Django’s formed functionality to simplify and automate vast portions of this work. By creating forms this way, developers are guaranteed to add Django’s layer of security.
Model Form
what if you want to use them together to save entries entered in a form inside a database? Django provides a very efficient way to do that using ModelForm by providing a means to save received data as a response directly to the database.
The process of creating such a ModelForm is similar to that of creating a model and form. Just like in the case of model and form, Django provides another helper class called ModelForm that helps in an easier implementation.
Let’s take an example. Say you want to create a reservation form for the little lemon restaurant. In the example, you first import the model you want to bind with your form.Then you add implementation details for it using a meta class. And finally, you create an instance of that form.
from django.forms import ModelForm
from myapp.models import Reservation

# Create the class for form.
class ReservationForm(ModelForm):
	class Meta:
		model = Reservation
		fields = ['name', 'seats', 'content', 'reporter']

# Create form to add reservation.
form = ReservationForm()
NOTE
Note, that instead of having separate classes for form and model, you have just one that inherits the ModelForm and implements it.
Since this is an implementation that involves sending form data back as a response, you also need to add some implementation details about the post method inside the view.
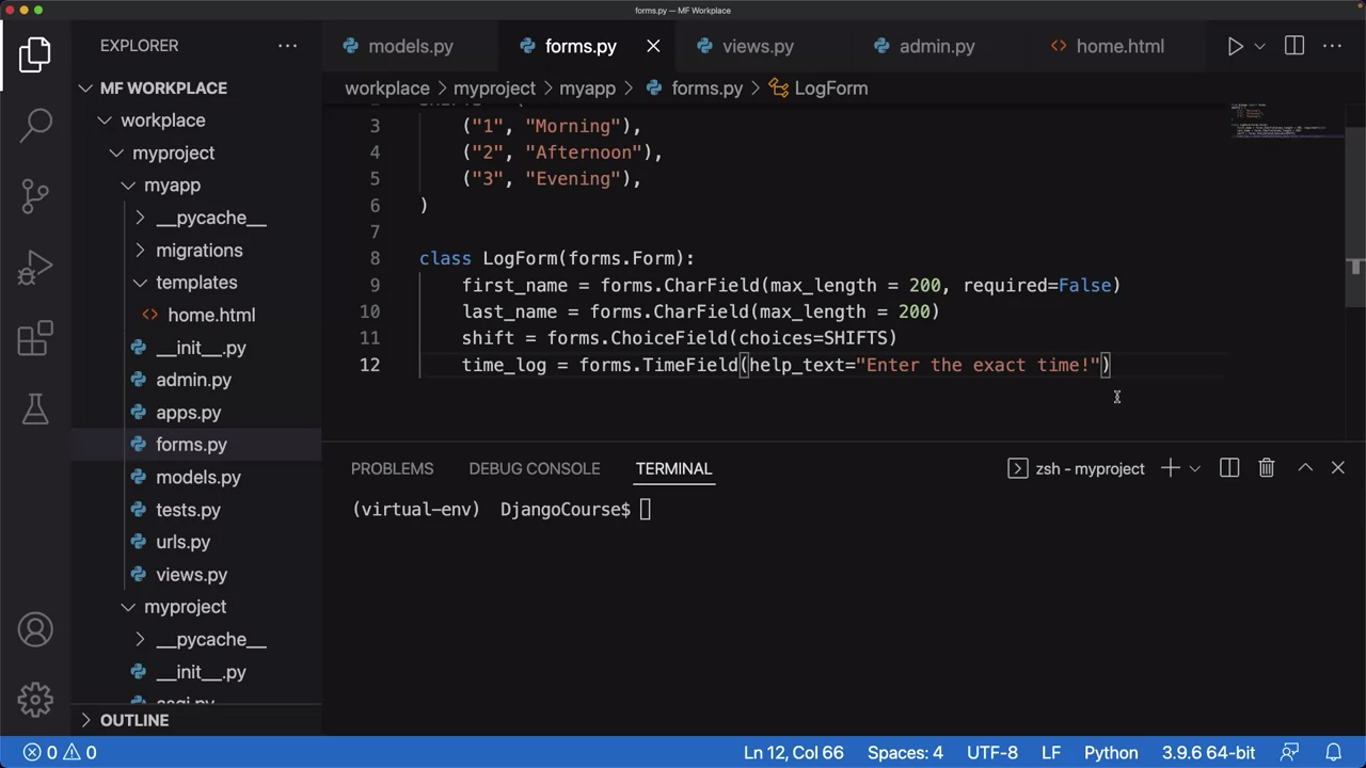
Just as a reminder, notice the code in the forms.py file and how it is used to render a form in the browser.
Building on the project that’s already in place, let’s modify the form to use ModelForm this time. So, first to simplify, remove the shifts attributes.
And since this is a ModelForm, copy the contents and paste it inside the models.py file.
Next, you need to reconfigure all the details so that it matches the configuration code for a model.
# models.py

from django.db import models

# Create your models here.

class InputForm(forms.Form):
    first_name = forms.CharField(max_length=200)
    last_name = forms.CharField(max_length=200)
    time_log = forms.TimeField(help_text="Enter the exact time")
Notice how the class name changed from log form to logger which is the name of the model.
from django.db import models

# Create your models here.

class Logger(models.Model):
    first_name = models.CharField(max_length=200)
    last_name = models.CharField(max_length=200)
    time_log = models.TimeField(help_text="Enter the exact time")
Next, let’s go to forms.py again, delete the existing content and then create the ModelForm based on the model that is in place.
from django import forms
from .models import Logger

class LogForm(forms.ModelForm):
    class Meta:
        model = Logger
        fields = '__all__'
Instead of assigning individual fields, let’s just enter the value of all which will import all the fields inside that particular model.
Next, you must make sure that you register the model. For this, go to admin.py and update the details.
from django.contrib import admin
from .models import Logger
# Register your models here.
admin.site.register(Logger)
Next, switch to the views.py file. Once inside the view, notice that there is already some basic configuration that helps render the form.
If you recall, the form object, which this time is the ModelForm is passed inside a context dictionary which is then passed inside the render function.
Now, you must add some code that will help accept the form data and send it to the model database.
So, let’s add a conditional statement such as if request.method equal to post, next, add form equal to log form and then pass a request.post inside it.
from django.shortcuts import render
from myapp.forms import LogForm
# Create your views here.

def form_view(request):
    form = LogForm()
    if request.mothod == 'POST':
        form = LogForm(request.POST)
    context = {"form": form}
    return render(request, "home.html", context)
What this code does is update the form object with the contents of post inside the request object.
Next, check out the form is valid. And if so, save the form using that save method.
from django.shortcuts import render
from myapp.forms import LogForm
# Create your views here.

def form_view(request):
    form = LogForm()
    if request.mothod == 'POST':
        form = LogForm(request.POST)
        if form.is_valid():
            form.save()
    context = {"form": form}
    return render(request, "home.html", context)
You already have everything you need in terms of the form template. After you run the migrations, run the server.
Next, enter the name Kyle McGregor. And the time 11 minutes past 11. And once you press the Submit button, notice that the post method is logged on the console.
Additional resources
The following resources will be helpful as additional references in dealing with different concepts related to the topics you have covered in this module.
Models – official documentation
Migrations – official documentation
Detailed overview of Migrations
Previous one → 8.Models & Migrations | Next one → 10.Admin